If I change a question in the Question Bank, will it be changed in all the quizzes it appears in?Yes, If you changed a question in the Question Bank, it will change in all the quizzes it appears in. Questions really live in the Question Bank. When you add a question to the quiz, you are just making a link from the quiz to the question in the Question Bank. So, you can add one question to many quizzes, and then if you edit it, it will change in all quizzes. If you want to change any question, you have to:
What happens if you change the correct answer, but the Quiz has closed and the students have already been graded?
|
Image attributionsYou can attribute images in several ways, and the important thing is that they are attributed correctly. Always check whether you are allowed to use images. Images that you find on Google Search are not all just free for use. Always go to the source of the image and check whether the person who posted it is happy for you to use it! Then make sure you mention the actual source (Google Images is not a source!). Ways to attribute images:
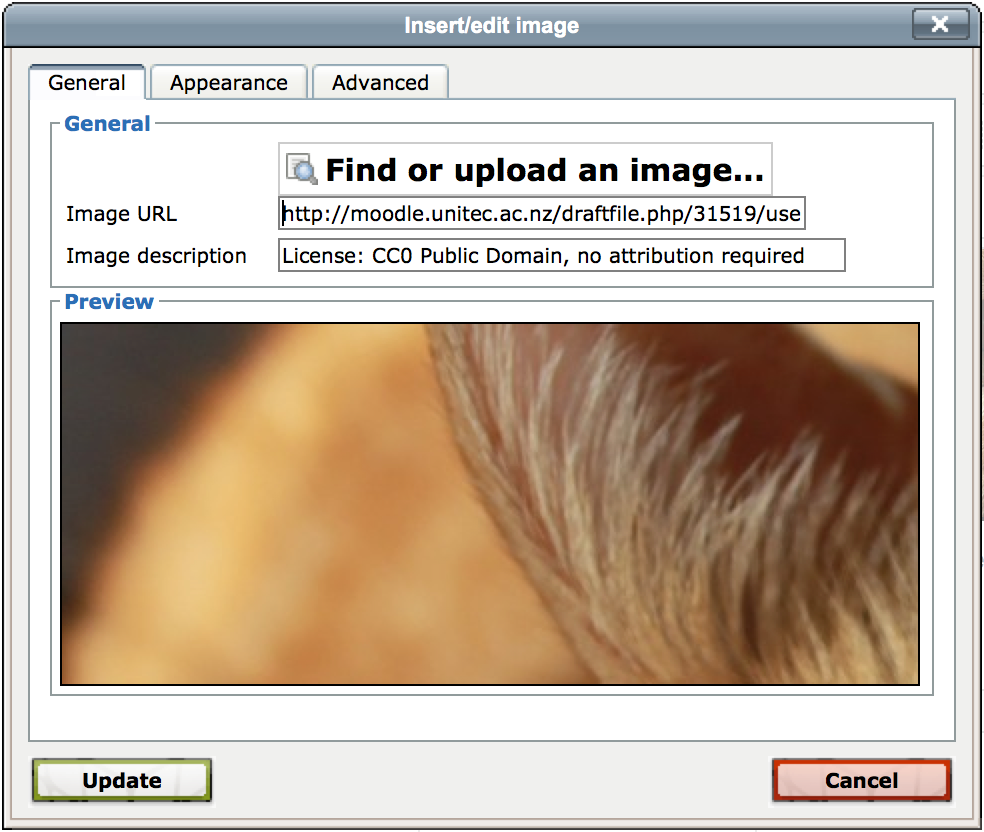
------- For example, this image here says "No attribution required". This means you don't have to attribute the original source, however, you should still state under which licence this image is used so that people know that it is public domain, no attribution.
Image licence: CC0 Public Domain, no attribution required. We have put the licence information in the image description, though the hover text (also called alt text) doesn't seem to work in a glossary. If you find that is the case where you have placed your image, it is best to also put the information in a caption (as above), or a side-block. ------- Put licence in image description like this:
HOVER TEXT - Add the image, go to the "advanced" tab and put the hover text required in the "title" field |

Images or picturesAdding images or pictures to your course page can sometimes be done by dragging the picture into the editing window. This doesn't really add the picture properly, though, and it is recommended that you use the picture uploader tool instead. NB: you must have the image saved to your computer first! Best formats are PNG, JPG or GIF.
NB: To edit any of these things after you've uploaded an image, simply select the image (so that it is highlighted) and click the insert/edit image icon again. You will be taken back to the same window, and the button will say "Update" instead of "Insert". To reduce the file size of an image (so it loads quicker in Moodle): (If the file size of an image is too big, your Moodle course can be slow too load, and it will take up lots of space). |
 - click this.
PageA Moodle page is a separate web page which can be filled with text, media and links. Adding a new page to your course:
|
Reduce image file sizesSometimes you get a message that you need to change an image size when trying to upload a picture. You may need to resize images to make them smaller without affecting the quality. Free tools for reducing image size: The best and easiest from Google: https://squoosh.app/
|
Reduce Microsoft Word and PowerPoint Document File SizeIf you created a Microsoft Word or PowerPoint documents but have realized that it is too large to be shared by email; or you’re low on disk space; or even can’t upload it to Moodle, don't fret! Follow this guide to get your document file size compressed. Use compressed graphics file formatsIf you have images in graphic formats like bitmap (.bmp) in your documents, you should convert them into one of the following graphic file formats: .jpg(jpeg); .gif or .png. Insert graphics instead of copying and pastingPeople like to use copy and paste to add graphics into a document. The feature is effortless, but it’s not efficient as the pasted image is a bitmap file. The differences in file sizes can be astounding especially if you’re using a file format such as JPG as your source. Choose E-mail (96 ppi) outputInside your document, click one of your picture, you will see a tab “Format Picture” appears at the toolbar area. Click the “Compress” button on the “Format Picture” tab; select the “Best for sending in e-mail (96 ppi) from the “Picture Quality” dropdown menu; tick the “Remove cropped picture regions” checkbox; and select the “(Apply to) All picture in this file” radio button. Then, click “OK”. This would change all the pictures used in your document to an optimal size. If you are using the latest version of Word or PowerPoint, you can simply go to File > Reduce File Size… Insert a hyperlink instead of inserting an objectWhen you insert an image or a media file, you have the option to insert it either as an embedded object or as a linked file. Insert > Photo/Audio/Movie > Photo/Audio/Movie from File.. > Select the file you want to insert; tick the “Link to File” checkbox. By inserting it as a linked file means it will not become a part of the final document file. But you should always make sure that the linked file is with you and in the computer where you will open the document. Otherwise, the hyperlink won’t work. Turn off Preview PictureThe preview picture is the thumbnail of the document’s first page. This thumbnail shows in the Details section of Windows Explorer when you highlight the file. Usually, this isn’t an issue unless your first page displays a graphic. To turn off Preview Picture in Microsoft document, go to File > Properties, Select the “Summary” tab, then deselect the check box for ‘Save preview picture with this document’, click OK. Save your document a second timeOpen your document, go to File > Save As… and give it another name. Then click “Save”. Doing this you will have a second document that often is smaller than the original copy. This is because Microsoft Document usually stores lots of redundant information such as earlier drafts and previous used images. Once you save it as another file, the unnecessary redundant information would be purged. |
Remove manually enrolled studentsManually enrolment has no effect on student accessibility to Unitec Moodle. Student enrollment is controlled by PeopleSoft only. As an Editing Teacher role, you can manually enrol a user, it looks fine from your teacher’s view. But, it only works for Staff. Even a student's name appears in your participant list, they still can’t access your course, because their account is not activated yet. Even worse, the inactivated manually enrolled account will cause unpredict issues which will incur complaints to Unitec. Please remove all manually enrolled students to avoid any further issues. |
Remove users |


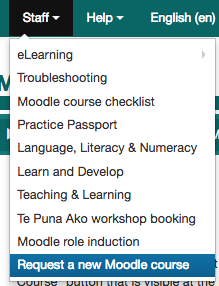
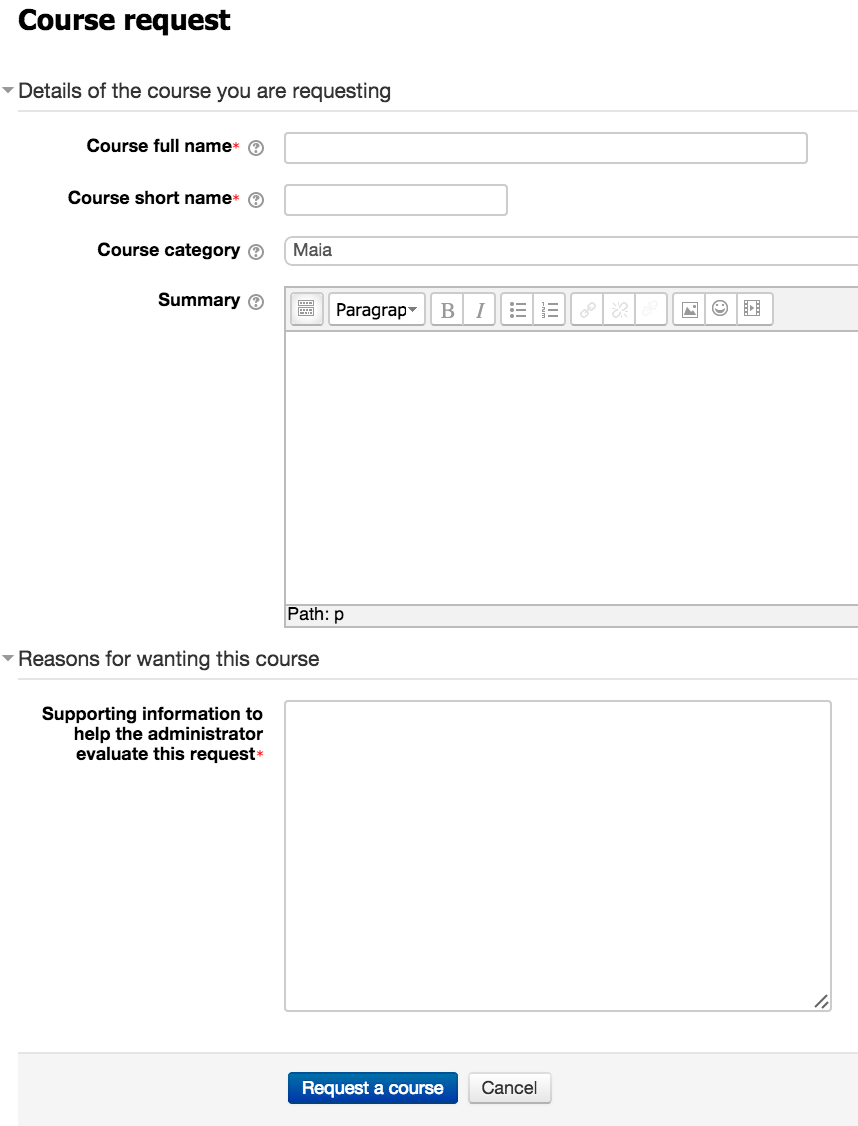
Request a new courseThis is for teachers only. If the course you are teaching is not already on Moodle you can use the "Request a Course" button that is visible at the bottom of any category in Moodle. You can get to "Request a course" in 2 ways:
You can then fill out the form.
|


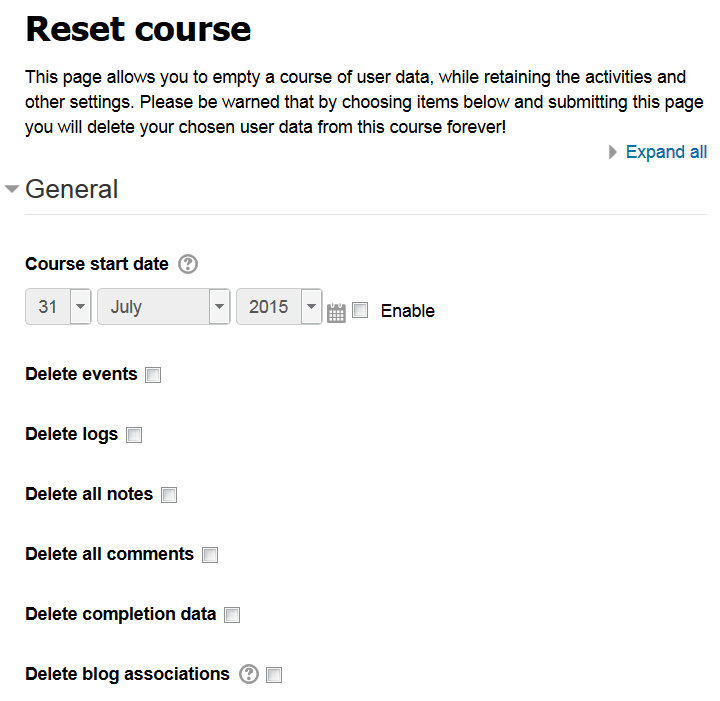
Reset a courseResetting your course can be useful between lots of students to purge out old user data so that the course is fresh. Of course there are times when you wish to keep old user data (like previous forum posts for students to build on) so be careful using this feature. You'll be taken to a settings page where you can choose what you wish to reset in the course.
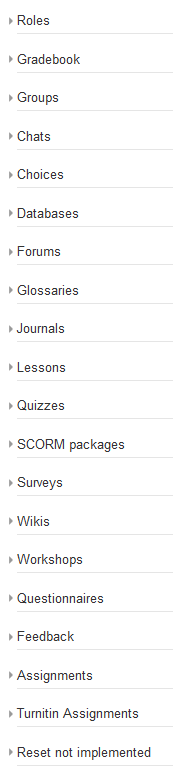
If you're using weekly format (rather than topics format) this can be a good place to change the course start date so that the weeks display properly for the new semester. Be careful deleting anything else in this section unless you're really sure. Then, depending on which activities you have in your course, you may see some other settings areas:
These allow you to delete the data from any of these activities. Your activities themselves remain, ready to be used by the next lot of students. Note that you will still need to go through assignments and other items that have due dates set to make sure that the due dates are updated for the new lot of students! |