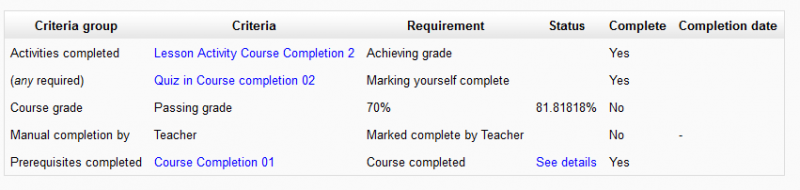
Block - Course completion statusThe course completion status block shows what has been done towards completing the course. The student and teacher will both see this block. The "More information" link will lead to a more detailed report. This report can have some interactive elements in the form of check boxes for the student and teacher. The "Course completion block" must be added to the course in order to see the "Course completion status" block. Student view The student can see their progress in the course by looking at the content of the block or clicking on the "More details" link to see a report. The student, if required, can mark an activity as completed on the course's homepage. Course completion report, student view, 1 course:
Course completion report, student view, 2 courses - teacher needs to mark complete:
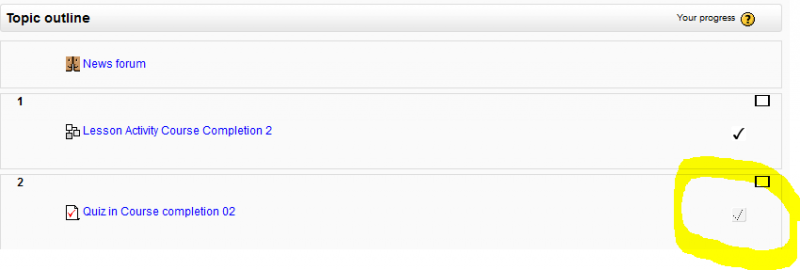
Course homepage, students has completed lesson, needs to self complete quiz:
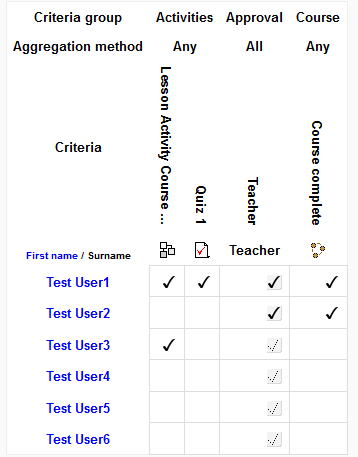
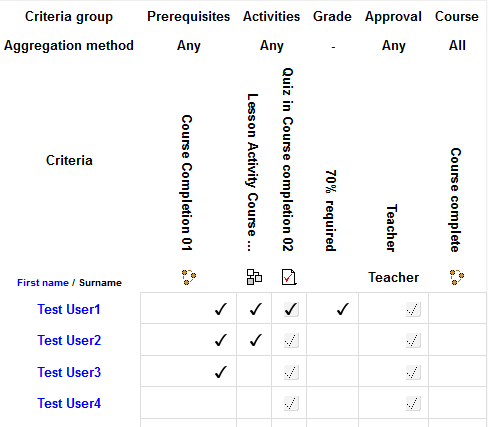
Teacher view This block shows the status for each student. It is also the place where the teacher (or others) can mark the course as complete. Note: The course completion status block will only appear if completion tracking criteria are set in Settings > Course administration > Completion tracking. This is what the teacher sees: Course completion report, teacher view, 1 course:
Course completion report, teacher view, showing prerequisite:
|

Block - HTML blockA HTML block is basically a 'free' block. This means you can add any text, links or media to it with the HTML editor. Add a HTML block
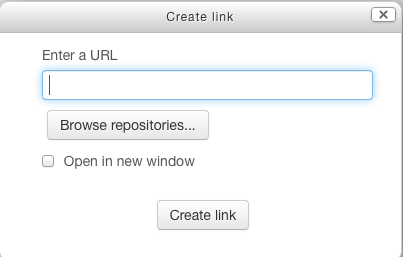
In an HTML block you can create links to external URLs, Moodle activities and resources or documents you have uploaded to Moodle
To link to a document:
|

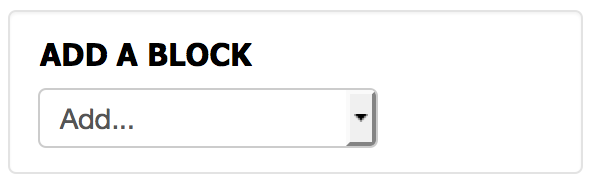
Blocks - Add a blockOn the left, under any existing blocks, is the "Add a block" menu. Select the block you would like to add from the menu (if you do not see the block you want to add here, it may already be on your course page! Some blocks can only be added once to a course).
Once the block has been added it will appear on the left at the bottom. From here you can move (drag and drop) the block to a new location, and configure the block (using the cog icon). |
Calendar - Add a new eventTo add a new event to a calendar, navigate to the month required in the calendar block.
|
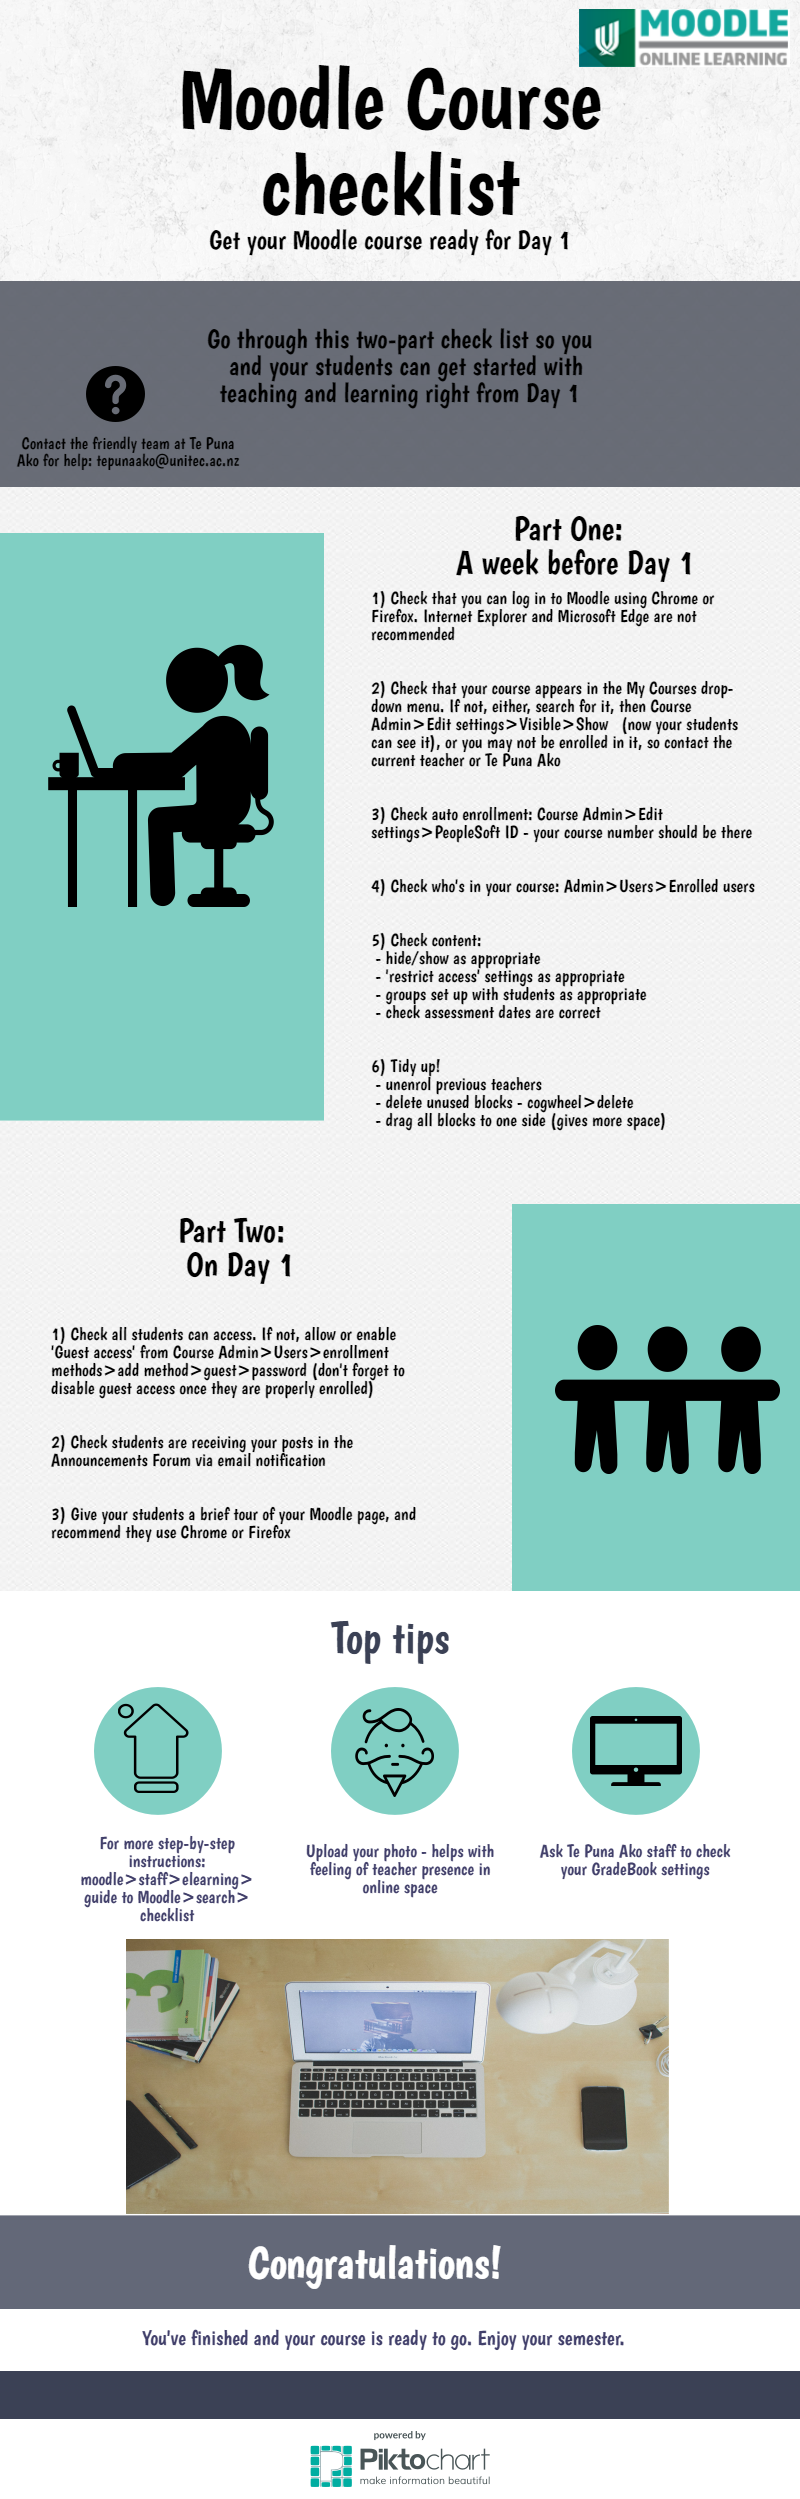
Checklist |
Compression PDF FileNot all files will benefit from compression. If it is already optimized, you may not be able to reduce the file size any more than it is.
Using Online Tools: SmallPDF (http://smallpdf.com)This website will compress PDF files and quickly return them to you. There is no limit of the size of the file, or the number of times you can use the service. You can drag and drop the file into the box on the website. Wait until the file is uploaded and compressed. The compression may take a few minutes, especially for larger files. Once the compression is complete, the website will send you the new file.
Using Macintosh PreviewClick File and select export. In the options, click the Quartz Filter menu, and select "Reduce File Size." Save the file. Select your desired location, then click Save. Your file will be saved in a much-reduced size. This may result in a noticeable drop in quality.
Using the Adobe Acrobat “Reduced Size” CommandOpen the PDF file you wish to reduce in Adobe Acrobat. This is not an option in the free version of Adobe Acrobat (which is Acrobat Reader). From the File menu hover your cursor over “Save As Other…”, which will open a new submenu. Select “Reduced Size PDF”. Select what versions of Acrobat you want the PDF to compatible with. Choosing newer versions will result in smaller file sizes, but will render the file un-openable in older versions of Acrobat.
Using the Adobe Acrobat “PDF Optimizer” CommandPDF Optimizer provides finer control for reducing the size of PDF files. For most users, the default settings will provide the best reduction in file size. Optimizer saves space by removing embedded and duplicate fonts, compressing images, and removing items from the file that are no longer needed. From the File menu hover your cursor over “Save As Other…”, which will open a new submenu. Select “Optimized PDF…”. Click the “Audit space usage” button to see a breakdown of what is taking up space in your PDF file. This will allow you to see if your images are making the file too big, or if your embedded fonts are inflating the size. Each aspect of your PDF will be rated by bytes and percentage of total size. Adjust your settings. Leave as default, or fine-tune your settings as needed. You can switch to different aspects of your PDF (Images, Font, Transparency, etc.) by using the menu on the left side of the window. You can choose to not optimize specific aspects by unchecking the boxes next to each menu item. This can be useful if you want to optimize the text but leave the images unaltered. When optimizing images, you can change color images to grayscale, compress, downsample, and lower the quality. Compression of images can result in poor quality that is not suitable for printed materials. Always check the quality of your optimization before committing to saving the changes. When optimizing fonts, unembed fonts that you know all of your readers will have. For example, if you are sending the PDF to people at your school, they most likely will all be using the same system to read it, so those fonts do not need to be embedded. Press OK. Your PDF will be converted using the new settings. You can check the new size by saving the file or by opening the PDF Optimizer again and clicking “Audit space usage” button.
Use the “Save as” in Adobe Acrobat and in Microsoft WordThis will allow a huge decrease of the size of your file (for example, it can make you file go from 200 kb to 20 kb => 10 times smaller in some situations)
|
Course - Topic headingsYou may wish to change the topic headings in your course from "Topic 1", "Topic 2" etc to something more informative. Make sure you have editing turned on. Under each topic heading section you'll see this icon: It will say "Edit summary" when you hover over it. Click it.
Untick "Use default section name" (this is "Topic 1", "Topic 2" etc) and then you can type in your own section name. Click "Save changes" |

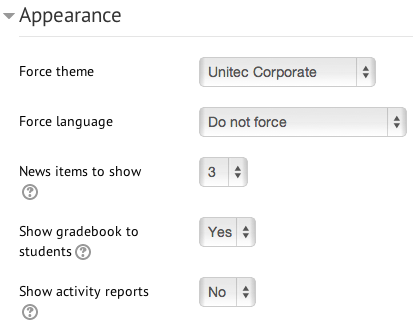
Course settings - Appearance
Force theme - If set to "Do not force" then the default theme (which you see on the front page of Moodle) will be used. Otherwise you can choose from a list of themes. Force language - we recommend leaving this to "Do not force". This way students can choose their own language from the language drop-down menu in the menu bar. News items to show - if you are using the "recent news" block, then this determines how many items it will display. Show gradebook to students - determines whether students can see the Moodle gradebook for their own grades. Show activity reports - determines whether students can see their own activity reports in the course. Teachers can always see activity reports, no matter what this is set to. |
Course settings - Completion tracking |

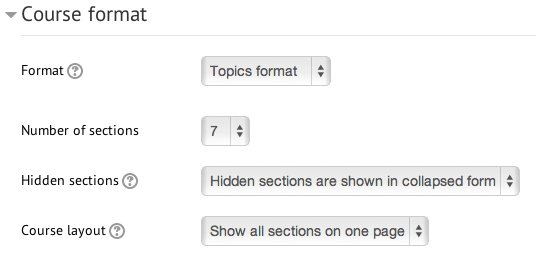
Course settings - Course format
Number of sections - if you chose Topics or Weekly as your format, this determines the number of section/topic/week boxes you have on your page. Hidden sections
Course layout
|