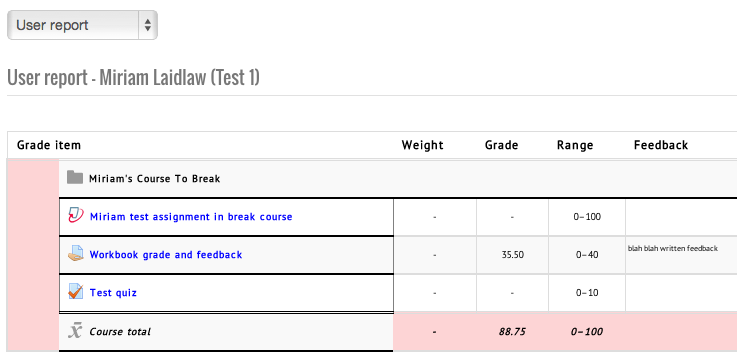
Grades - User report (analytics) |
Groups - Adding/removing groups from groupingsOnce you have created your groupings and your groups, you need to assign groups to groupings.
Removing groups follows the same process, but instead of selecting the group from the right hand list and clicking "Add", you select it from the left hand list and click "Remove". |
Groups - Adding/removing users from groups
|
Groups - Creating groups
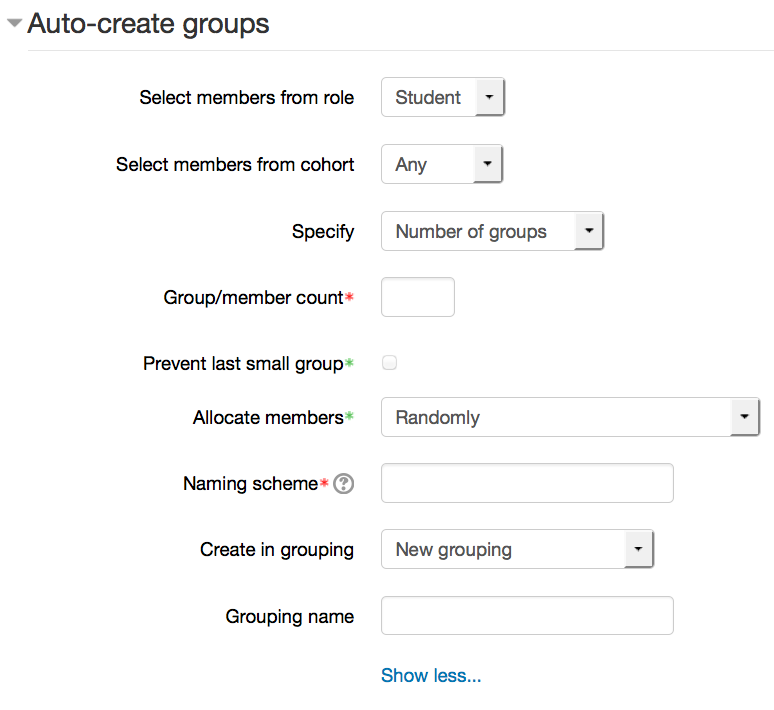
Auto create groups
Select members from role - The members of your group will be selected from the pool of students by default. If you want to include teachers and students in the auto-creation, change this to "All". Select members from cohort - Only site administrators should see this setting. Specify - number of groups or members per group - do you want to break the class up into a specific number of groups, or by the number of people per group? Group/member count - this field is required and is linked to the previous setting. i.e. If you want your students split into 3 groups, put 3 in here and have "number of groups" for the previous setting. Prevent last small group - If there are not the right numbers to make even groups, often one group will be created that is smaller than the rest. Checking this will distribute those students amongst the existing groups instead, even if it pushes the numbers above the ones you specified for maximum members in a group. Allocate members - your options are randomly, alphabetically by first name last name, alphabetically by last name first name, alphabetically by ID number. Naming scheme - The at symbol (@) may be used to create groups with names containing letters. For example Group @ will generate groups named Group A, Group B, Group C, ... The hash symbol (#) may be used to create groups with names containing numbers. For example Group # will generate groups named Group 1, Group 2, Group 3, ... |
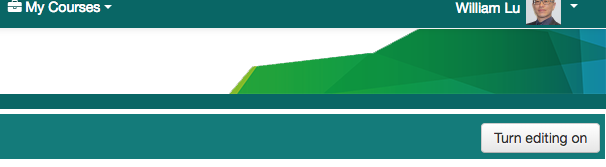
Groups - Restricting Access to Specific Groups1. Click Turn editing on at the top right of your course page:
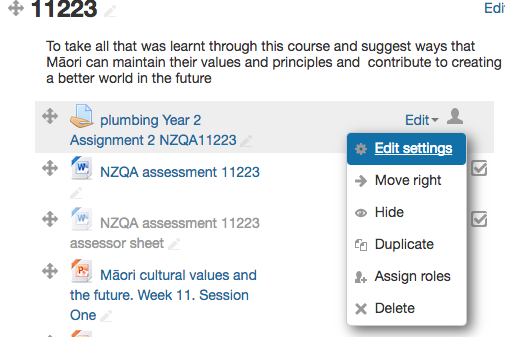
2. Click Edit settings to the right of the activity you want to restrict access to:
or Click Edit topic to the right of the section you want to restrict access to:
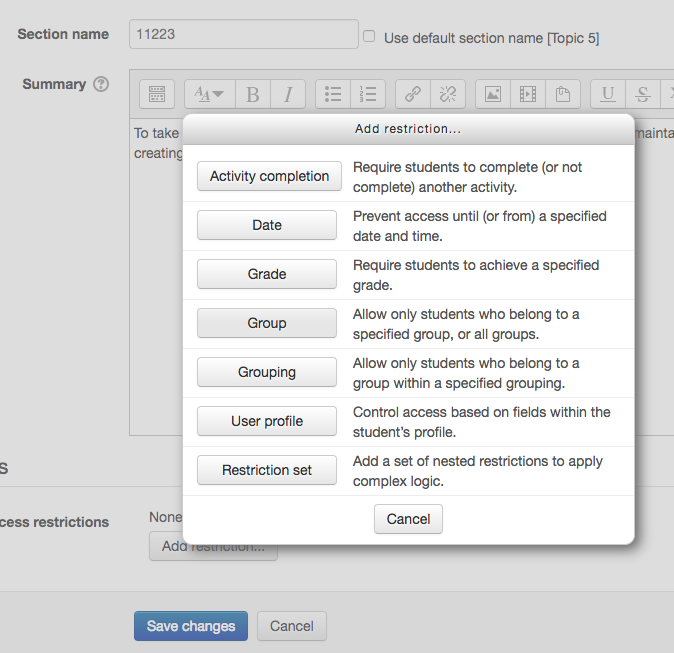
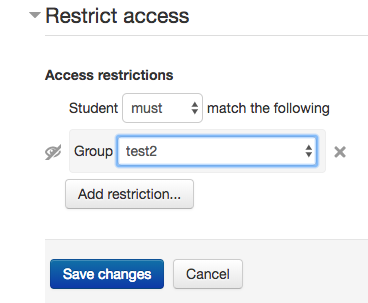
3. Under the Restrict access heading, click Add restriction.
4. Then click on the Group button.
5. Select the group that you want to restrict from accessing the assignment/section from the drop down menu.
6. You can shut off the eye if you want other students who are not in this group to see the warning: "Not available unless..."
7. Save changes. |


Groups - Teaching in a shared courseThis guide is about how teachers can teach in a shared course. Has to be done by the team leader:
Note:
Has to be done by teachers:
Note: |
Resizing images in MoodleYou can do this using free software such as Gimp or Paint.NET. On a Windows machine, you can use the inbuilt Paint software to resize images. On Macs, you can use iPhoto. If you need to tweak an image size slightly after uploading, it's easy.
NB: Super hint! If you wish an image to resize automatically to the size available on the screen, then remove the height property in the image dimensions, and add 100% (or whatever percentage) to the width property! The image will then scale / resize automatically!
Resize this window and see the difference between these two pictures. One will resize, the other will not:
|


Remove users |


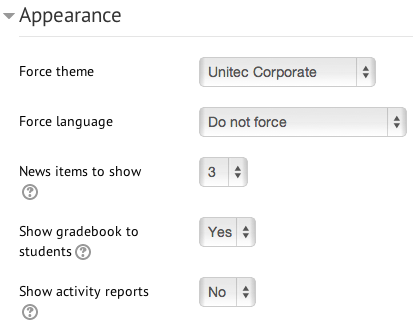
Course settings - Appearance
Force theme - If set to "Do not force" then the default theme (which you see on the front page of Moodle) will be used. Otherwise you can choose from a list of themes. Force language - we recommend leaving this to "Do not force". This way students can choose their own language from the language drop-down menu in the menu bar. News items to show - if you are using the "recent news" block, then this determines how many items it will display. Show gradebook to students - determines whether students can see the Moodle gradebook for their own grades. Show activity reports - determines whether students can see their own activity reports in the course. Teachers can always see activity reports, no matter what this is set to. |
Course settings - Completion tracking |
