Enrolment - Manual enrolmentManually enrolling staff into your Moodle course means that you as a teacher/course administrator search for and add each teacher, and have to then remove them later when they no longer need access. Please don't manually enrol any student. Students are enrolled automatically by PeopleSoft. Instructions: |
Enrolment - Automatic enrolmentBy using the PeopleSoft code, you can let PeopleSoft automatically enrol your students into your Moodle course. They will be enrolled one week before the PeopleSoft course start date, and unenrolled two weeks after the PeopleSoft course end date. If you need them in longer than these dates, please email yliu@unitec.ac.nz with the course code and the new requested start and end dates. Instructions:
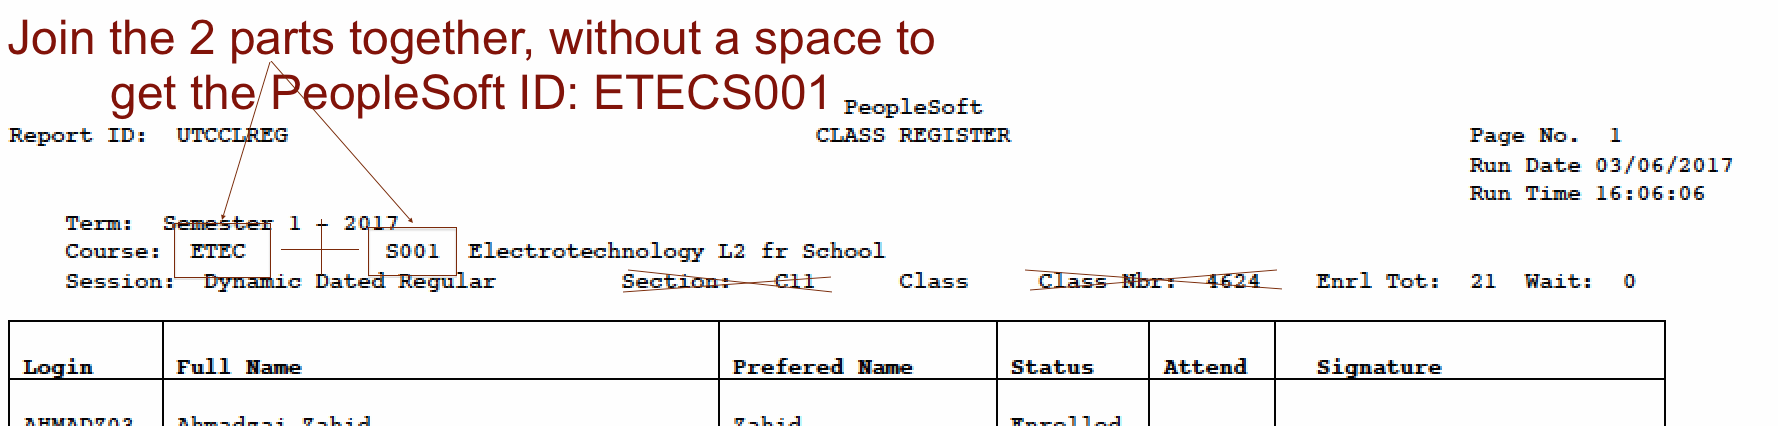
NB: Only one course on Moodle can use the same PeopleSoft ID. Course enrolment or Programme enrolment? Moodle Peoplesoft ID field can accept either the Peoplesoft Course or Programme code. A Peoplesoft course code is PeopleSoft Subject + PeopleSoft Category (ie. APMG8099). There is no space between them. The wrong ID will enrol the wrong students or none!
The list of all Programmes and their PeopleSoft IDs can be found here. |
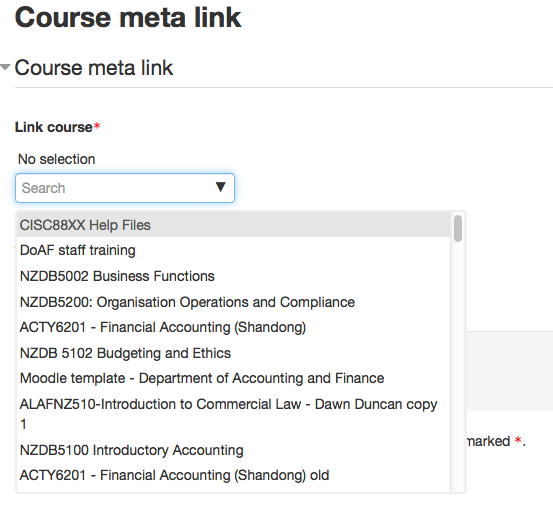
Enrolment - Meta enrolment (meta link)Use this when you want to pull enrolments (student and teacher) from another course into your course. NB: You must be a 'teacher' or higher level in both courses to set this up. Instructions:
Done! Now all students from the other course will also be enrolled in yours. When they are unenrolled from the other course, they will also be unenrolled from yours. |
Enrolment - Self-enrolmentThis lets students enrol themselves in your course. You can put a password on so that not every student can just enrol. NB: students who have self-enrolled must either unenrol themselves from the course when they are done, or the teacher must unenrol them manually. They will not be removed automatically when the course finishes. Instructions:
(we recommend deleting guest access as this will make the 'Enrol me' button to be located in an obvious pace) |
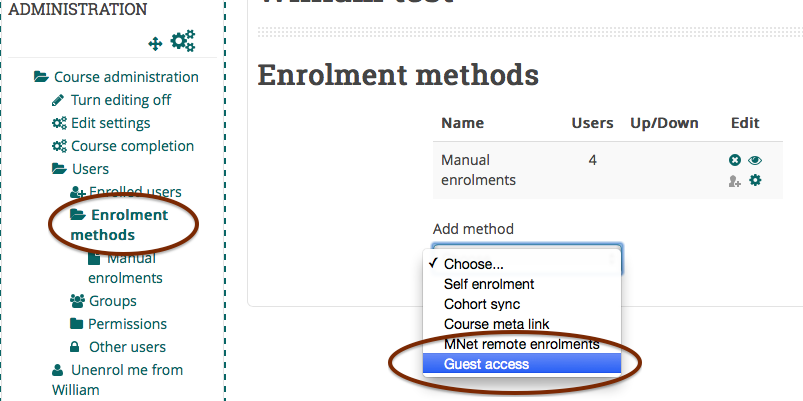
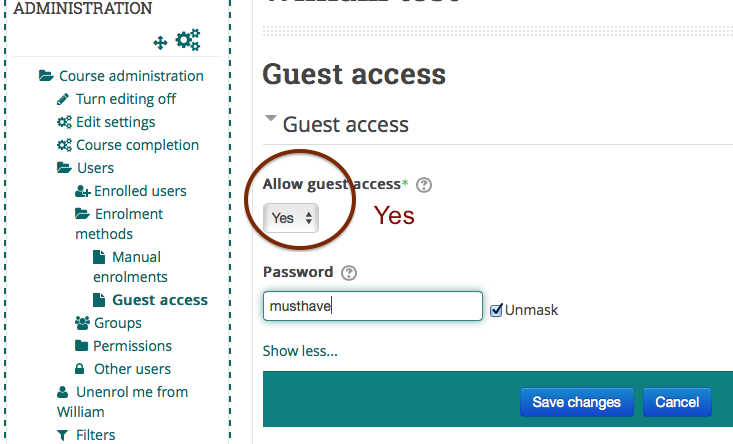
Enrolment - Guest accessGuest access allows people who are not enrolled in your course, or even people who don't have Moodle accounts at all, to access your course page. This is not a way of enrolling students or teachers into your course. Guests cannot participate in the course in any way (forums, assignments, etc) but they can view anything that an enrolled student can view. Courses with guest access enabled are required to have a password set, with the possible exception of some programme or pathway "homepages". If you believe your programme or pathway requires a homepage with open access, you must get permission from Te Puna Ako and measures must be put in place to ensure sensitive data for students and staff are not made available to visitors from outside Unitec. NB: enabling guest access (but without a password) gives Google access to your course. If you have sensitive or copyrighted material in your course, do not enable guest access. If you do want to enable guest access, make sure you have set a guest password. The instructions below are for historical purposes. 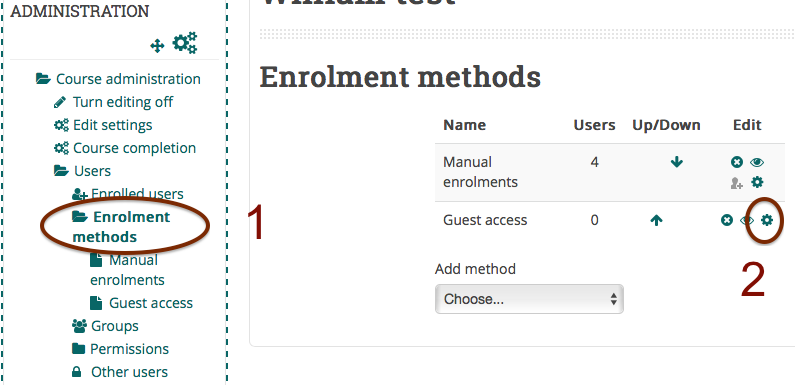 Make sure the the eye is open, so guests can access to your course. Or choose "Guest access" from the "Add method" drop down menu if it isn't there already:
2. Click the edit icon to set a guest password:
3. Click "Save changes" |
Enrolment - Removing people from your course (unenrolling users)Removing staff or students from your course works exactly the same. You can remove staff and students who have been manually enrolled or self-enrolled. You cannot remove students who have been enrolled by "external database" (PeopleSoft). Staff or students enrolled by "course meta link" must be unenrolled from the source course to be unenrolled from yours. Staff (or sometimes students) who are enrolled by "category enrolment" cannot be removed by you, as they have been assigned to their role at the category level to all courses in that category. If you feel that there are staff there by mistake, please contact your programme administrator or elearn@unitec.ac.nz to clarify. Instructions for removing manually or self-enrolled students:
Done! |
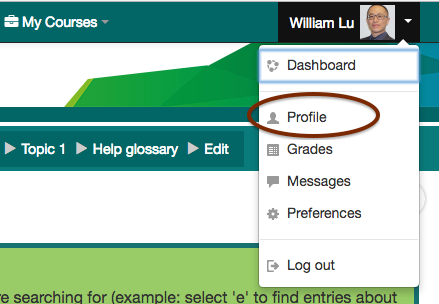
Update profile (my profile)You can find your profile by clicking on your user picture in the top right. This is what other users on the site see when they click on your name. You can add more details and a description, and upload a user picture. 1. From the drop-down menu at the top-right corner, click on 'Profile':
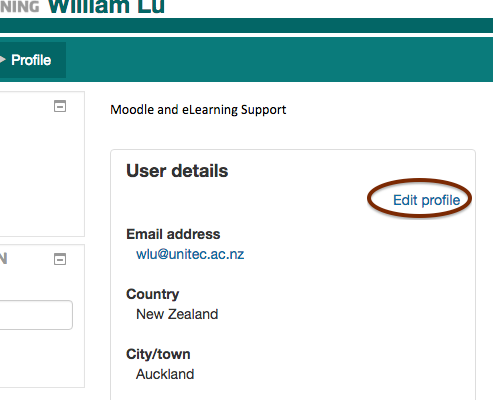
2. Click on the link 'Edit profile':
3. Click the ? next to some fields to see what these settings do 4. Upload a user picture from your computer 5. Click the "Update profile" button at the very bottom |
Course settings - General
Course full name is the full name of the course that will be displayed in the "My Courses" menu and block. They should follow this format: PeopleSoftID - Course full name eg ETEC3821 - Electrical Fundamentals A Course short name is displayed in the navigation/breadcrumb menu. This should be your PeopleSoftID code. Category should be the programme or department your course is in. Visible should be set to "show" if you wish students to see, "hide" if you wish only teachers in the course to see it (ie it is under maintenance). Course start date - ignore this, it doesn't affect anything. PeopleSoft ID - if you want your students to be automatically enrolled into your course, make sure your correct course PeopleSoft ID code is entered here. |

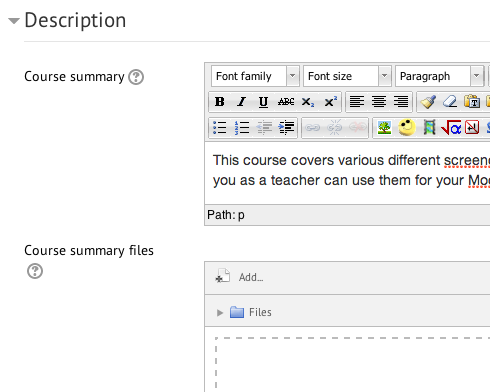
Course settings - Description |
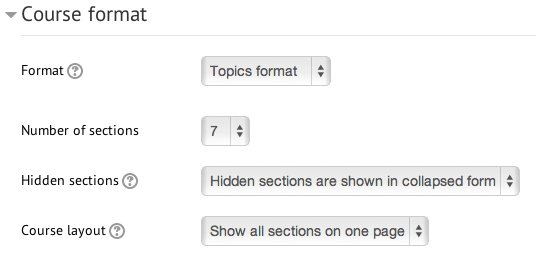
Course settings - Course format
Number of sections - if you chose Topics or Weekly as your format, this determines the number of section/topic/week boxes you have on your page. Hidden sections
Course layout
|