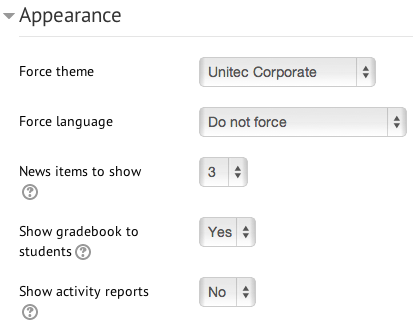
Course settings - Appearance
Force theme - If set to "Do not force" then the default theme (which you see on the front page of Moodle) will be used. Otherwise you can choose from a list of themes. Force language - we recommend leaving this to "Do not force". This way students can choose their own language from the language drop-down menu in the menu bar. News items to show - if you are using the "recent news" block, then this determines how many items it will display. Show gradebook to students - determines whether students can see the Moodle gradebook for their own grades. Show activity reports - determines whether students can see their own activity reports in the course. Teachers can always see activity reports, no matter what this is set to. |
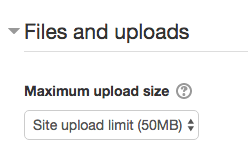
Course settings - Files and uploadsYou can increase or decrease the file upload size by: Turn editing on> Administration>Edit settings>Files and Uploads
Maximum upload size - determines the largest size of file that can be uploaded to the course. Activity modules also include a maximum upload size setting for determining the file size. |
Course settings - Completion tracking |

Course settings - GroupsYou can create Groups, and add specific students to it. The purpose of this might be to give feedback to groups of students working together which is only relevant to that group. To create Groups, first go to the Administration Block>Edit Settings>Groups. Then fill in fields. Then you can go back to Users>Groups>Create groups. After that click add/remove users to add students to your Groups.
We generally recommend leaving these settings as you see above. Group mode
The group mode defined at course level is the default mode for all activities within the course. Each activity that supports groups can also define its own group mode, though if the group mode is forced at course level, the group mode setting for each activity is ignored. Force group mode If group mode is forced, then the course group mode is applied to every activity in the course. Group mode settings in each activity are then ignored. Default grouping You can choose a default grouping for all activities in the course to be available for. |

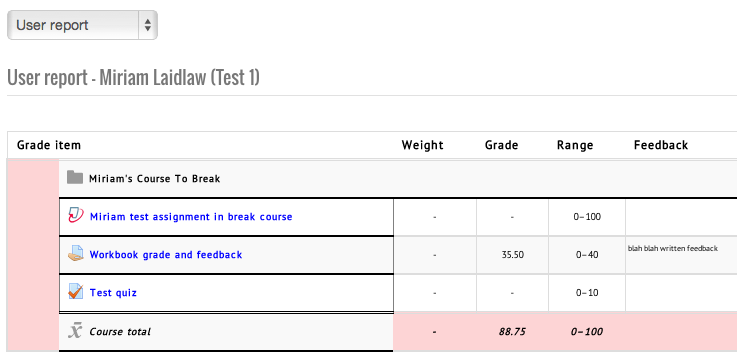
Grades - Grader report (analytics)The grader report is the grid view that teachers see. Students see the user report, as they can only see their own grades.
There can be quite a bit of sideways scroll on this page, so be prepared to scroll to the bottom, then scroll to the right. Do not alter assignment grades through the grader report! Use the assignment grading page. Only manual grade items should be altered through the grader report. |

Grades - User report (analytics) |
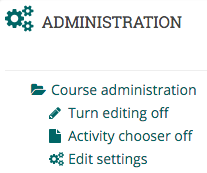
Turn editing on |
ResourcesThese are items containing information/knowledge that a teacher offers to support learning. To add a new resource to your course you must first turn editing on
Note: There are now two methods for adding activities and resources to course pages, you may either use the traditional Add activity or resource link or the new Activity chooser. Check the Administration block to see if you have the Activity chooser turned on or off. You may turn the chooser on or off by clicking on the entry within the Administration block.
Add an resource using the Add activity or resource linkNote: To use this method the Activity chooser must be turned off
The Add an activity or resource window will appear. Scroll past the list of activities to select the type of resource you wish to add and click the Add button, otherwise click Cancel to return to your course page.
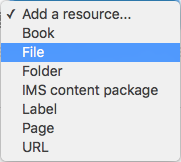
Add a resource using the Activity chooserNote: To use this method the Activity chooser must be turned on When enabled the Activity chooser replaces the Add activity or resource link described above with two drop down boxes one for resources and one for activities.
Scroll to the bottom of the section where you wish to add the resource and click the Add a resource drop-down menu. Click on the resource type you wish to add from the list that appears.
This page describes the process of adding resources to your course page, however, the process of adding activities is essentially the same. |
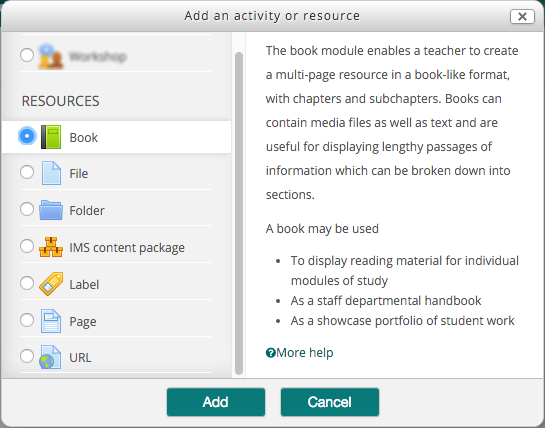
Resources - BookPresents content in a textbook format, allowing for chapters and subchapters (2 levels only). Pages can be enhanced by multimedia. Setting up a book: Choose "Book" from the "Add an activity or resource" menu. Give the book a name. You can give it a description, though this is not necessary. Chapter numbering
Custom titles Normally the chapter title is displayed in the table of contents (TOC) AND as a heading above the content. If the custom titles checkbox is ticked, the chapter title is NOT displayed as a heading above the content. A different title (perhaps longer than the chapter title) may be entered as part of the content. You will be prompted to add your first page (chapter) when you create the book. Add in a title (this will show in the book table of contents) and content (this will display in the main page area). Adding pages (chapters and subchapters): Make sure you have editing on when you are viewing your book to edit and add chapters. You will know if you do, because the table of contents will have editing icons after each chapter/page like this:
When adding a page you have the option to make it a 'sub-chapter'. This nests the page under the one you clicked the plus icon by. When you have multiple pages, there will be another icon which lets you change the order of pages in your book: |
Resources - FileA document presented for students to download - PDF, Word, Excel, PowerPoint, image... Adding a file: Drag and drop the file onto your course page (make sure you have editing turned on before doing this). OR Choose "File" from the "Add an activity or resource" menu. Give it a name. Description is optional. Drag the file into the drag and drop box or choose the "Add..." button to browse for the file on your computer. Once the file appears in the box on the Moodle page, you can continue. Appearance Display This setting, together with the file type and whether the browser allows embedding, determines how the file is displayed. Options may include:
Display size Displays the file size, such as '3.1 MB', beside links to the file. If there are multiple files in this resource, the total size of all files is displayed. Display type Displays the type of the file, such as 'Word document', beside links to the file. If there are multiple files in this resource, the start file type is displayed. If the file type is not known to the system, it will not display. |