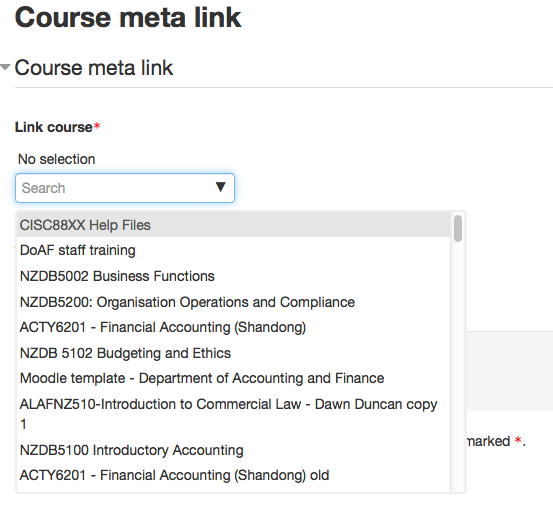
Enrolment - Meta enrolment (meta link)Use this when you want to pull enrolments (student and teacher) from another course into your course. NB: You must be a 'teacher' or higher level in both courses to set this up. Instructions:
Done! Now all students from the other course will also be enrolled in yours. When they are unenrolled from the other course, they will also be unenrolled from yours. |
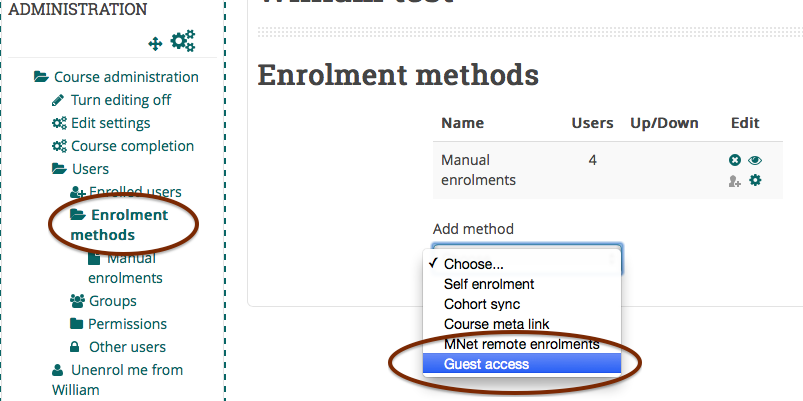
Enrolment - Guest accessGuest access allows people who are not enrolled in your course, or even people who don't have Moodle accounts at all, to access your course page. This is not a way of enrolling students or teachers into your course. Guests cannot participate in the course in any way (forums, assignments, etc) but they can view anything that an enrolled student can view. Courses with guest access enabled are required to have a password set, with the possible exception of some programme or pathway "homepages". If you believe your programme or pathway requires a homepage with open access, you must get permission from Te Puna Ako and measures must be put in place to ensure sensitive data for students and staff are not made available to visitors from outside Unitec. NB: enabling guest access (but without a password) gives Google access to your course. If you have sensitive or copyrighted material in your course, do not enable guest access. If you do want to enable guest access, make sure you have set a guest password. The instructions below are for historical purposes. 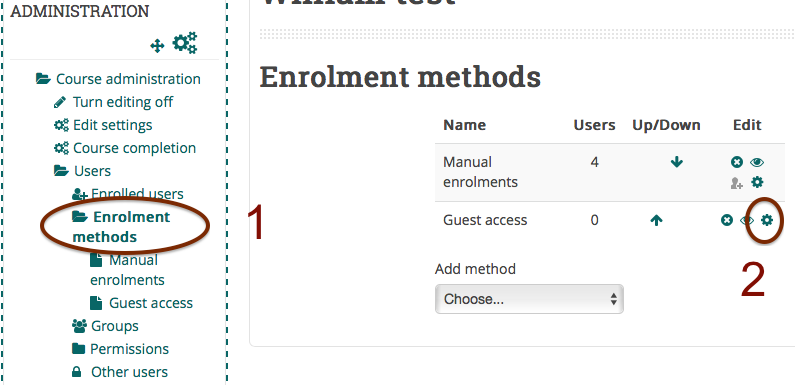 Make sure the the eye is open, so guests can access to your course. Or choose "Guest access" from the "Add method" drop down menu if it isn't there already:
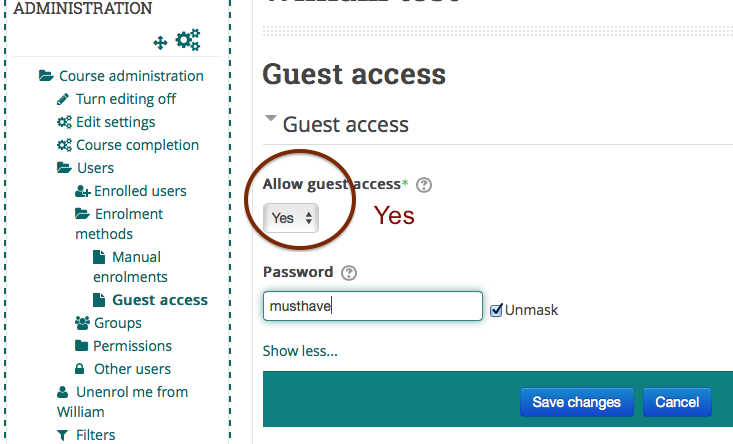
2. Click the edit icon to set a guest password:
3. Click "Save changes" |
Enrolment - Removing people from your course (unenrolling users)Removing staff or students from your course works exactly the same. You can remove staff and students who have been manually enrolled or self-enrolled. You cannot remove students who have been enrolled by "external database" (PeopleSoft). Staff or students enrolled by "course meta link" must be unenrolled from the source course to be unenrolled from yours. Staff (or sometimes students) who are enrolled by "category enrolment" cannot be removed by you, as they have been assigned to their role at the category level to all courses in that category. If you feel that there are staff there by mistake, please contact your programme administrator or elearn@unitec.ac.nz to clarify. Instructions for removing manually or self-enrolled students:
Done! |
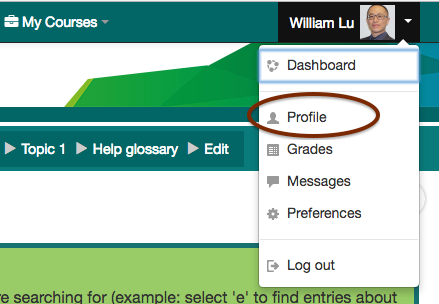
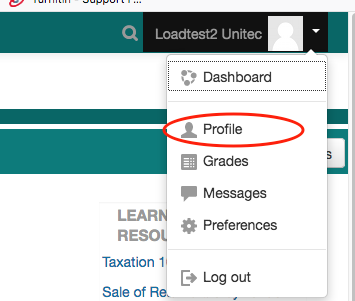
Update profile (my profile)You can find your profile by clicking on your user picture in the top right. This is what other users on the site see when they click on your name. You can add more details and a description, and upload a user picture. 1. From the drop-down menu at the top-right corner, click on 'Profile':
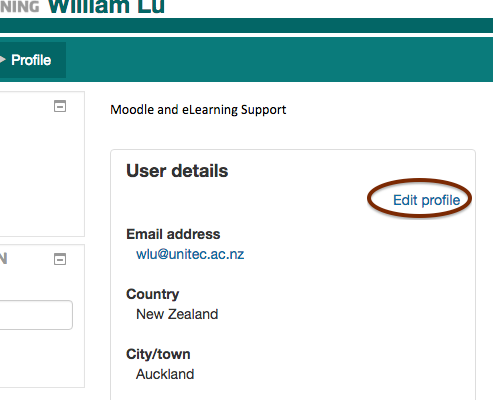
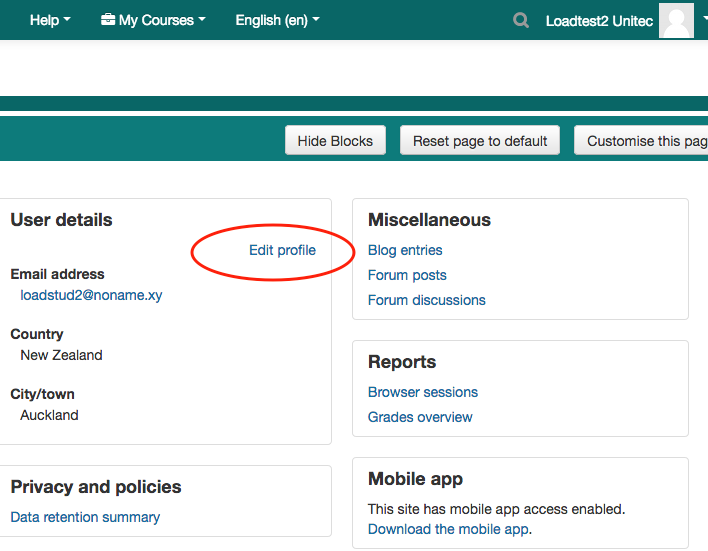
2. Click on the link 'Edit profile':
3. Click the ? next to some fields to see what these settings do 4. Upload a user picture from your computer 5. Click the "Update profile" button at the very bottom |
Grades - Grader report (analytics)The grader report is the grid view that teachers see. Students see the user report, as they can only see their own grades.
There can be quite a bit of sideways scroll on this page, so be prepared to scroll to the bottom, then scroll to the right. Do not alter assignment grades through the grader report! Use the assignment grading page. Only manual grade items should be altered through the grader report. |

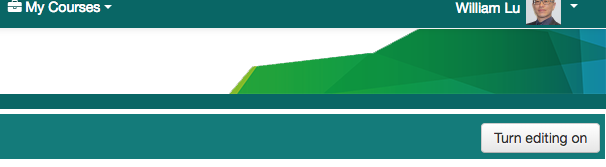
Turn editing on |
Editing iconsWhen you turn editing on in a course, you will see a range of icons:
|
Activities - Feedback - Setting up a feedback activityChoose "Feedback" from the "Add an activity or resource" menu.
Give your feedback activity a name. Write a brief description (maybe why you are gathering this feedback). Display description on course page - If enabled, the description above will be displayed on the course page just below the link to the activity or resource.
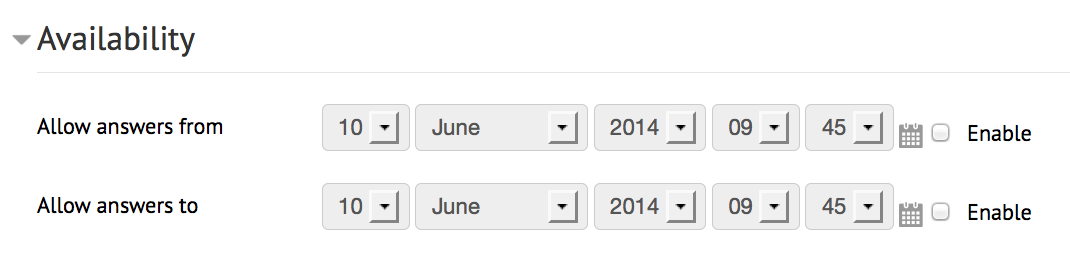
You can leave these disabled. Otherwise, choose a date range where students can submit feedback.
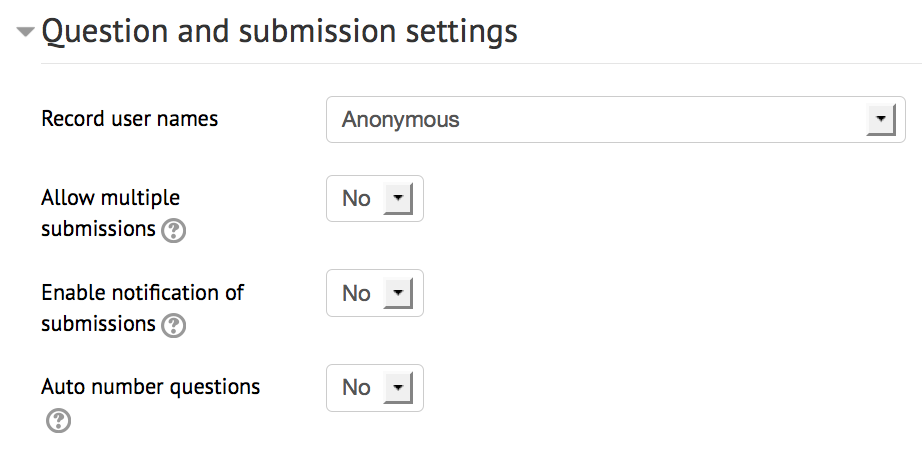
Record user names
Allow multiple submissions - If enabled for anonymous surveys, users can submit feedback an unlimited number of times. Enable notification of submissions - If enabled, teachers will receive notification of feedback submissions. Auto number questions - Enables or disables automated numbers for each question.
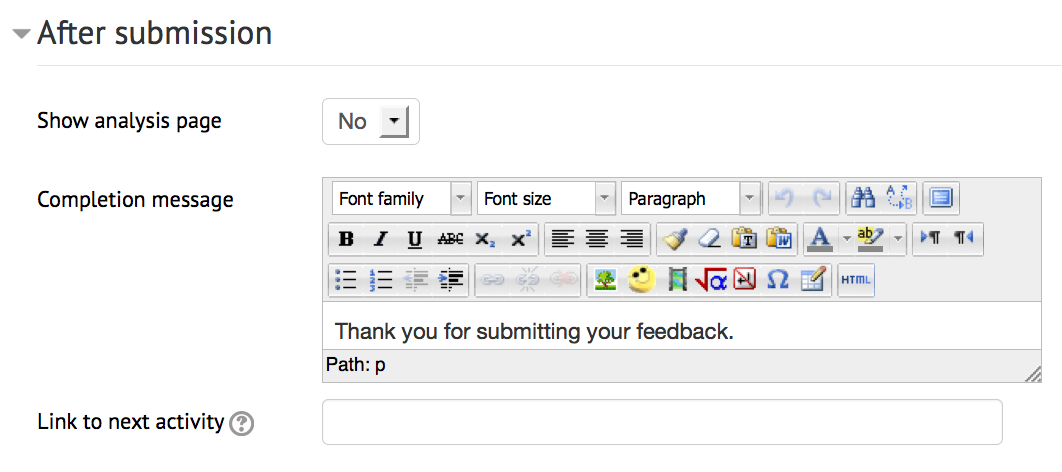
Show analysis page - Allows the students to see an analysis page after they've submitted feedback. Completion message - You can enter a message, maybe a quick thank you, which is displayed after a student submits feedback. Link to next activity - After submitting the feedback, a continue button is displayed, which links to the course page. Alternatively, it may link to the next activity if the URL of the activity is entered here. |

Activities - Feedback - Adding / editing questions in a feedback formUsing the tabs along the top of the activity, choose "Edit questions"
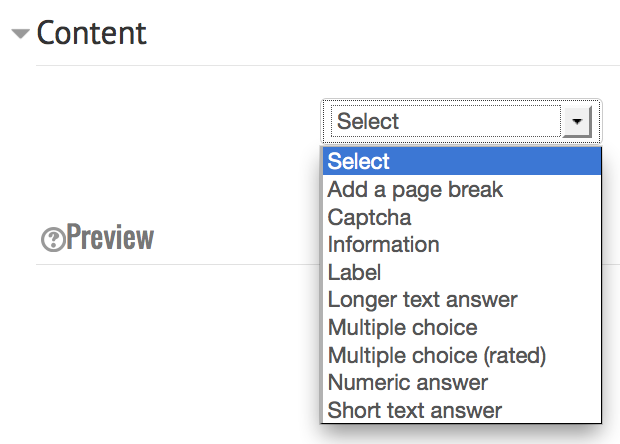
There will be no questions there yet. Choose a question type:
As you add questions you will see them appear in the preview section below. As a teacher you cannot answer the questions in the feedback form. For more detailed information on building your feedback form, please see the MoodleDocs. |

Course - Topic headingsYou may wish to change the topic headings in your course from "Topic 1", "Topic 2" etc to something more informative. Make sure you have editing turned on. Under each topic heading section you'll see this icon: It will say "Edit summary" when you hover over it. Click it.
Untick "Use default section name" (this is "Topic 1", "Topic 2" etc) and then you can type in your own section name. Click "Save changes" |

Free images - stock, creators, editorsThere are various sites that provide free images. Some give you the tools to create the images yourself, and some provide royalty free or creative commons images for you to use. We have bolded the ones we recommend for quality of images and ease of use. NB: If photos have people on them, there may be a model-release involved. Please check for these. Image creators
Royalty free or creative commons images ready to use
Image editors - resize, crop, apply effects to your own images
Other useful resources |
Image attributionsYou can attribute images in several ways, and the important thing is that they are attributed correctly. Always check whether you are allowed to use images. Images that you find on Google Search are not all just free for use. Always go to the source of the image and check whether the person who posted it is happy for you to use it! Then make sure you mention the actual source (Google Images is not a source!). Ways to attribute images:
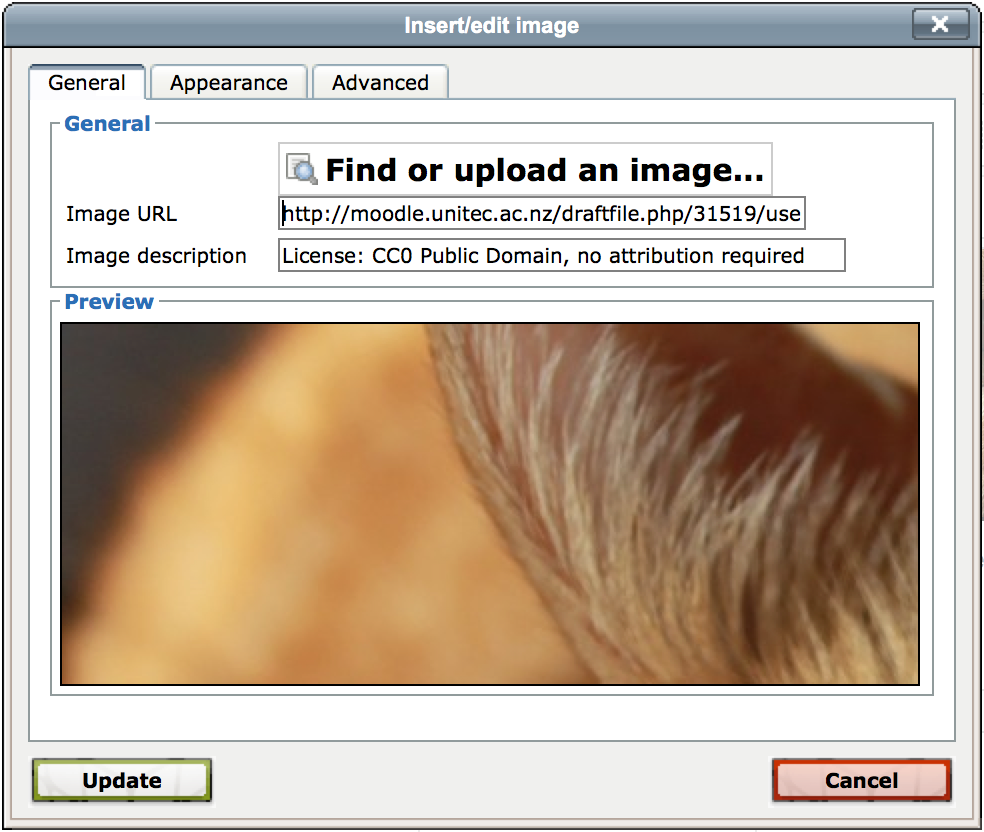
------- For example, this image here says "No attribution required". This means you don't have to attribute the original source, however, you should still state under which licence this image is used so that people know that it is public domain, no attribution.
Image licence: CC0 Public Domain, no attribution required. We have put the licence information in the image description, though the hover text (also called alt text) doesn't seem to work in a glossary. If you find that is the case where you have placed your image, it is best to also put the information in a caption (as above), or a side-block. ------- Put licence in image description like this:
HOVER TEXT - Add the image, go to the "advanced" tab and put the hover text required in the "title" field |

Email notificationsAdjusting all email notifications from Moodle
Then you will see a long list of events that Moodle can send email notifications for. Choose which of them you wish (or don't wish) to receive by email, by using the check boxes. When you are done, click "Save" About email notifications from Moodle Moodle is not an email platform. If you wish to email your students, please email them! Moodle does sometimes send email notifications of events that happen on Moodle such as:
These notifications sometimes fail, so they are not a reliable way of emailing your students. To email your students, send them an actual email. Adjusting forum email digest settings
|
PageA Moodle page is a separate web page which can be filled with text, media and links. Adding a new page to your course:
|
Block - HTML blockA HTML block is basically a 'free' block. This means you can add any text, links or media to it with the HTML editor. Add a HTML block
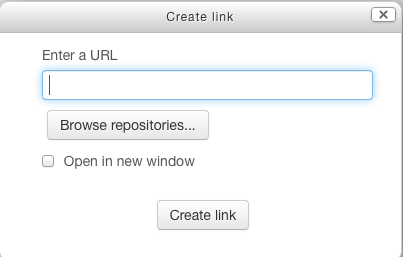
In an HTML block you can create links to external URLs, Moodle activities and resources or documents you have uploaded to Moodle
To link to a document:
|

Calendar - Add a new eventTo add a new event to a calendar, navigate to the month required in the calendar block.
|
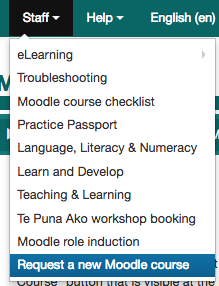
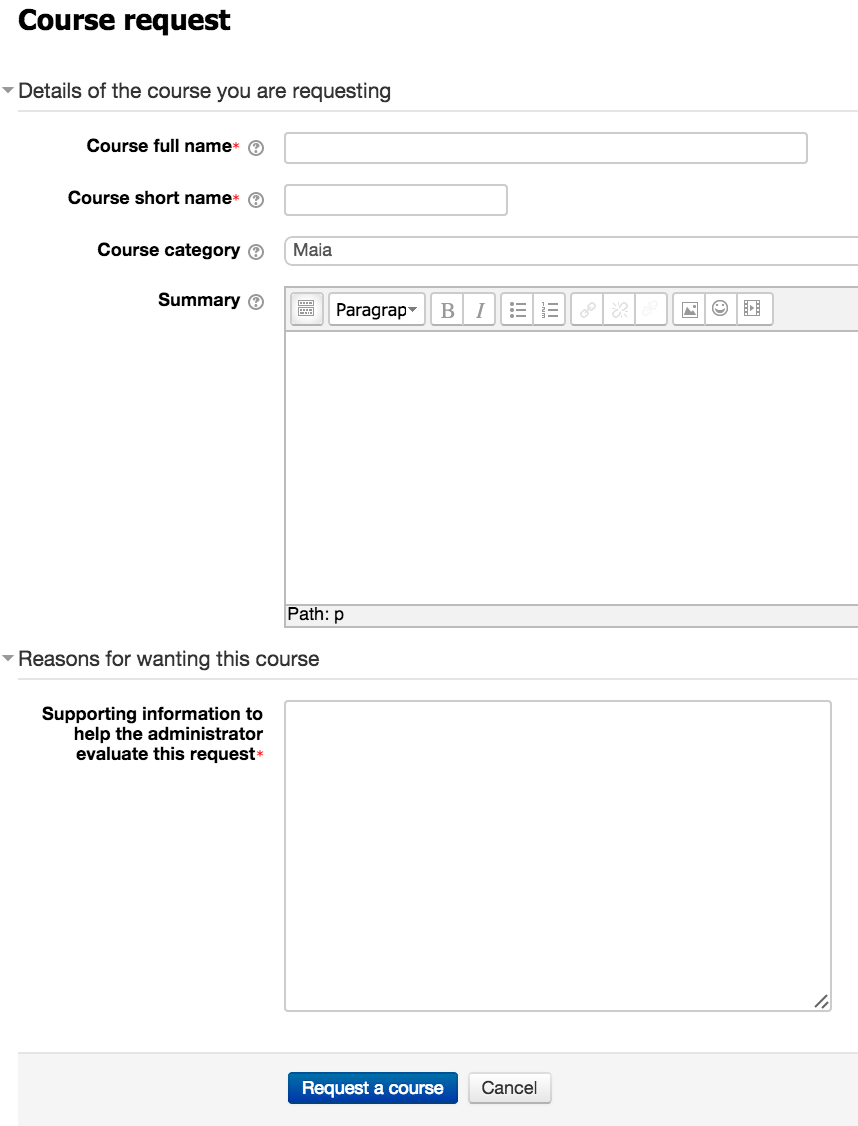
Request a new courseThis is for teachers only. If the course you are teaching is not already on Moodle you can use the "Request a Course" button that is visible at the bottom of any category in Moodle. You can get to "Request a course" in 2 ways:
You can then fill out the form.
|


Typing Māori easilyIf you are using Mac
If you are using Windows
|
Horizontal ruleIt is possible to make a beautiful horizontal rule in Moodle. Here is an example which you can add to your own course by clicking the < > button and pasting the following code. <hr style="height:8px; color:##800000; background-color:#800000;" width="75%"> The horizontal rule is a great way to separate resources and activities into manageable chunks, display subtopics in sections. |
Enrolment - Programme codesHere is a list of Unitec programmes with their ID codes and school codes that provide these programmes:
|
Adding a link to a resource in a pageSometimes you will want to add a link to a file or other Moodle resource inside a Moodle page - like your Assessments page or your Welcome page. Instructions:
|
Enable JavaScript on browsersGoogle Chrome
Internet Explorer
Mozilla Firefox
Apple Safari |
Enable Java on your computerFind the Java Control Panel on Windows
Windows 8
Use search to find the Control Panel Press Windows logo key + W to open the Search charm to search settings In the search box enter Java Control Panel Click on the Java icon to open the Java Control Panel.
Windows XP
Click on the Start button and then click on the Control Panel option. Double click on the Java icon to open the Java Control Panel.
Find the Java Control Panel on Mac
Launch the Java Control Panel on Mac OS X (10.7.3 and above) Click on Apple icon on upper left of screen. Go to System Preferences Click on the Java icon to access the Java Control Panel.
Change Security settings:
Security tab: Allows you to configure various settings related to security such as grant permissions to content, alert users about site certificates, enable trusted publishers and blacklist revocation checks.
How to Enable Java on your browser
Firefox
Safari
|
Compression PDF FileNot all files will benefit from compression. If it is already optimized, you may not be able to reduce the file size any more than it is.
Using Online Tools: SmallPDF (http://smallpdf.com)This website will compress PDF files and quickly return them to you. There is no limit of the size of the file, or the number of times you can use the service. You can drag and drop the file into the box on the website. Wait until the file is uploaded and compressed. The compression may take a few minutes, especially for larger files. Once the compression is complete, the website will send you the new file.
Using Macintosh PreviewClick File and select export. In the options, click the Quartz Filter menu, and select "Reduce File Size." Save the file. Select your desired location, then click Save. Your file will be saved in a much-reduced size. This may result in a noticeable drop in quality.
Using the Adobe Acrobat “Reduced Size” CommandOpen the PDF file you wish to reduce in Adobe Acrobat. This is not an option in the free version of Adobe Acrobat (which is Acrobat Reader). From the File menu hover your cursor over “Save As Other…”, which will open a new submenu. Select “Reduced Size PDF”. Select what versions of Acrobat you want the PDF to compatible with. Choosing newer versions will result in smaller file sizes, but will render the file un-openable in older versions of Acrobat.
Using the Adobe Acrobat “PDF Optimizer” CommandPDF Optimizer provides finer control for reducing the size of PDF files. For most users, the default settings will provide the best reduction in file size. Optimizer saves space by removing embedded and duplicate fonts, compressing images, and removing items from the file that are no longer needed. From the File menu hover your cursor over “Save As Other…”, which will open a new submenu. Select “Optimized PDF…”. Click the “Audit space usage” button to see a breakdown of what is taking up space in your PDF file. This will allow you to see if your images are making the file too big, or if your embedded fonts are inflating the size. Each aspect of your PDF will be rated by bytes and percentage of total size. Adjust your settings. Leave as default, or fine-tune your settings as needed. You can switch to different aspects of your PDF (Images, Font, Transparency, etc.) by using the menu on the left side of the window. You can choose to not optimize specific aspects by unchecking the boxes next to each menu item. This can be useful if you want to optimize the text but leave the images unaltered. When optimizing images, you can change color images to grayscale, compress, downsample, and lower the quality. Compression of images can result in poor quality that is not suitable for printed materials. Always check the quality of your optimization before committing to saving the changes. When optimizing fonts, unembed fonts that you know all of your readers will have. For example, if you are sending the PDF to people at your school, they most likely will all be using the same system to read it, so those fonts do not need to be embedded. Press OK. Your PDF will be converted using the new settings. You can check the new size by saving the file or by opening the PDF Optimizer again and clicking “Audit space usage” button.
Use the “Save as” in Adobe Acrobat and in Microsoft WordThis will allow a huge decrease of the size of your file (for example, it can make you file go from 200 kb to 20 kb => 10 times smaller in some situations)
|
Reduce Microsoft Word and PowerPoint Document File SizeIf you created a Microsoft Word or PowerPoint documents but have realized that it is too large to be shared by email; or you’re low on disk space; or even can’t upload it to Moodle, don't fret! Follow this guide to get your document file size compressed. Use compressed graphics file formatsIf you have images in graphic formats like bitmap (.bmp) in your documents, you should convert them into one of the following graphic file formats: .jpg(jpeg); .gif or .png. Insert graphics instead of copying and pastingPeople like to use copy and paste to add graphics into a document. The feature is effortless, but it’s not efficient as the pasted image is a bitmap file. The differences in file sizes can be astounding especially if you’re using a file format such as JPG as your source. Choose E-mail (96 ppi) outputInside your document, click one of your picture, you will see a tab “Format Picture” appears at the toolbar area. Click the “Compress” button on the “Format Picture” tab; select the “Best for sending in e-mail (96 ppi) from the “Picture Quality” dropdown menu; tick the “Remove cropped picture regions” checkbox; and select the “(Apply to) All picture in this file” radio button. Then, click “OK”. This would change all the pictures used in your document to an optimal size. If you are using the latest version of Word or PowerPoint, you can simply go to File > Reduce File Size… Insert a hyperlink instead of inserting an objectWhen you insert an image or a media file, you have the option to insert it either as an embedded object or as a linked file. Insert > Photo/Audio/Movie > Photo/Audio/Movie from File.. > Select the file you want to insert; tick the “Link to File” checkbox. By inserting it as a linked file means it will not become a part of the final document file. But you should always make sure that the linked file is with you and in the computer where you will open the document. Otherwise, the hyperlink won’t work. Turn off Preview PictureThe preview picture is the thumbnail of the document’s first page. This thumbnail shows in the Details section of Windows Explorer when you highlight the file. Usually, this isn’t an issue unless your first page displays a graphic. To turn off Preview Picture in Microsoft document, go to File > Properties, Select the “Summary” tab, then deselect the check box for ‘Save preview picture with this document’, click OK. Save your document a second timeOpen your document, go to File > Save As… and give it another name. Then click “Save”. Doing this you will have a second document that often is smaller than the original copy. This is because Microsoft Document usually stores lots of redundant information such as earlier drafts and previous used images. Once you save it as another file, the unnecessary redundant information would be purged. |
Reduce image file sizesSometimes you get a message that you need to change an image size when trying to upload a picture. You may need to resize images to make them smaller without affecting the quality. Free tools for reducing image size: The best and easiest from Google: https://squoosh.app/
|
Grade Me blockA block that teachers can add to courses so as to quickly find ungraded assessments. Turn editing on > Add a block > Grade Me
|


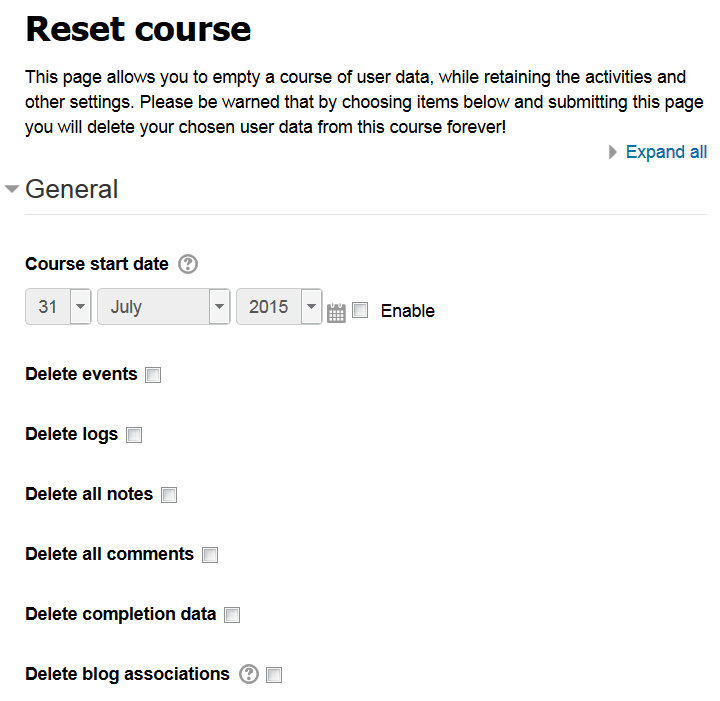
Reset a courseResetting your course can be useful between lots of students to purge out old user data so that the course is fresh. Of course there are times when you wish to keep old user data (like previous forum posts for students to build on) so be careful using this feature. You'll be taken to a settings page where you can choose what you wish to reset in the course.
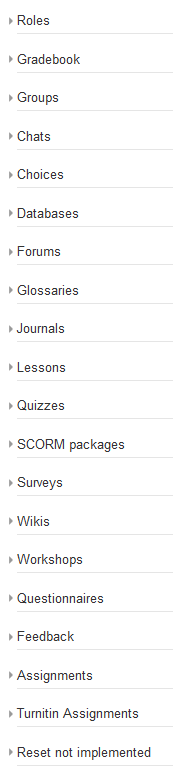
If you're using weekly format (rather than topics format) this can be a good place to change the course start date so that the weeks display properly for the new semester. Be careful deleting anything else in this section unless you're really sure. Then, depending on which activities you have in your course, you may see some other settings areas:
These allow you to delete the data from any of these activities. Your activities themselves remain, ready to be used by the next lot of students. Note that you will still need to go through assignments and other items that have due dates set to make sure that the due dates are updated for the new lot of students! |
Activities - Turnitin AssignmentCreates a Turnitin Moodle Direct assignment which links an activity in Moodle to an assignment / assignments on Turnitin. Once linked, the activity allows instructors to access and provide feedback for student's written work using the assessment tools available within Turnitin's Document Viewer. Walkthrough video: https://vimeo.com/203368521
Steps: Setting up a Turnitin Assignment: To create a Turnitin Assignment open the course home page, after logging in as a tutor click the 'Turn editing on' button. Select 'Turnitin Assignment' from the 'Add an activity...' drop down menu. General Turnitin Assignment settings:
Advanced Turnitin Assignment settings:
Once you have selected all of the required options click 'Save and Display' to be directed to the Summary screen where you will see options to configure each assignment part in more detail. Assignment Submission Dates After completion of the assignment settings the 'Summary' page gives you the opportunity update the assignment parts and balance the grades awarded for each part as a proportion of the overall grade. The edit the dates and grades awarded for each part click the pencil icon. The default dates for each assignment part are initially set to be one week from the date the assignment was created.
|
Tame your Google Gmail filterWhy I didn't receive any email from Moodle?Unfortunately, there's no easy way for you to ensure your emails don't hit the Promotions tab. It's also unclear how Gmail decides whether an email is "promotional" or not. Below is how to "teach" a gmail account to treat your emails as primary. This can be done by clicking on the email (without opening it) & dragging it to the "primary tab". You will then see a message that says: "The conversation has been moved to "primary". Undo Do this for future messages from "email address x"?Yes" If you click yes, all future emails from that address will go to the primary tab. This will certainly work for each individual who does it, I.e.. Each person who does it, their gmail account will always send your emails to the primary tab. |
How to Clear the Cache?Your internet browser's cache stores certain information (snapshots) of webpages you visit on your computer or mobile device so that they'll load more quickly upon future visits and while navigating through websites that use the same images on multiple pages so that you do not download the same image multiple times. Occasionally, however your cache can prevent you from seeing updated content, or cause functional problems when stored content conflicts with live content. You can fix many browser problems simply by clearing your cache. An easy way to reload a page and bypass the cache (force-reload page) involves using keyboard shortcuts. Generally, the keyboard shortcut [Ctrl] + [F5] will work. But ultimately, this depends on what browser you are using.
|
Grades - Marking workflowMarking workflow allows for results of assignment type activities to sit in a number of different states prior to being released to students. This is only available for assignment type activities not quiz. On a basic level this allows results to be hidden from students until you're ready, but also allows for assessors to keep track of the state of individual student's assignment through a mark->review->release workflow. Enable marking workflowEdit the settings for the assignment activity:
Under the Grade area of the Edit settings page, set Use marking workflow to Yes
Save your changes, you have now enabled marking workflow for this assignment. Using marking workflowWhen you are ready to grade an assignment click on the assignment and then View/grade all submissions as normal
In the grading page is where you can start to see marking workflow options appear, the default marking workflow state is Not marked, you can see this under the status column of the assignment grading page.
When grading an individual assessment there is now an option to set marking workflow state, any state other than "Released" will hide the current grade from the student.
Changing the marking workflow state of multiple submissionsIt is also possible to change the marking workflow state for multiple or all students who have participated in an assignment. Go to the assignment grading page and use the check boxes down the left hand side to select multiple or all participants in the list.
Now down the bottom you have an option to act on the selected participants
Click Go and you will be taken to a Set marking workflow state for (multiple) users page, scroll to the bottom of the page and select the new marking workflow state and then click Save changes.
All the selected participants activities are now set to this new marking workflow state |


Download/Backing up Turnitin assignments and gradesAn inactive Turnitin activity (link) is problematic for you because if anyone clicks on the Turnitin activity, it will incorrectly enrol all the previous years students into your current Moodle course, user list and gradebook. If you want to keep your students work from this Turnitin activity, you can download their submissions (with your grades) to your computer by following these easy steps below: 1. In your Moodle course, go to your Turnitin assignment page and change the list option from "Show 10" to "Show All" (See the screen shot below). 2. Select the check box beside "Student" to select all students' assignments. 3. Click "Download". 4. Select "Selected GradeMark Files". It may take a long time to download. Please be patient. 5. Click on "Turnitin Messages Inbox" to check if students' assignments have been downloaded. If so click on "bulk download" to save it onto your computer. Then delete the online copy by clicking on the red recycle bin icon beside it. That's all.
6. You can then delete this Turnitin assignment from your Moodle course. |

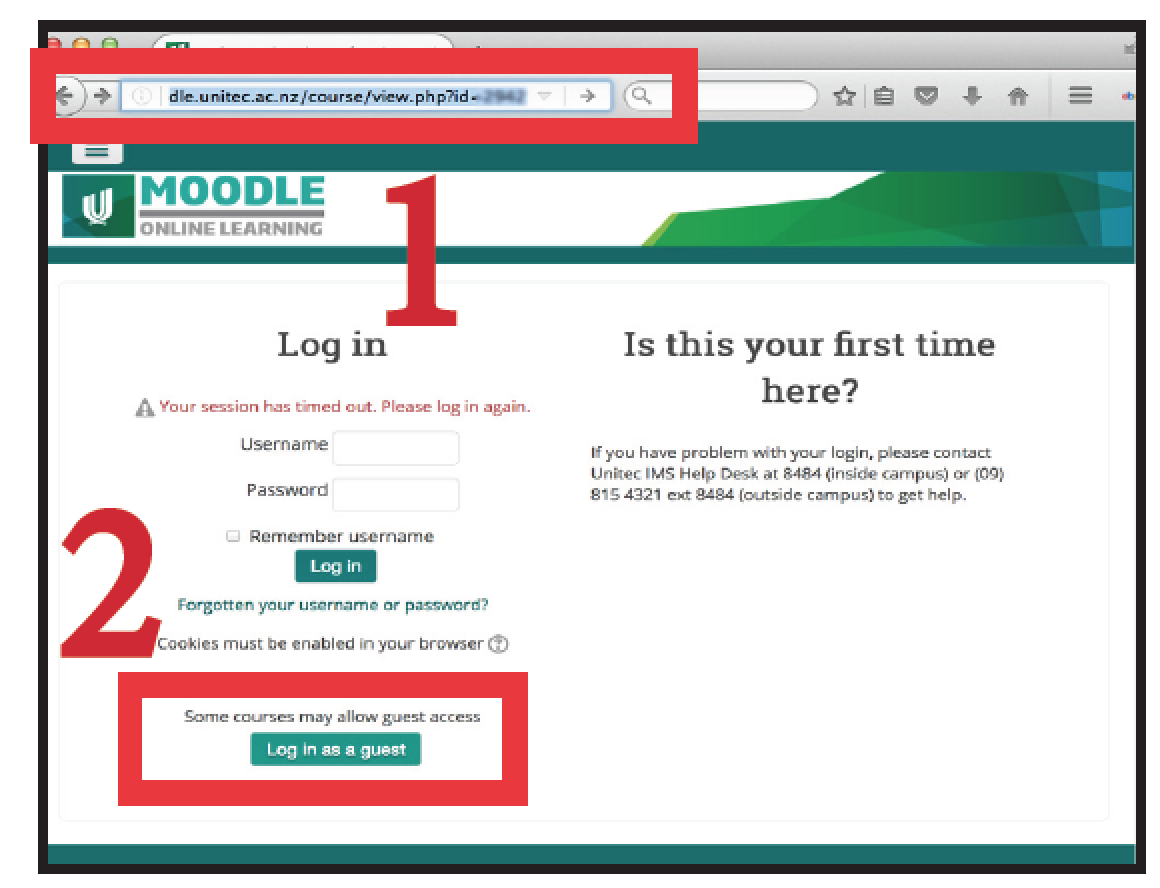
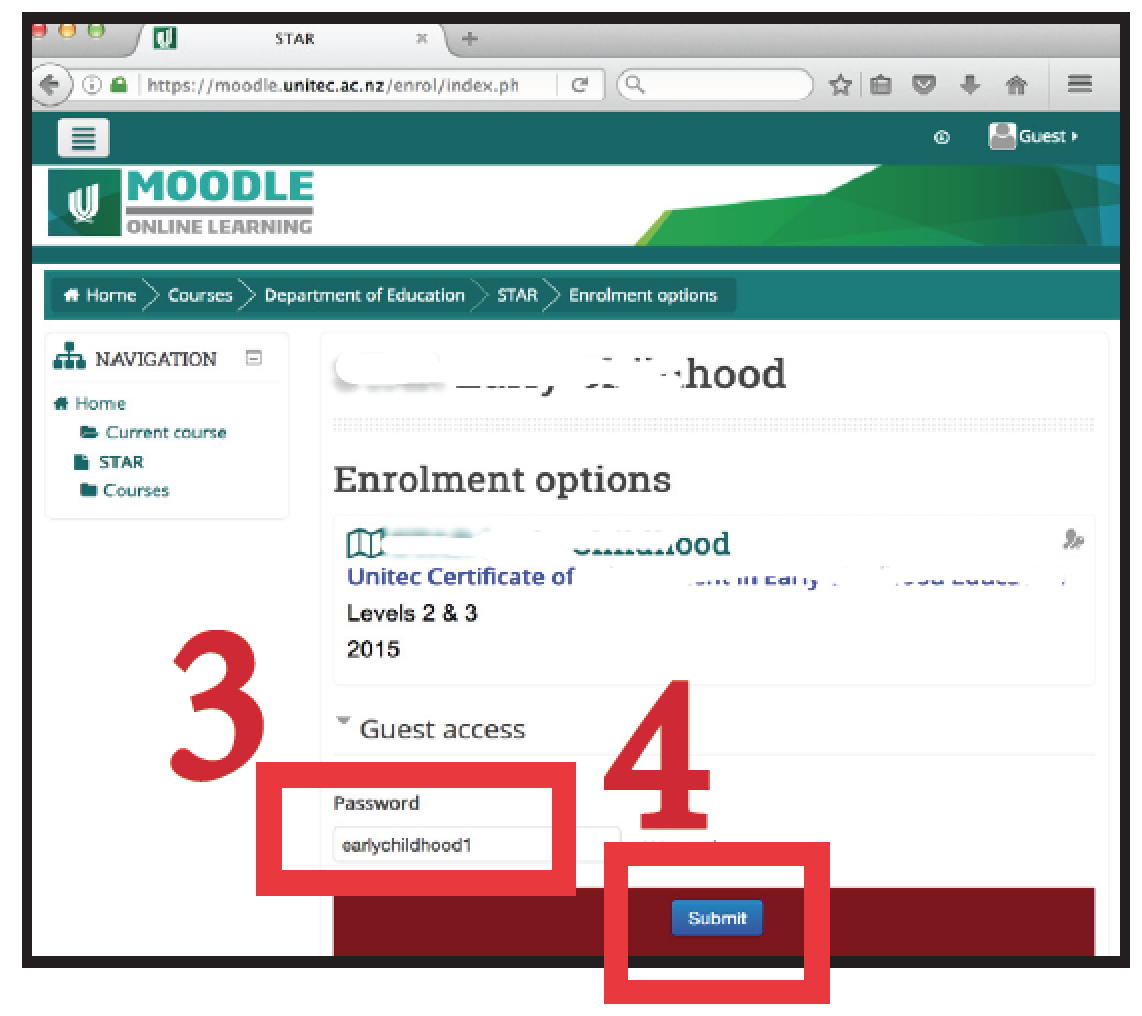
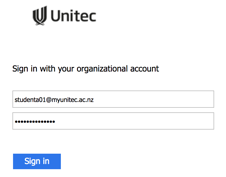
Enrolment - Guest access info for studentsHow to access a course as “Guest” Step 1: Follow the course link which your tutor gave to you, i.e:
Step 2: Click on the button: “Log in as a guest” Step 3: Enter the password which your tutor gave to you.
Step 4: Click on the button: “Submit” Tip: Note: |
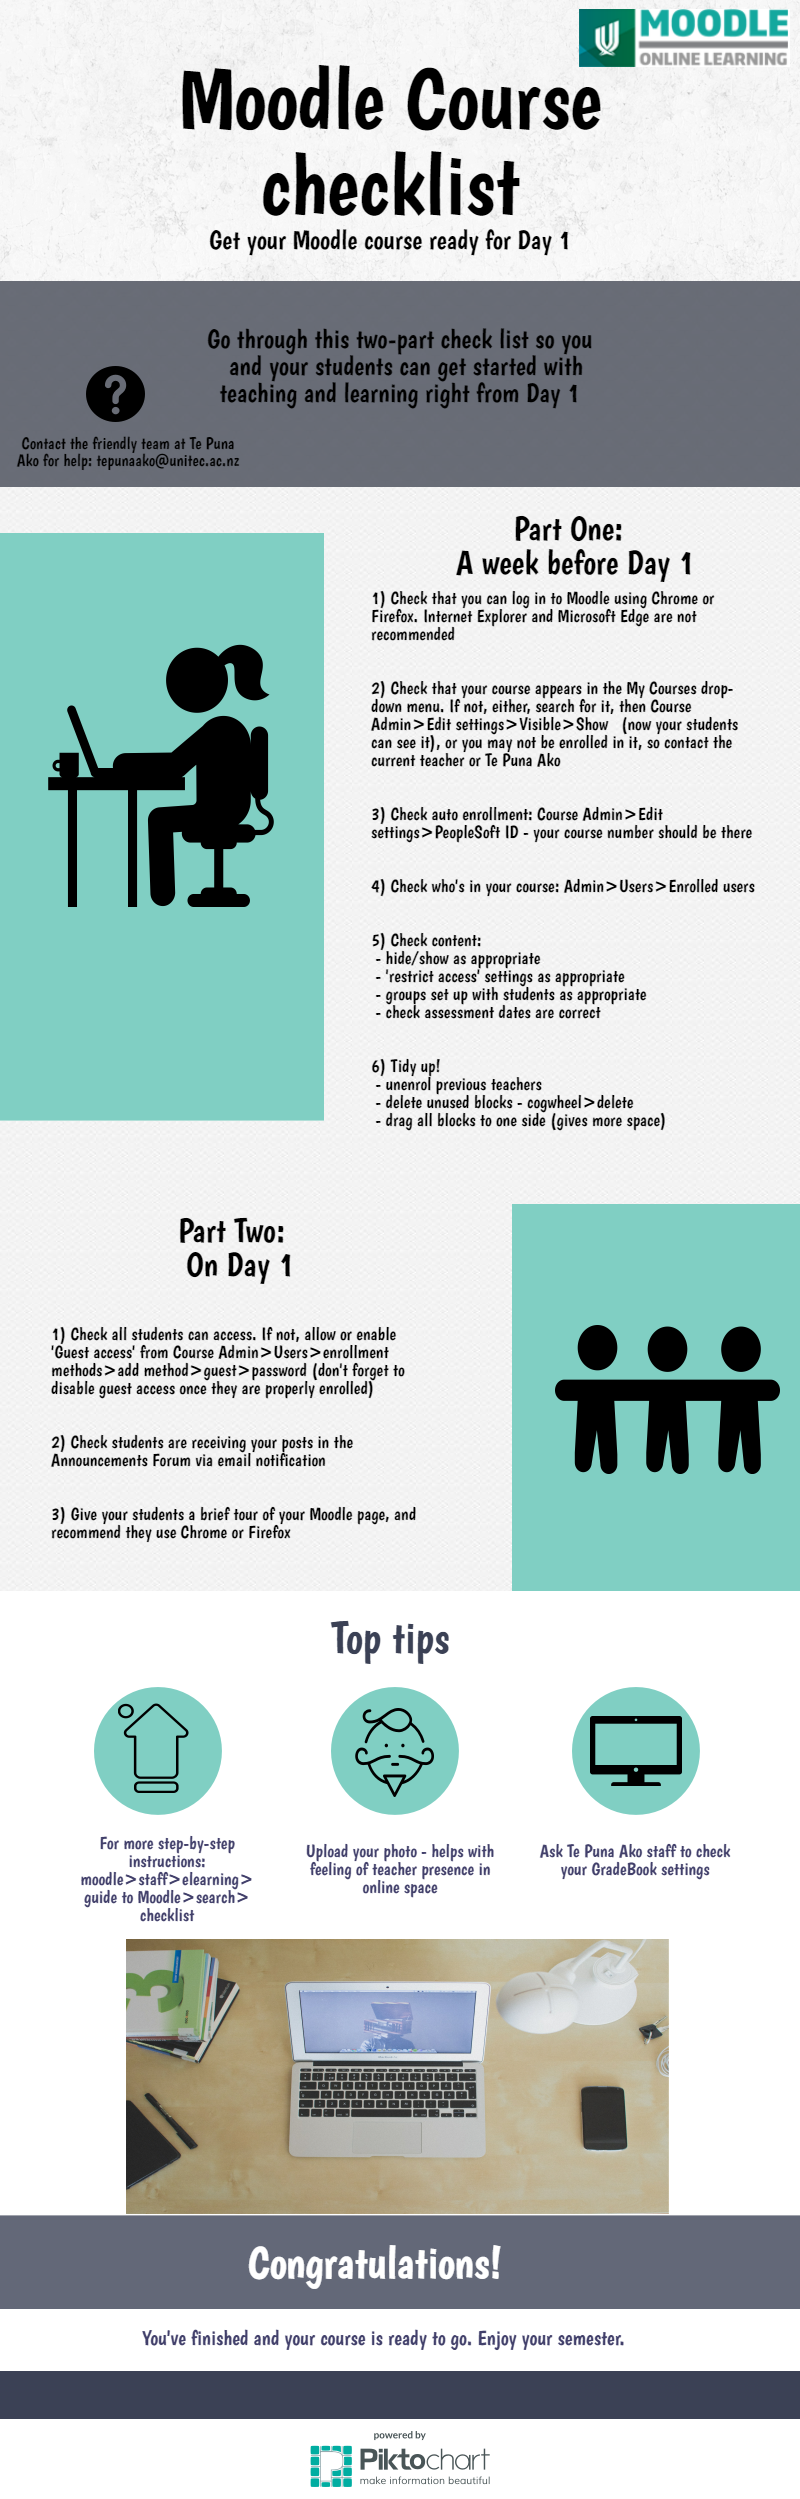
Checklist |
Delete manually enrolled users |

Enrolment - Enrol your students into Moodle
Follow the steps below to enter your PeoplesoftID into Moodle:
|
Reset Turnitin assignment
Option 1: (Copy) says Create Duplicates, New Turnitin Class.... |

Upload a big fileWe cannot recommend moodle for submissions of files of this size, file submission data is stored in the moodle database which is both very expensive and limited. This is in addition to potentially causing problems for the server when uploading and downloading files of this size. Our recommendation is that students share their files with you using OneDrive, this is a Microsoft service provided for students by Unitec, unlike moodle it is intended for file storage and sharing.
|

Activities - Turnitin MarkingHere are several videos introducing quick ways to mark Turnitin assignments.
|
Groups - Restricting Access to Specific Groups1. Click Turn editing on at the top right of your course page:
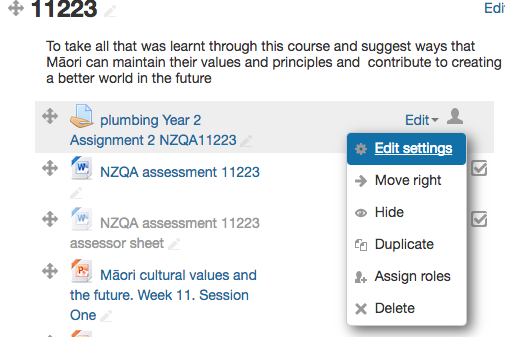
2. Click Edit settings to the right of the activity you want to restrict access to:
or Click Edit topic to the right of the section you want to restrict access to:
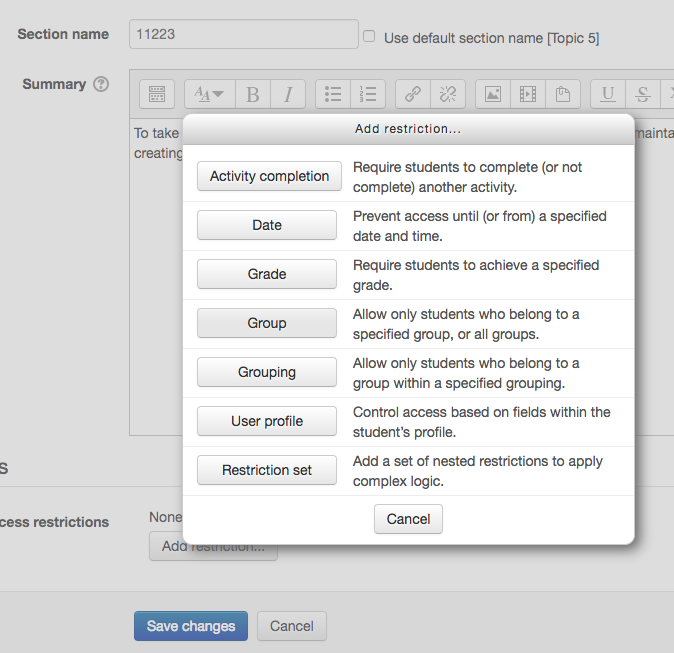
3. Under the Restrict access heading, click Add restriction.
4. Then click on the Group button.
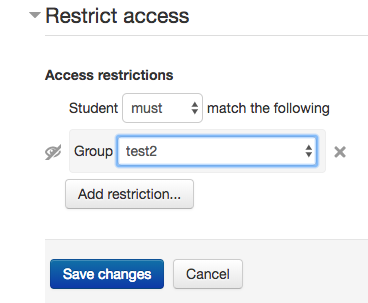
5. Select the group that you want to restrict from accessing the assignment/section from the drop down menu.
6. You can shut off the eye if you want other students who are not in this group to see the warning: "Not available unless..."
7. Save changes. |


How to copy a Quickmarks
|
If I change a question in the Question Bank, will it be changed in all the quizzes it appears in?Yes, If you changed a question in the Question Bank, it will change in all the quizzes it appears in. Questions really live in the Question Bank. When you add a question to the quiz, you are just making a link from the quiz to the question in the Question Bank. So, you can add one question to many quizzes, and then if you edit it, it will change in all quizzes. If you want to change any question, you have to:
What happens if you change the correct answer, but the Quiz has closed and the students have already been graded?
|
Turnitin file formatsTo submit a paper to Turnitin, your paper must meet our requirements. Turnitin will currently accept the following file types to generate Originality Reports:
The paper being submitted must contain more than 20 words, must be under 20MB (or approximately one million characters), must not exceed 200 pages in length, and must not contain spaces in between every letter (l i k e t h i s). Please note that we do not support:
Therefore, if an unsupported word processor is being used, you may need to save the file as a TXT or RTF file in order to upload to Turnitin. If a file format issue is occurring, please re-open the file in a word processor, and save the file again using the "save as" function and choosing a different format from the file type pull down menu (try RTF or TXT as they are the most "safe"). Occasionally content in document headers and footers can prevent a file from being accepted by the Turnitin service. If you encounter issues uploading a document that contains headers and footers, editing or removing the content may resolve the issue. Footnotes:
|
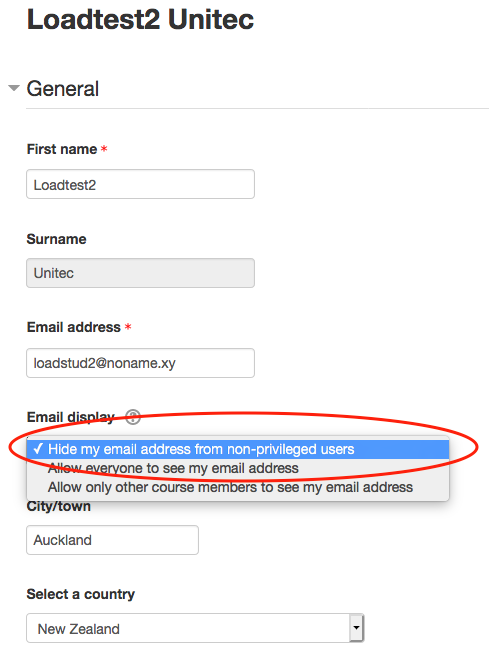
Hide my email from other studentsIf you don't want other students in Moodle to see your email address, you can hide it: 1. Click on your profile photo at the top-right corner, then, click the "Profile" option from the drop-down menu.
2. Click the "Edit profile" link.
3. Select the "Hide my email address from non-privileged users" option from the "Email display" drop-down menu. (non-privileged users means students, guests, visitors. Privileged users, such as teachers and managers, will always be able to see your email address.)
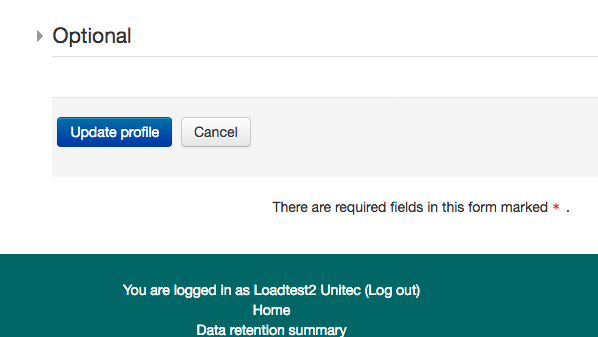
4. Save your changes by scrolling down the page and clicking the "Update profile" button.
|
Download/Backing up Quiz and gradesIt is important to note that student submissions/responses/results will disappear from Moodle 16 days after the enrolment end date. You should ensure you have downloaded and saved them before that deadline. If you should need to retrieve a student's data, you can manually re-enrol the student into the Moodle course. Please remember to un-enrol this student when you have downloaded what you need. If you need to download for the whole class, you will need to manually re-enrol every student in the cohort. And then, click the "Regrade all" button.
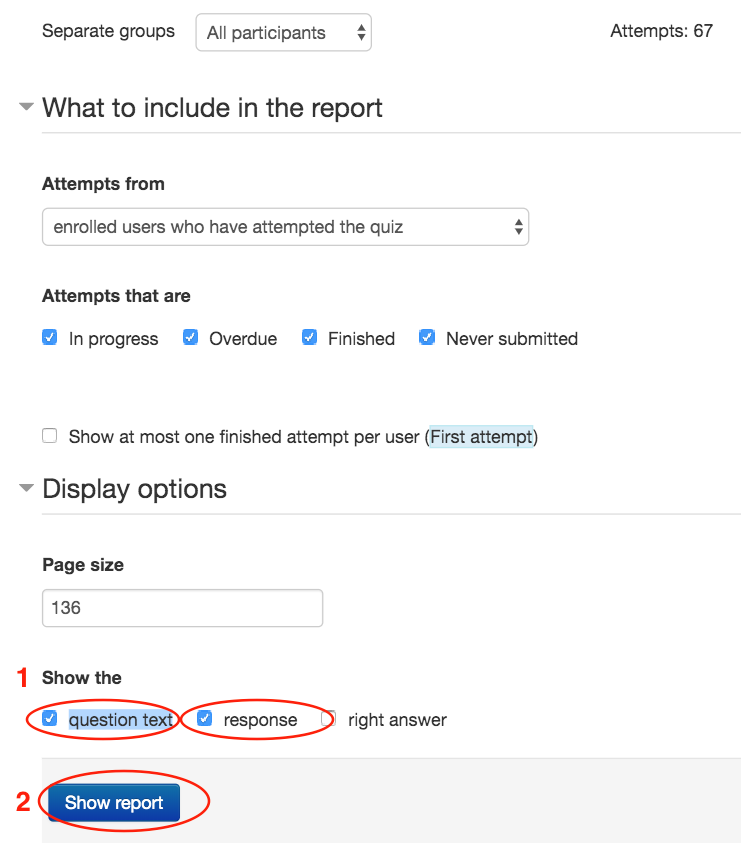
2. Tick the ‘Show the’ options, then click the ‘Show report’ button:
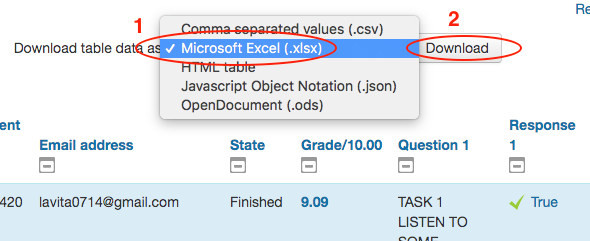
3. From the ‘Download table data as’ dropdown menu, select ‘Microsoft Excel (.xlsx)’, then click the ‘Download’ button and save the file.
|

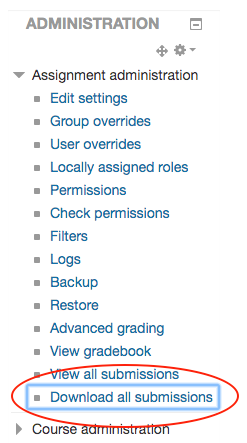
Download/Backing up Moodle Assignments and gradesIt is important to note that student assignments will disappear from Moodle 16 days after the enrolment end date. If you should need to retrieve a student's data, you can manually re-enrol the student into the Moodle course and download their assignment(s). Please remember to un-enrol this student when you have downloaded what you need. If you need assignments from a whole class, you will need to manually re-enrol every student in the cohort. To download the original student submissions:In the ‘Assignment administration’ block, click the 'Download all submissions' link and save the file.
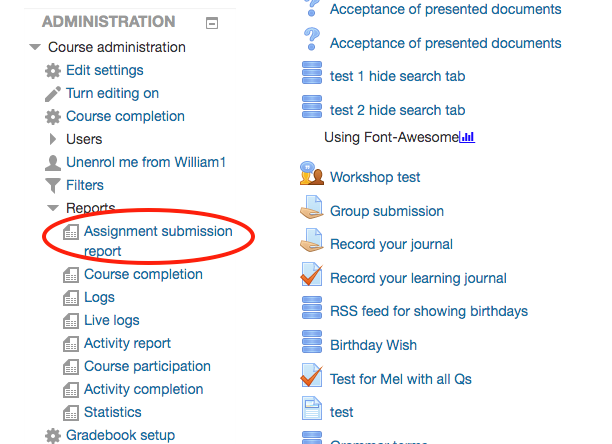
To download the original student submissions and grades, include teachers' annotated PDFs, feedback files and feedback comments: 1. Find the "Assignment submission report" under the "Report" dropdown menu in the Course administration block:
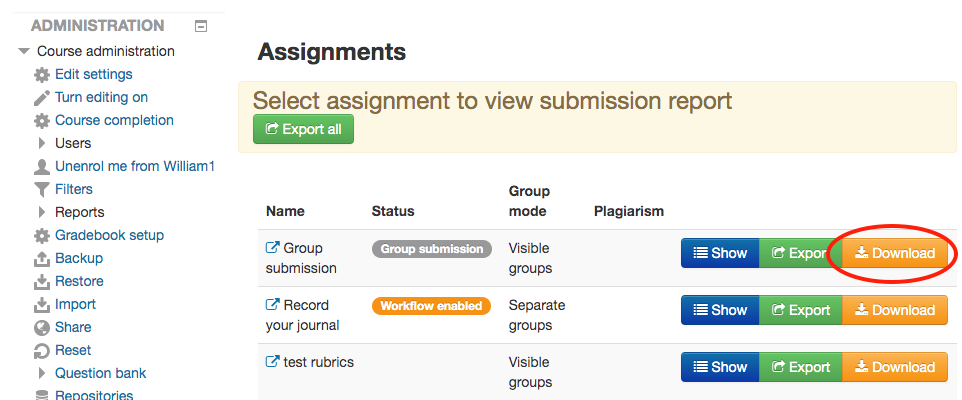
2. Click on the "Download" button to download a zip file and save it to your computer.
|
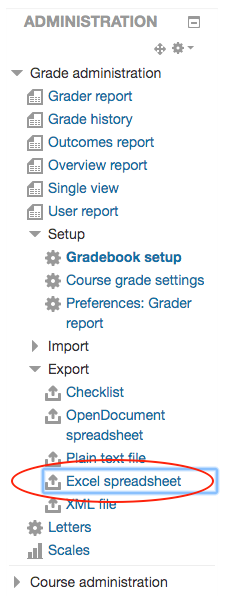
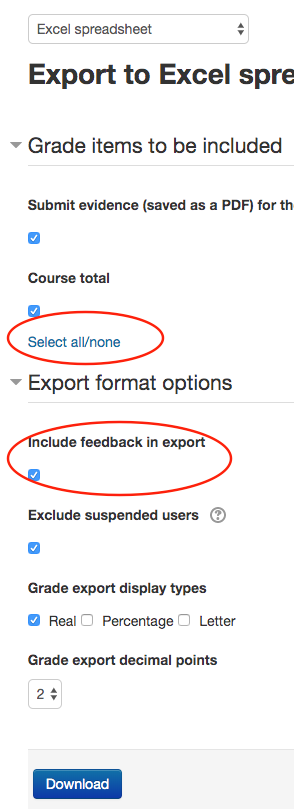
Download/Backing up Moodle GradebookIt is important to note that student submissions/responses/results/grades will disappear from Moodle 16 days after the enrolment end date. You should ensure you have downloaded and saved them before that deadline. If you should need to retrieve a student's data/grades, you can manually re-enrol the student into the Moodle course. Please remember to un-enrol this student when you have downloaded what you need. If you need to download grades for the whole class, you will need to manually re-enrol every student in the cohort. After that, please go to each Quiz and click the "Regrade all" button. 1. In the ‘Course administration’ block, click the ‘Gradebook setup’ link: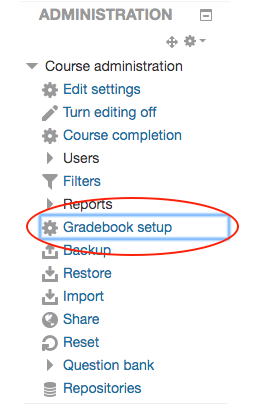 2. In the ‘Export’ dropdown menu, click the ‘Excel spreadsheet’ link: 3. Tick all options, then click the ‘Download’ button and save the file. |
ActivitiesThese are the interactive parts of your course, and allow students (and teachers) to do things. To add a new activity to your course you must first turn editing on
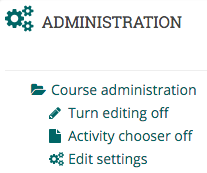
Note: There are now two methods for adding activities and resources to course pages, you may either use the traditional Add activity or resource link or the new Activity chooser. Check the Administration block to see if you have the Activity chooser turned on or off. You may turn the chooser on or off by clicking on the entry within the Administration block.
Add an activity using the Add activity or resource linkNote: To use this method the Activity chooser must be turned off
The Add an activity or resource window will appear. Select the type of activity you wish to add and click the Add button, otherwise click Cancel to return to your course page.
Add an activity using the Activity chooserNote: To use this method the Activity chooser must be turned on When enabled the Activity chooser replaces the Add activity or resource link described above with two drop down boxes one for resources and one for activities.
Scroll to the bottom of the section where you wish to add the activity and click the Add and activity drop down menu. Click on the activity type you wish to add from the list that appears.
This page describes the process of adding activities to your course page, however, the process of adding resources is essentially the same. |


Activities - ChatThe chat activity module enables participants to have text-based, real-time synchronous discussions. The chat may be a one-time activity or it may be repeated at the same time each day or each week. Chat sessions are saved and can be made available for everyone to view or restricted to users with the capability to view chat session logs. Chats are especially useful when the group chatting is not able to meet face-to-face, such as
|
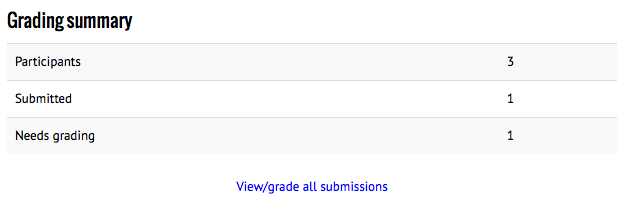
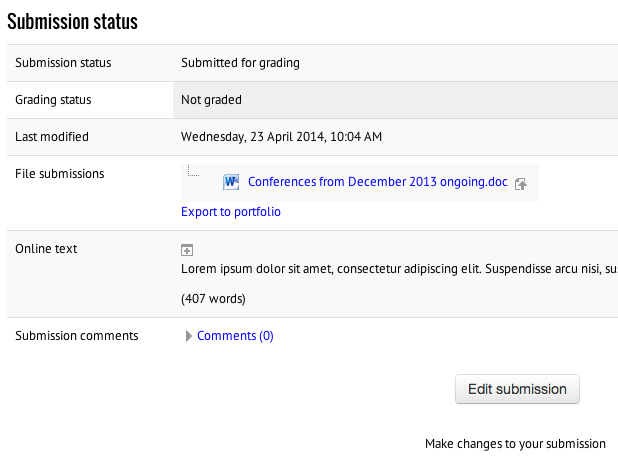
Activities - Assignment - Grading assignmentsOnce students have submitted assignments, you will see this information when you visit the assignment module in your course:
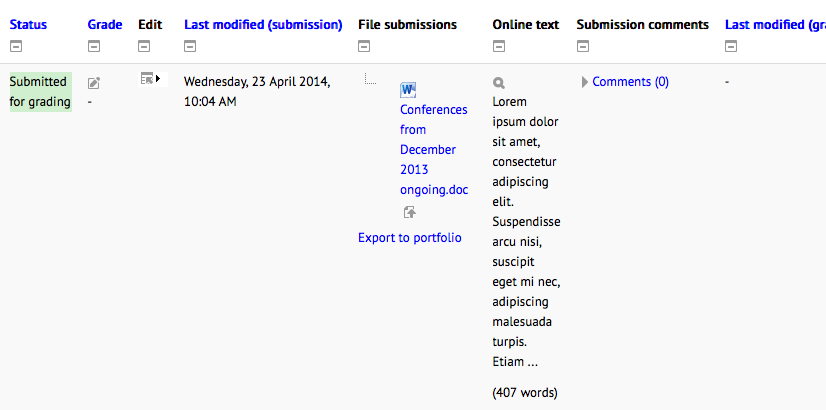
Click "View/grade all submissions" You will see a grid view of all your students and their submissions. Students who have submitted will have a green "Submitted for grading" box under "Status".
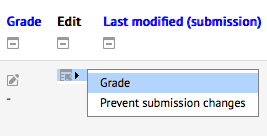
To grade, click the small pencil icon next to it, or hover over the icon in the "Edit" column for more options.
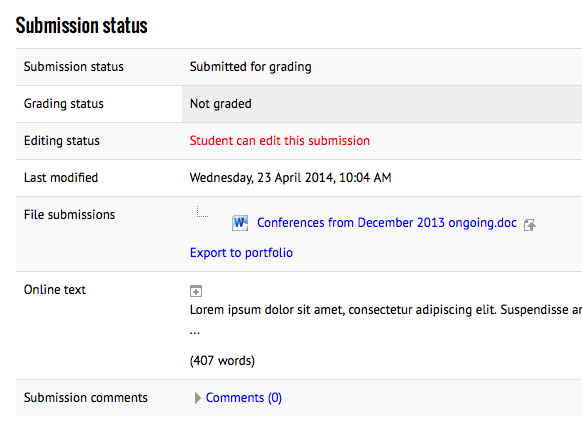
The grading view gives you an overview of the student's assignment:
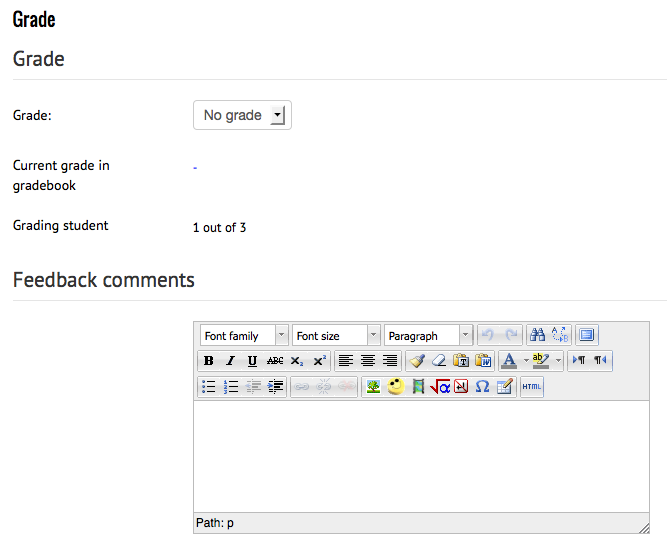
From here you can download the file, or click the "+" button above the online text to view the full online text submission. If the student has added submission comments to their assignment, they will also show here where it says "Comments (0)". Further down you can grade the assignment using the drop down menu (if you have chosen a custom grading scale) or if you have chosen a number grade then you will get a small box to type the grade into.
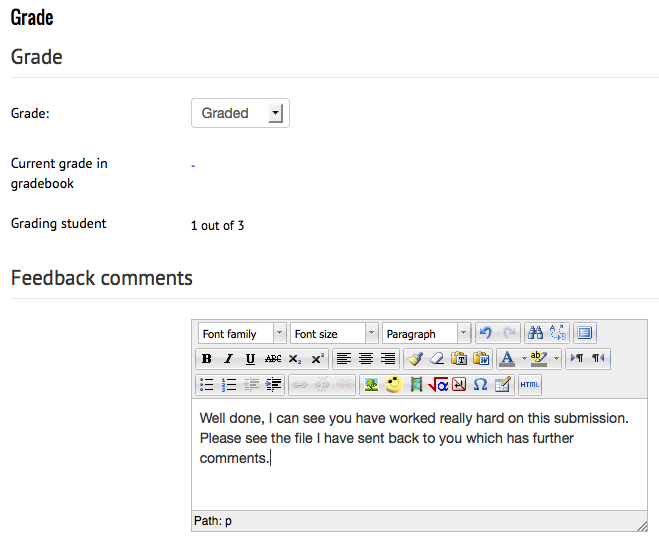
There is also a box for putting your feedback into. NB - an assignment's grade MUST be filled out or changed from "No grade" before the student can see any feedback! No grade, no feedback!
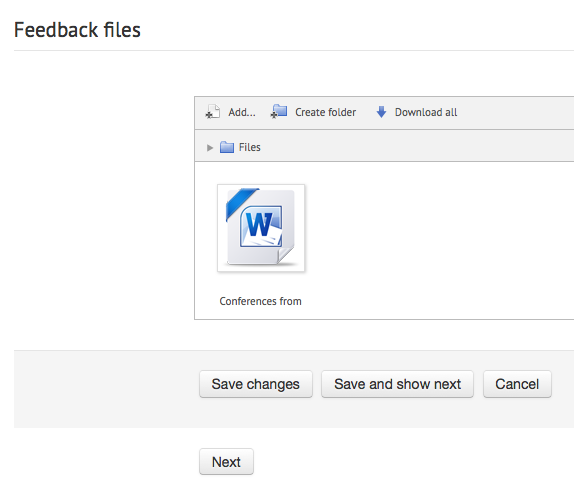
If you enabled the ability to add feedback files, you will see an upload box underneath the comments section for you to upload the feedback file to the student. This can be their own assignment, sent back to them with comments all over it.
Once you are done, either click "Save changes" if this is the only student you are giving feedback to, or "Save and show next" if you are grading all of your students. Clicking "Cancel" or "Next" will lose your grade and feedback information! |
Activities - Assignment - Setting up an assignmentFrom the "Add an activity or resource" menu, choose "Assignment"
Assignment name - Give the assignment a descriptive name Assignment description - This is a good place for the assignment information and marking criteria Display description on course page - checking this will display the assignment description directly below the assignment name on the course page. Otherwise students will see the description when they click on the assignment name to view the assignment.
Allow submissions from - If enabled, students will not be able to submit before this date. If disabled, students will be able to start submitting right away. Due date - This is when the assignment is due. Submissions will still be allowed after this date but any assignments submitted after this date are marked as late. To prevent submissions after a certain date - set the assignment cut off date. Cut-off date - If set, the assignment will not accept submissions after this date without an extension. Always show description - If disabled, the Assignment Description above will only become visible to students at the "Allow submissions from" date.
Submission types
Maximum number of uploaded files - If file submissions are enabled, each student will be able to upload up to this number of files for their submission. Maximum submission size - Files uploaded by students may be up to this size.
Feedback comments - If enabled, the marker can leave feedback comments for each submission. Offline grading worksheet - If enabled, the teacher will be able to download and upload a worksheet with student grades when marking the assignments. Feedback files - If enabled, the teacher will be able to upload files with feedback when marking the assignments. These files may be, but are not limited to marked up student submissions, documents with comments or spoken audio feedback.
Require students click submit button - If enabled, students will have to click a Submit button to declare their submission as final. This allows students to keep a draft version of the submission on the system. If this setting is changed from "No" to "Yes" after students have already submitted those submissions will be regarded as final. Require that students accept the submission statement - Require that students accept the submission statement for all submissions to this assignment. Attempts reopened Determines how student submission attempts are reopened. The available options are:
Maximum number of attempts - The maximum number of submissions attempts that can be made by a student. After this number of attempts has been made the student's submission will not be able to be reopened.
Students submit in groups - If enabled students will be divided into groups based on the default set of groups or a custom grouping. A group submission will be shared among group members and all members of the group will see each others changes to the submission. Require all group members submit - If enabled, all members of the student group must click the submit button for this assignment before the group submission will be considered as submitted. If disabled, the group submission will be considered as submitted as soon as any member of the student group clicks the submit button. Grouping for student groups - This is the grouping that the assignment will use to find groups for student groups. If not set - the default set of groups will be used.
Notify graders about submissions - If enabled, graders (usually teachers) receive a message whenever a student submits an assignment, early, on time and late. Message methods are configurable. Notify graders about late submissions - If enabled, graders (usually teachers) receive a message whenever a student submits an assignment late. Message methods are configurable.
Grade - Select a number that the assignment is graded out of, or one of the custom scales available either from the site level or created at the course level. Grading method Choose the advanced grading method that should be used for calculating grades in the given context. To disable advanced grading and switch back to the default grading mechanism, choose 'Simple direct grading'. Other options are 'Marking guide' and 'Rubric'. Grade category - This setting controls the category in which this activity's grades are placed in the gradebook. Blind marking - Blind marking hides the identity of students to markers. Blind marking settings will be locked once a submission or grade has been made in relation to this assignment. |


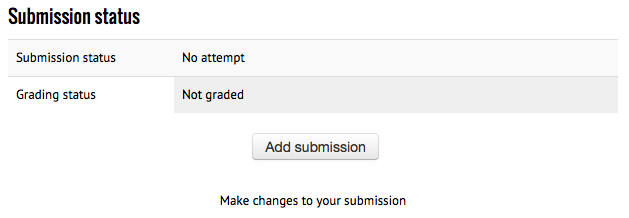
Activities - Assignment - Submitting assignmentsStudents can submit assignments by visiting the assignment activity in Moodle. They will see a submission button (if submissions are open).
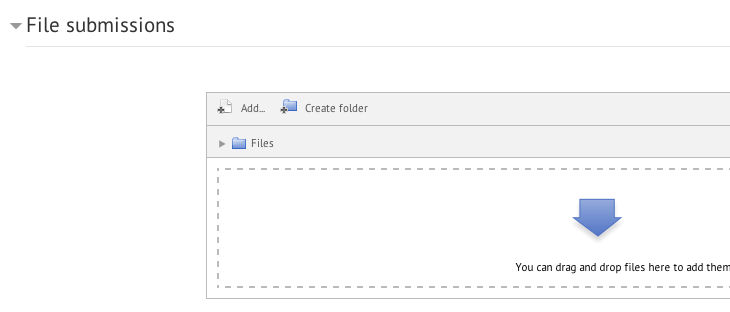
Depending on what has been set up by the teacher, a student may be asked to upload a file:
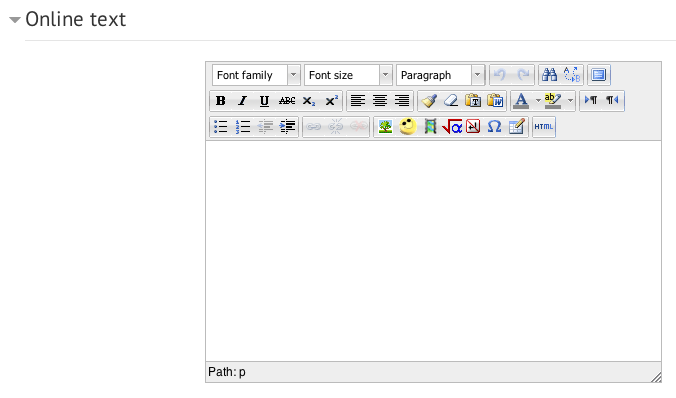
And/or write some text directly into Moodle:
When they are done they click "Save changes". They are then given an overview of their assignment, which they may or may not be able to edit depending on the assignment settings:
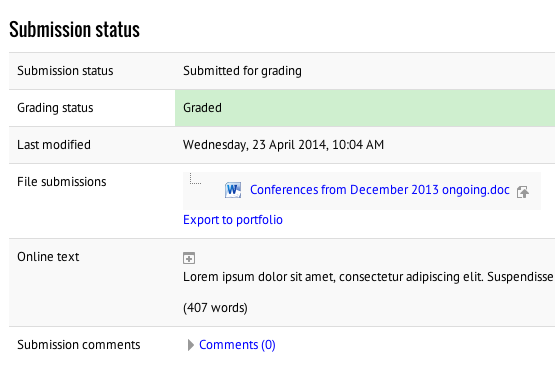
Once the teacher has graded the assignment, this view may change to something like this:
And feedback appears underneath:
|

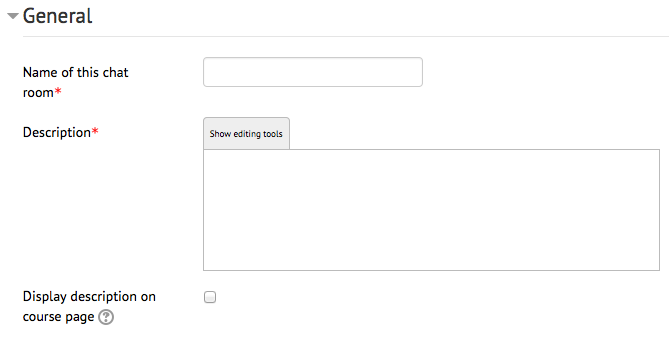
Activities - Chat - Setting up a chat roomChoose "Chat" from the "Add an activity or resource" menu.
Give your chat room a name. Write a brief description (maybe what you wish the students to use the chat room for, some general guidelines/rules). Display description on course page - If enabled, the description above will be displayed on the course page just below the link to the activity or resource.
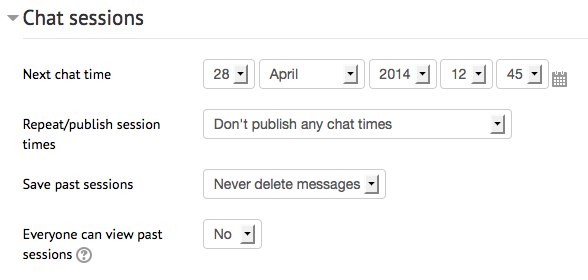
If you want students to be made aware of times that you will be in the chat room, choose a session time. Repeat/publish session times - Choose whether a session time will be published in the course calendar, and how often you are repeating this session time. NOTE - the chat room remains open at all times even outside of the published session times. If you don't want students to use the chat room outside of the published session times, please use the eye to hide the chat room from students. Save past sessions - this determines how long Moodle keeps a record/transcript of chat sessions. Everyone can view past sessions - If set to No, only users have mod/chat:readlog capability are able to see the chat logs (teachers, non-editing teachers). If set to Yes, students can also view past chat sessions. |
Course settings - Completion tracking |

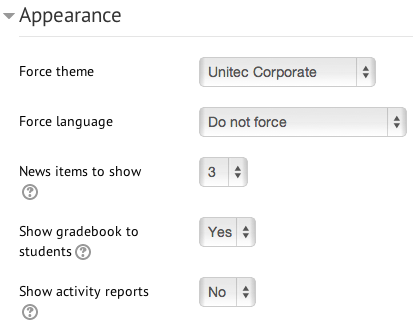
Course settings - Appearance
Force theme - If set to "Do not force" then the default theme (which you see on the front page of Moodle) will be used. Otherwise you can choose from a list of themes. Force language - we recommend leaving this to "Do not force". This way students can choose their own language from the language drop-down menu in the menu bar. News items to show - if you are using the "recent news" block, then this determines how many items it will display. Show gradebook to students - determines whether students can see the Moodle gradebook for their own grades. Show activity reports - determines whether students can see their own activity reports in the course. Teachers can always see activity reports, no matter what this is set to. |
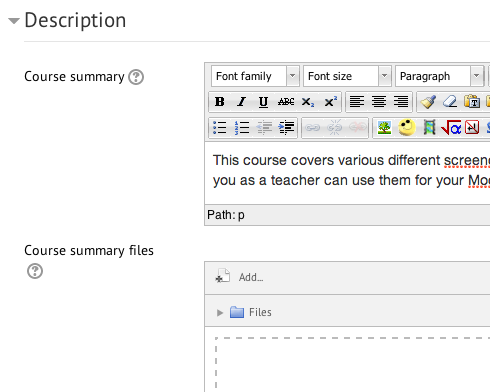
Course settings - Description |
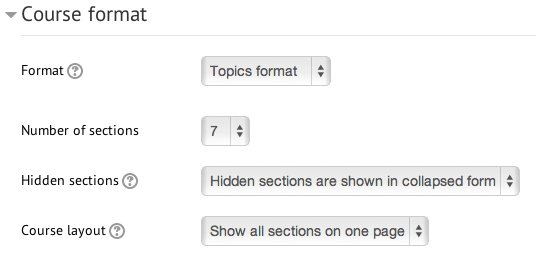
Course settings - Course format
Number of sections - if you chose Topics or Weekly as your format, this determines the number of section/topic/week boxes you have on your page. Hidden sections
Course layout
|
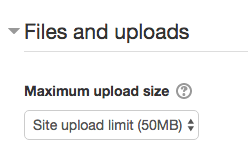
Course settings - Files and uploadsYou can increase or decrease the file upload size by: Turn editing on> Administration>Edit settings>Files and Uploads
Maximum upload size - determines the largest size of file that can be uploaded to the course. Activity modules also include a maximum upload size setting for determining the file size. |
Course settings - General
Course full name is the full name of the course that will be displayed in the "My Courses" menu and block. They should follow this format: PeopleSoftID - Course full name eg ETEC3821 - Electrical Fundamentals A Course short name is displayed in the navigation/breadcrumb menu. This should be your PeopleSoftID code. Category should be the programme or department your course is in. Visible should be set to "show" if you wish students to see, "hide" if you wish only teachers in the course to see it (ie it is under maintenance). Course start date - ignore this, it doesn't affect anything. PeopleSoft ID - if you want your students to be automatically enrolled into your course, make sure your correct course PeopleSoft ID code is entered here. |

Course settings - GroupsYou can create Groups, and add specific students to it. The purpose of this might be to give feedback to groups of students working together which is only relevant to that group. To create Groups, first go to the Administration Block>Edit Settings>Groups. Then fill in fields. Then you can go back to Users>Groups>Create groups. After that click add/remove users to add students to your Groups.
We generally recommend leaving these settings as you see above. Group mode
The group mode defined at course level is the default mode for all activities within the course. Each activity that supports groups can also define its own group mode, though if the group mode is forced at course level, the group mode setting for each activity is ignored. Force group mode If group mode is forced, then the course group mode is applied to every activity in the course. Group mode settings in each activity are then ignored. Default grouping You can choose a default grouping for all activities in the course to be available for. |

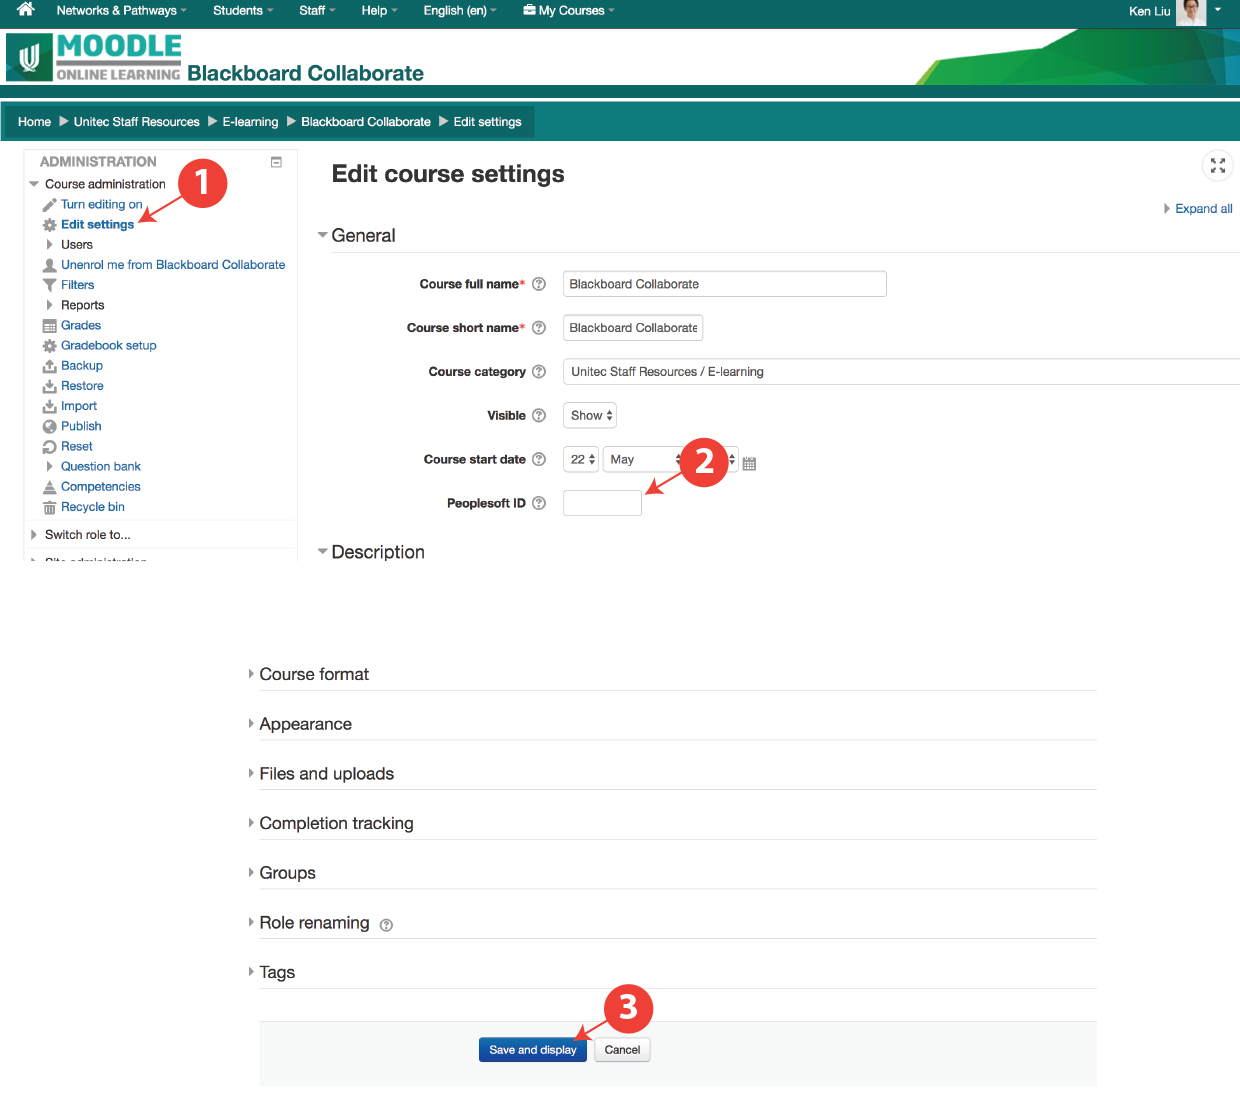
Enrolment - Automatic enrolmentBy using the PeopleSoft code, you can let PeopleSoft automatically enrol your students into your Moodle course. They will be enrolled one week before the PeopleSoft course start date, and unenrolled two weeks after the PeopleSoft course end date. If you need them in longer than these dates, please email yliu@unitec.ac.nz with the course code and the new requested start and end dates. Instructions:
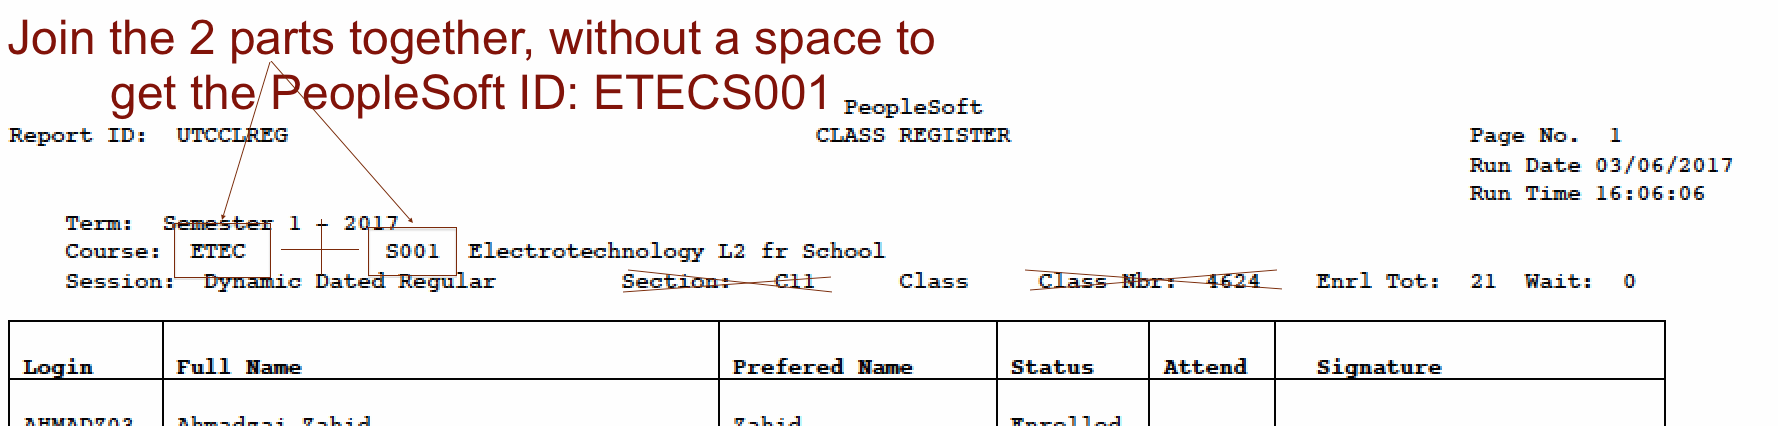
NB: Only one course on Moodle can use the same PeopleSoft ID. Course enrolment or Programme enrolment? Moodle Peoplesoft ID field can accept either the Peoplesoft Course or Programme code. A Peoplesoft course code is PeopleSoft Subject + PeopleSoft Category (ie. APMG8099). There is no space between them. The wrong ID will enrol the wrong students or none!
The list of all Programmes and their PeopleSoft IDs can be found here. |
Enrolment - Manual enrolmentManually enrolling staff into your Moodle course means that you as a teacher/course administrator search for and add each teacher, and have to then remove them later when they no longer need access. Please don't manually enrol any student. Students are enrolled automatically by PeopleSoft. Instructions: |
Enrolment - Self-enrolmentThis lets students enrol themselves in your course. You can put a password on so that not every student can just enrol. NB: students who have self-enrolled must either unenrol themselves from the course when they are done, or the teacher must unenrol them manually. They will not be removed automatically when the course finishes. Instructions:
(we recommend deleting guest access as this will make the 'Enrol me' button to be located in an obvious pace) |
Grades - Manual grade overrideSometimes it is desirable to modify a student's grade from what moodle has generated (for example a quiz grade). This is called manual grade override. Setting these overrides is very easy it's typically just a matter of clicking on the grade while reviewing an activity attempt or submission and typing in a new one. Clearing these overrides is not so straight forward, it requires going into the gradebook setup and removing it. |
Grades - moodle Gradebook setup / Weighted mean of gradesIt is important to differentiate between the moodle gradebook found on your moodle course and the Unitec gradebook accessed through The Nest. These two systems are not the same and are not linked together. It is however possible to make the moodle gradebook in your moodle course correctly align with the weightings for the various assessment activities. This will provide better feedback for your students about their current progress and make your final input of grades into the Unitec gradebook much simpler. |
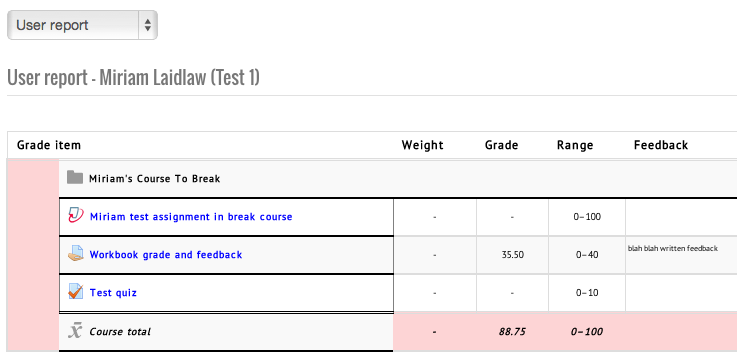
Grades - User report (analytics) |
Groups - Adding/removing groups from groupingsOnce you have created your groupings and your groups, you need to assign groups to groupings.
Removing groups follows the same process, but instead of selecting the group from the right hand list and clicking "Add", you select it from the left hand list and click "Remove". |
Groups - Adding/removing users from groups
|
Groups - Creating groups
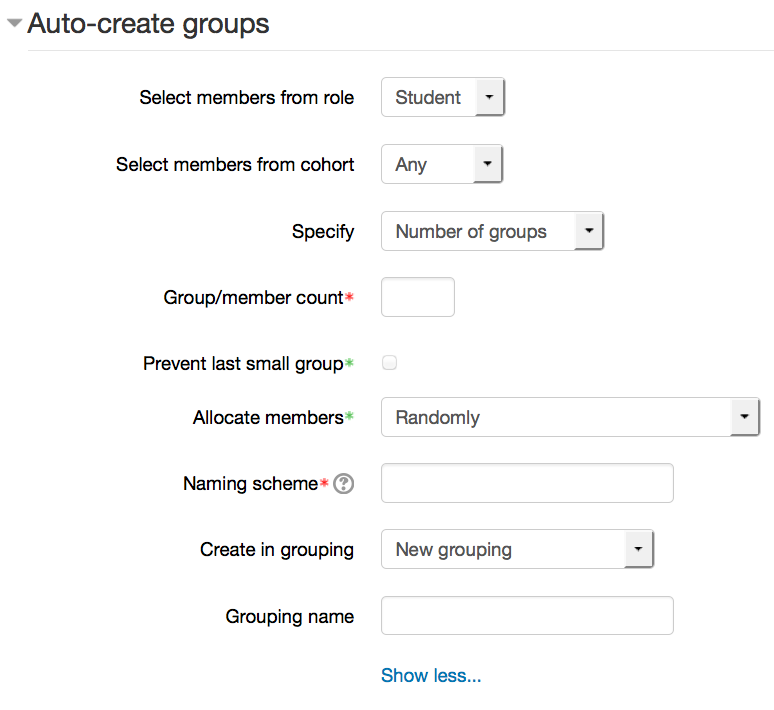
Auto create groups
Select members from role - The members of your group will be selected from the pool of students by default. If you want to include teachers and students in the auto-creation, change this to "All". Select members from cohort - Only site administrators should see this setting. Specify - number of groups or members per group - do you want to break the class up into a specific number of groups, or by the number of people per group? Group/member count - this field is required and is linked to the previous setting. i.e. If you want your students split into 3 groups, put 3 in here and have "number of groups" for the previous setting. Prevent last small group - If there are not the right numbers to make even groups, often one group will be created that is smaller than the rest. Checking this will distribute those students amongst the existing groups instead, even if it pushes the numbers above the ones you specified for maximum members in a group. Allocate members - your options are randomly, alphabetically by first name last name, alphabetically by last name first name, alphabetically by ID number. Naming scheme - The at symbol (@) may be used to create groups with names containing letters. For example Group @ will generate groups named Group A, Group B, Group C, ... The hash symbol (#) may be used to create groups with names containing numbers. For example Group # will generate groups named Group 1, Group 2, Group 3, ... |
Groups - Teaching in a shared courseThis guide is about how teachers can teach in a shared course. Has to be done by the team leader:
Note:
Has to be done by teachers:
Note: |
How to import content from one course to anotherOnce a programme template has been decided on, you can import it over the top of your own course. It will not affect any of your existing content, and you may find that you need to move things around once the template is in place to make the content fit. Some people choose to start from a blank template (start from scratch) and then import the existing content they want to keep from their old course into their new one. This is also an option. If you would like a new course (your old course will be left as it is), please fill out this form. One of the eLearn team will process this request and you will be emailed when your new course is ready for you to use. If you would like to import the programme template over your existing course, please follow the instructions below. Note: You must have editing teacher access to both the template course and your own course. If you do not have editing teacher access to the template course, please speak with another teacher in your programme, they can assign you access. 1. Go to your own course 2. You may need to tidy up the first section in your own course and remove everything from that section 3. Course Administration (block) > Import 4. Find the template course in the list, or search for it using the search box 5. Select that course and click "Continue" 6. Leave all three options ticked (include activities, include blocks, include filters) and click "Next" 7. Scroll to the bottom of the Schema Settings page and click "Next" 8. Scroll to the bottom of the Confirmation and Review page and click "Perform Import" 9. Depending on how much is in the template, you may need to wait a few seconds. You will receive a confirmation screen saying that the import has been successful. Click "Continue" to return to your course, where you should see the new template applied. |
Images or picturesAdding images or pictures to your course page can sometimes be done by dragging the picture into the editing window. This doesn't really add the picture properly, though, and it is recommended that you use the picture uploader tool instead. NB: you must have the image saved to your computer first! Best formats are PNG, JPG or GIF.
NB: To edit any of these things after you've uploaded an image, simply select the image (so that it is highlighted) and click the insert/edit image icon again. You will be taken back to the same window, and the button will say "Update" instead of "Insert". To reduce the file size of an image (so it loads quicker in Moodle): (If the file size of an image is too big, your Moodle course can be slow too load, and it will take up lots of space). |
Remove manually enrolled studentsManually enrolment has no effect on student accessibility to Unitec Moodle. Student enrollment is controlled by PeopleSoft only. As an Editing Teacher role, you can manually enrol a user, it looks fine from your teacher’s view. But, it only works for Staff. Even a student's name appears in your participant list, they still can’t access your course, because their account is not activated yet. Even worse, the inactivated manually enrolled account will cause unpredict issues which will incur complaints to Unitec. Please remove all manually enrolled students to avoid any further issues. |
Remove users |


Resizing images before uploading to MoodleIt is often best to resize images before you upload them to Moodle. This makes their file size smaller, and means less data your students have to download every time they view the image. Here is a quick instructional video on resizing an image using a free browser-based tool called Pixlr Editor. You don't have to install something, just go to the Pixlr website and start using it! Instructions:
It is now ready to upload to Moodle! |
Resizing images in MoodleYou can do this using free software such as Gimp or Paint.NET. On a Windows machine, you can use the inbuilt Paint software to resize images. On Macs, you can use iPhoto. If you need to tweak an image size slightly after uploading, it's easy.
NB: Super hint! If you wish an image to resize automatically to the size available on the screen, then remove the height property in the image dimensions, and add 100% (or whatever percentage) to the width property! The image will then scale / resize automatically!
Resize this window and see the difference between these two pictures. One will resize, the other will not:
|


ResourcesThese are items containing information/knowledge that a teacher offers to support learning. To add a new resource to your course you must first turn editing on
Note: There are now two methods for adding activities and resources to course pages, you may either use the traditional Add activity or resource link or the new Activity chooser. Check the Administration block to see if you have the Activity chooser turned on or off. You may turn the chooser on or off by clicking on the entry within the Administration block.
Add an resource using the Add activity or resource linkNote: To use this method the Activity chooser must be turned off
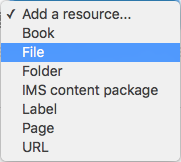
The Add an activity or resource window will appear. Scroll past the list of activities to select the type of resource you wish to add and click the Add button, otherwise click Cancel to return to your course page.
Add a resource using the Activity chooserNote: To use this method the Activity chooser must be turned on When enabled the Activity chooser replaces the Add activity or resource link described above with two drop down boxes one for resources and one for activities.
Scroll to the bottom of the section where you wish to add the resource and click the Add a resource drop-down menu. Click on the resource type you wish to add from the list that appears.
This page describes the process of adding resources to your course page, however, the process of adding activities is essentially the same. |
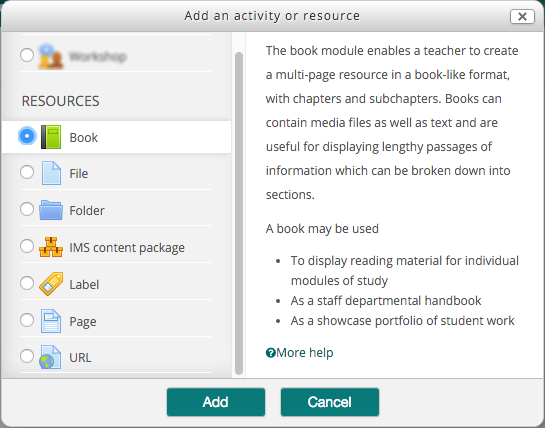
Resources - BookPresents content in a textbook format, allowing for chapters and subchapters (2 levels only). Pages can be enhanced by multimedia. Setting up a book: Choose "Book" from the "Add an activity or resource" menu. Give the book a name. You can give it a description, though this is not necessary. Chapter numbering
Custom titles Normally the chapter title is displayed in the table of contents (TOC) AND as a heading above the content. If the custom titles checkbox is ticked, the chapter title is NOT displayed as a heading above the content. A different title (perhaps longer than the chapter title) may be entered as part of the content. You will be prompted to add your first page (chapter) when you create the book. Add in a title (this will show in the book table of contents) and content (this will display in the main page area). Adding pages (chapters and subchapters): Make sure you have editing on when you are viewing your book to edit and add chapters. You will know if you do, because the table of contents will have editing icons after each chapter/page like this:
When adding a page you have the option to make it a 'sub-chapter'. This nests the page under the one you clicked the plus icon by. When you have multiple pages, there will be another icon which lets you change the order of pages in your book: |
Resources - FileA document presented for students to download - PDF, Word, Excel, PowerPoint, image... Adding a file: Drag and drop the file onto your course page (make sure you have editing turned on before doing this). OR Choose "File" from the "Add an activity or resource" menu. Give it a name. Description is optional. Drag the file into the drag and drop box or choose the "Add..." button to browse for the file on your computer. Once the file appears in the box on the Moodle page, you can continue. Appearance Display This setting, together with the file type and whether the browser allows embedding, determines how the file is displayed. Options may include:
Display size Displays the file size, such as '3.1 MB', beside links to the file. If there are multiple files in this resource, the total size of all files is displayed. Display type Displays the type of the file, such as 'Word document', beside links to the file. If there are multiple files in this resource, the start file type is displayed. If the file type is not known to the system, it will not display. |
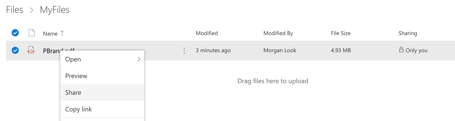
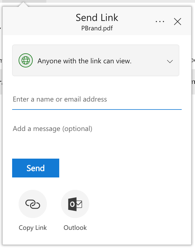
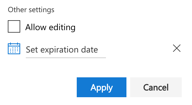
Resources - File - Linking to Office365 documents for studentsThis page describes a method for creating read-only links for students to view office documents directly in the browser. DescriptionIt is common for teachers to want to put content on a Moodle course for students to access. This may be in the form of Microsoft Office documents such as Word, Powerpoint or Excel. Traditionally a teacher might upload these documents as File resources, either as the original file type (eg. doc, ppt, xls) or exported to PDF first. This method works fine, but these resources need to be carefully maintained should the content of the file need changes in future. An alternative solution may be to create read-only links for students to view live documents directly in their browser, while also allowing the teacher to edit the content without any need to update or otherwise maintain links in Moodle. Step 1: Get a link for your office documentThis requires your document to be stored in OneDrive or SharePoint and the document open in your web browser. Once the document is open and you are satisfied the content is ready to share with your students, click the Share button in the top right corner of the window. or This will bring up the sharing popup, click on Get a link on the left hand side, then click on the drop down list to select appropriate security options. If you wish to restrict access to Unitec students only; select View link - account in your organization required, otherwise if you want anyone to be able to view the document; select View link - no sign in required. Warning: Do not leave the drop down list in the default Edit link - no sign in required state; this will mean anyone will be able to edit your document! Select one of the View link - options instead. Once you have selected the appropriate View link - option you are ready to select and copy the URL link provided. Right click on the URL box and select copy from the drop down menu (or use control-c to copy the text). You are now ready to move onto the next step. Step 2: Create a URL resource in moodle and link to your documentGo to your moodle course page and Turn editing on, then use the activity picker to create a new URL resource. Give your link a meaningful name, and an optional description if you wish. Paste your URL into the External URL box It's a good idea to check that your URL resource is setup to open in a new window so that students don't lose their place in Moodle by following your link. This is done under appearance. Check any other settings you might wish to change, for example displaying the description on the course page and automatic completion tracking when students view the resource. Finally, click Save and Return to Course and you are done. Turn editing off for your course and check your newly created link works correctly. |
Tidy up your courseThis entry contains suggestions for how to tidy up your moodle course.1. If you’re not using it, delete it, or drag it to a hidden section2. Put links into a Glossary or a Page (to reduce scroll of death)Glossary features:
Page features:
3. Put files e.g PDF, Word or PPT into Folders (or Glossary) or do 5. belowFolder features:
4. Videos and imagesPut videos into a 'page' by either adding a link or inserting the embed code. Don't put the video on your course homepage, as it will take time to load. Reduce your image size - otherwise, it will take time to load. 5. Instead of uploading Word, Ppt, Excel etc files , use Office 365 and link from there.Benefits:
6. Contact Te Puna Ako staff for help with how to do any of these steps (or search in the Guide to Moodle for the relevant word e.g. page/glossary).......... enjoy your tidy course!! |
Why am I not getting emails from Moodle?If you are a teacher, but your Moodle profile email is not the one you are using now, then you should change it to the right one. If you are a student, our Moodle updates your profile every day according to your Unitec Student Portal data. you should NOT change your email in Moodle, because of the change will be overwritten by PeopleSoft overnight. So please change your email here: https://myportal.unitec.ac.nz/welcome, then wait for the next day to see your Moodle email updated. If it is the right email but you didn’t get any email from Moodle, they might land into your Junk mails or Spam folder. Follow the link below to the guide of how to tame Gmail. Hotmail and other Email Apps should be similar. https://moodle.unitec.ac.nz/mod/glossary/showentry.php?eid=595Another possibility (unlikely) is that you had turned off the Moodle notification at some stage. Follow the link below to the guide of how to turn it back on: https://moodle.unitec.ac.nz/mod/glossary/showentry.php?eid=572 |
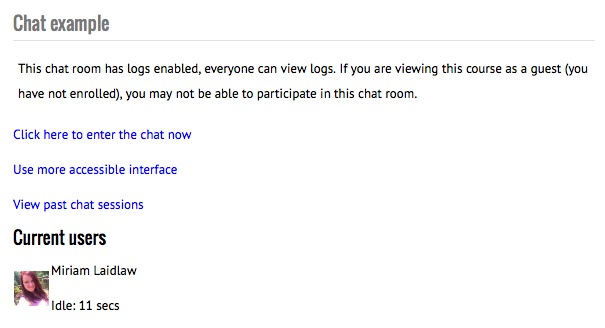
Activities - Chat - Using a chat roomVisit the chat room on your course page.
This will show you:
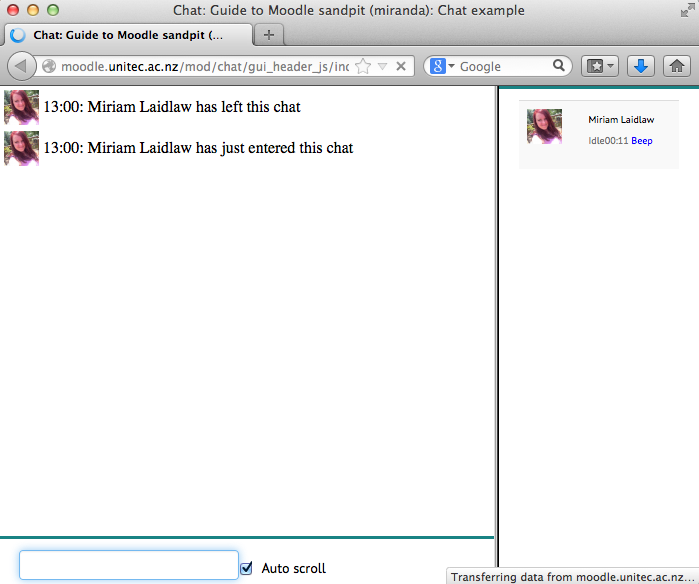
Click to enter the chat room.
This is a simple three-panel chat interface. Top left you see any messages users have posted. Note you will only see messages from the time you enter the room until the time you leave the room. To see messages posted when you're not in the room, view the chat logs. Bottom left is where you can type your messages. Press enter/return on your keyboard to post them to the chat window. The right panel is the list of users in the room. It shows you how long the user has been idle, and gives you a link to "beep" the user (this will make a beeping sound on their computer if they have sound turned on). To leave the room, simply close the chat room window. |
Activities - ChoiceThe choice activity module enables a teacher to ask a single question and offer a selection of possible responses. Choice results may be published after students have answered, after a certain date, or not at all. Results may be published with student names or anonymously. A choice activity may be used |
Activities - Choice - Setting up a choiceSelect "Choice" from the "Add an activity or resource" menu.
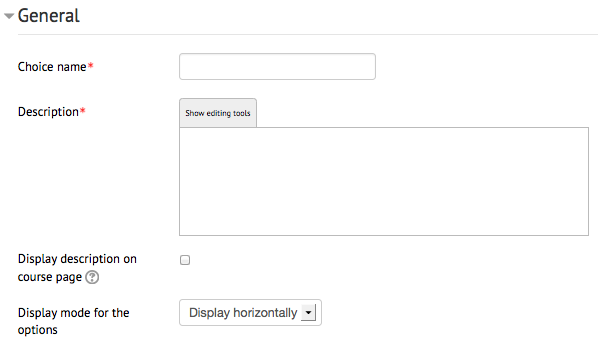
Choice name - Give the activity a name. This will display on the course page and at the top of the page when viewing the activity. Description - This is a good place to put the question you are asking the students to answer. Display description on course page - If enabled, the description above will be displayed on the course page just below the link to the activity or resource. Display mode for the options
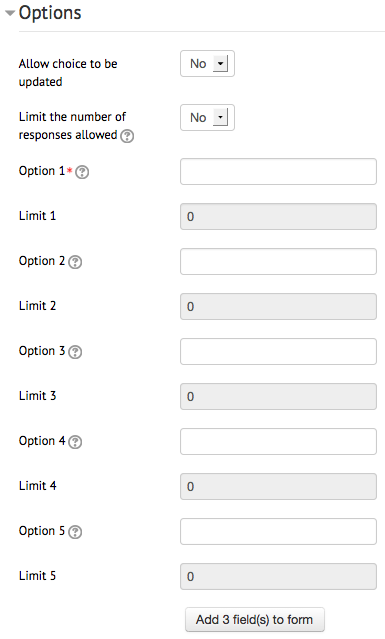
Allow choice to be updated - Allows the student to change their mind/choice even after they have answered. Limit the number of responses allowed - This lets you put a limit on each option. For example, you can get students to arrange themselves into groups of 4 using the choice activity, so you would limit each option to 4 users. Once 4 users have chosen that option, no more can choose it, they must choose another. If this is left on No, then the "Limit" fields remain disabled. Options - At least one option must be given. Any fields left blank will not be included. Limits - If you set "limit the number of responses" to Yes, then these fields will become enabled and you can choose how many students/users can choose each option.
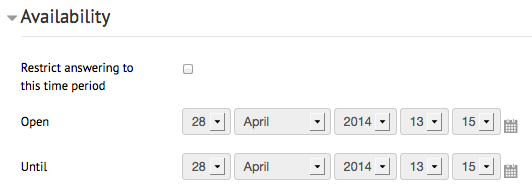
Restrict answering to this time period - By checking this box, you can select a time during which students can use the activity and make their choices. After the time is closed, students can still view the activity and choices they made, but can no longer make changes or new choices.
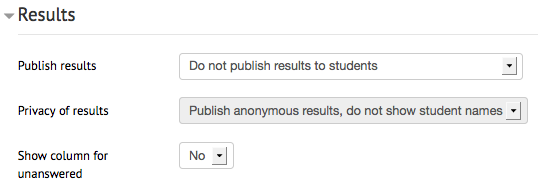
Publish results
Privacy of results
NOTE - teachers always see which students have answered which choice, no matter the settings above. |
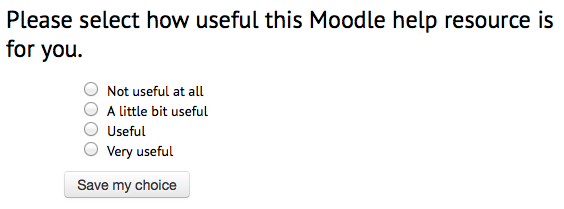
Activities - Choice - Using a choiceOnce you have a choice activity set up it is simple to use. Students visit the choice activity, select the option they wish to answer, and click "Save my choice".
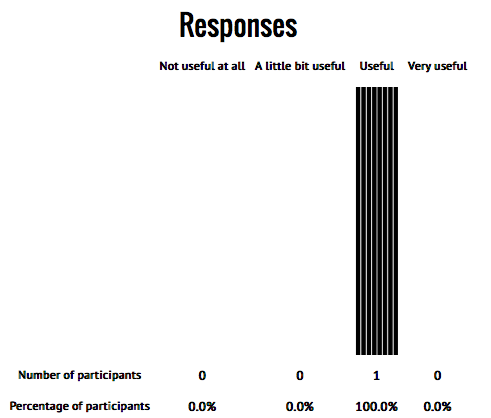
If they see anonymous results, they may see a bar graph like this:
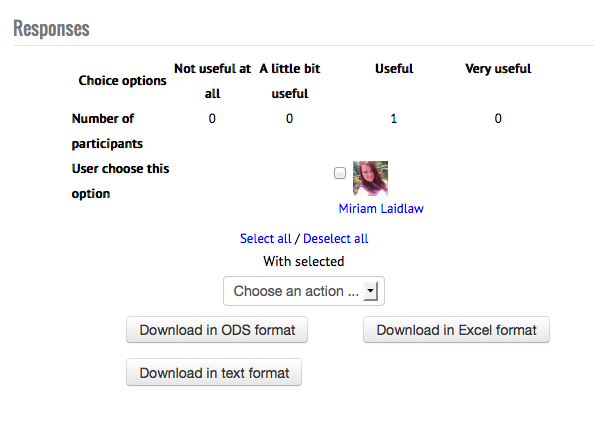
You as the teacher would also see this bar graph, but you also have a link near the top right that says "View X responses" where X is the number of users/students who have answered the choice activity.
You will see all responses, who responded what, and have the option of deleting responses or downloading all responses in various formats. |
Activities - FeedbackThe feedback activity module enables a teacher to create a custom survey for collecting feedback from participants using a variety of question types including multiple choice, yes/no or text input. Feedback responses may be anonymous if desired, and results may be shown to all participants or restricted to teachers only. Any feedback activities on the site front page may also be completed by non-logged-in users. Feedback activities may be used |
Activities - Database - FieldsIn order to collect data, you need to add fields to your database. It is best to plan out in advance exactly what information you wish to collect. Field types
Things that are automatically collected (don't need fields added):
Adding a field:
|
Activities - Database - Setting up a databaseChoose "Database" from the "Add an activity or resource" menu.
Name - Give your database a name Description - Give your database a description. This will display at the top of your database. Display description on course page - If enabled, the description above will be displayed on the course page just below the link to the activity or resource.
Approval required - If enabled, entries require approving by a teacher before they are viewable by everyone. Allow comment on entries - This allows teachers and students to comment on database entries. Entries required for completion - The number of entries a student is required to submit before the activity can be considered complete. Entries required before viewing - The number of entries a student is required to submit before they can view entries from other students. Note: If entries are required before viewing, the database auto-linking filter should be disabled. This is because the database auto-linking filter can't determine whether a user has submitted the required number of entries. Maximum number of entries - The maximum number of entries a student is allowed to submit for this activity.
Available from and to is when the database may have entries added to it. Read only from and to is when the database can still be viewed but can no longer have any entries added to it (or edited).
If you are feeding the entries of this database out using an RSS feed (either into another course or an external site), here you can determine how many entries are included in the RSS feed.
Grade category - This setting controls the category in which this activity's grades are placed in the gradebook. Roles with permission to rate - To submit ratings users require the moodle/rating:rate capability and any module specific capabilities. Users assigned the following roles should be able to rate items. The list of roles may be amended via the permissions link in the administration block. Aggregate type - The aggregate type defines how ratings are combined to form the final grade in the gradebook.
If "No ratings" is selected, then the activity will not appear in the gradebook. Scale - If ratings are enabled, choose which scale will be used. Restrict ratings to items with dates in this range - If enabled, only entries made between the dates specified can be rated. If entries are made outside of those times, they cannot be rated. |


Block - Calendar |
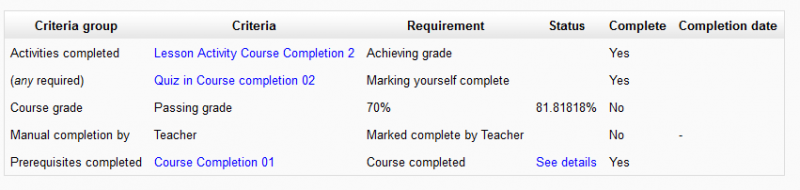
Block - Course completion statusThe course completion status block shows what has been done towards completing the course. The student and teacher will both see this block. The "More information" link will lead to a more detailed report. This report can have some interactive elements in the form of check boxes for the student and teacher. The "Course completion block" must be added to the course in order to see the "Course completion status" block. Student view The student can see their progress in the course by looking at the content of the block or clicking on the "More details" link to see a report. The student, if required, can mark an activity as completed on the course's homepage. Course completion report, student view, 1 course:
Course completion report, student view, 2 courses - teacher needs to mark complete:
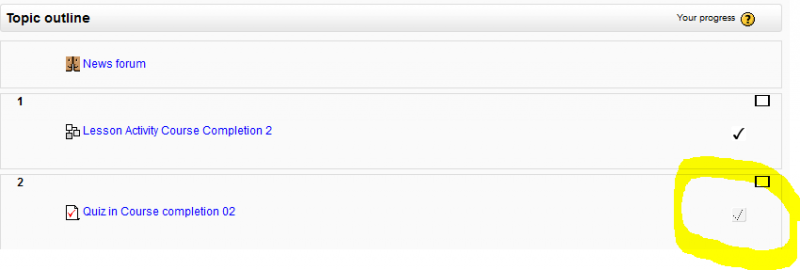
Course homepage, students has completed lesson, needs to self complete quiz:
Teacher view This block shows the status for each student. It is also the place where the teacher (or others) can mark the course as complete. Note: The course completion status block will only appear if completion tracking criteria are set in Settings > Course administration > Completion tracking. This is what the teacher sees: Course completion report, teacher view, 1 course:
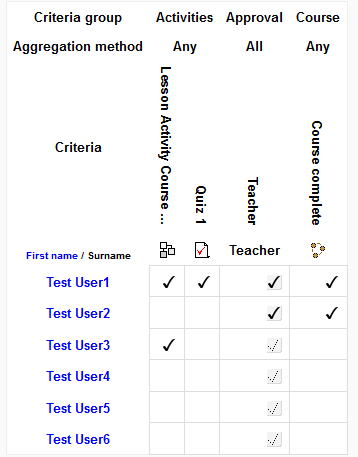
Course completion report, teacher view, showing prerequisite:
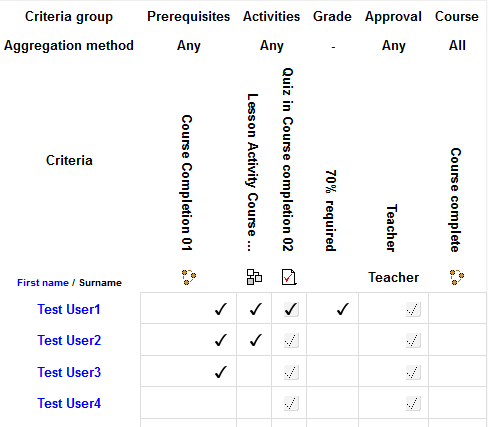
|

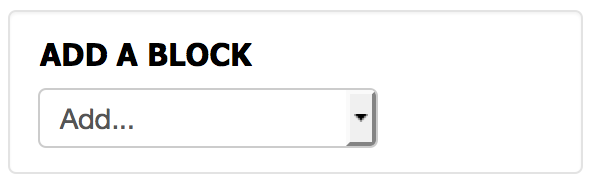
Blocks - Add a blockOn the left, under any existing blocks, is the "Add a block" menu. Select the block you would like to add from the menu (if you do not see the block you want to add here, it may already be on your course page! Some blocks can only be added once to a course).
Once the block has been added it will appear on the left at the bottom. From here you can move (drag and drop) the block to a new location, and configure the block (using the cog icon). |
Add a YouTube videoIf you want to embed a Youtube video on Moodle, you can do that by letting Youtube itself provide you with the code you need:
|

Activities - LessonThe lesson activity module enables a teacher to deliver content and/or practice activities in interesting and flexible ways. A teacher can use the lesson to create a linear set of content pages or instructional activities that offer a variety of paths or options for the learner. In either case, teachers can choose to increase engagement and ensure understanding by including a variety of questions, such as multiple choice, matching and short answer. Depending on the student's choice of answer and how the teacher develops the lesson, students may progress to the next page, be taken back to a previous page or redirected down a different path entirely. A lesson may be graded, with the grade recorded in the gradebook. Lessons may be used
|
Activities - QuizThe quiz activity enables a teacher to create quizzes comprising questions of various types, including multiple choice, matching, short-answer and numerical. The teacher can allow the quiz to be attempted multiple times, with the questions shuffled or randomly selected from the question bank. A time limit may be set. Each attempt is marked automatically, with the exception of essay questions, and the grade is recorded in the gradebook. The teacher can choose when and if hints, feedback and correct answers are shown to students. Quizzes may be used
Video Resources: 1. The video below shows how to add and remove Quiz questions - click the square box icon in bottom right corner to make it play in full screen. |
Activities - SCORM packageA SCORM package is a collection of files which are packaged according to an agreed standard for learning objects. The SCORM activity module enables SCORM or AICC packages to be uploaded as a zip file and added to a course. Content is usually displayed over several pages, with navigation between the pages. There are various options for displaying content in a pop-up window, with a table of contents, with navigation buttons etc. SCORM activities generally include questions, with grades being recorded in the gradebook. SCORM activities may be used
|
Activities - WikiThe wiki activity module enables participants to add and edit a collection of web pages. A wiki can be collaborative, with everyone being able to edit it, or individual, where everyone has their own wiki which only they can edit. A history of previous versions of each page in the wiki is kept, listing the edits made by each participant. Wikis have many uses, such as
How to edit a wiki: 2. Click the wiki 3. Click the edit tab 4, Delete or Add the text you want to change. 5. To edit the table (ie add more rows), click the icon in the top left corner of the edit window, then click the 'table' icon 6. Click save |
Activities - WorkshopThe workshop activity module enables the collection, review and peer assessment of students' work. Students can submit any digital content (files), such as word-processed documents or spreadsheets and can also type text directly into a field using the text editor. Submissions are assessed using a multi-criteria assessment form defined by the teacher. The process of peer assessment and understanding the assessment form can be practised in advance with example submissions provided by the teacher, together with a reference assessment. Students are given the opportunity to assess one or more of their peers' submissions. Submissions and reviewers may be anonymous if required. Students obtain two grades in a workshop activity - a grade for their submission and a grade for their assessment of their peers' submissions. Both grades are recorded in the gradebook. |
Activities - Database - TemplatesTemplates are how the database looks on your Moodle page. There are three main templates you need to worry about:
All others can be left on their default settings. List view This is the default view when people first arrive in the database activity. It shows multiple entries, usually stacked vertically one after the other. If there are a lot of entries in the database, and the entries are long, it may be worth making this a reduced view (with just a title and entry author) which can click through to the single entry. Single entry view This shows just a single database entry. It will contain all the information. Add template This determines what the page looks like when a student (or teacher) adds a new entry to the database. It will also contain all the possible fields for the participant to fill out, laid out in a way and order that makes sense. |
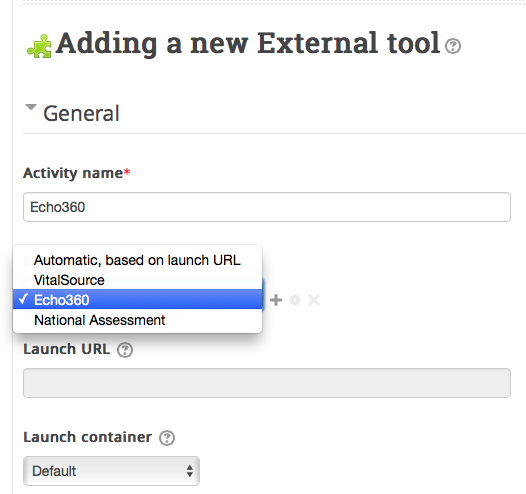
Activities - External ToolThe external tool activity module enables students to interact with learning resources and activities on other web sites. For example, an external tool could provide access to a new activity type or learning materials from a publisher. For example, to Add Echo360 activity, you can select "Echo360' from the 'External too type' drop down menu:
|
Activities - ForumThe forum activity module enables participants to have asynchronous discussions i.e. discussions that take place over an extended period of time. There are several forum types to choose from, such as a standard forum where anyone can start a new discussion at any time; a forum where each student can post exactly one discussion; or a question and answer forum where students must first post before being able to view other students' posts. A teacher can allow files to be attached to forum posts. Attached images are displayed in the forum post. Participants can subscribe to a forum to receive notifications of new forum posts. A teacher can set the subscription mode to optional, forced or auto, or prevent subscription completely. If required, students can be blocked from posting more than a given number of posts in a given time period; this can prevent individuals from dominating discussions. Forum posts can be rated by teachers or students (peer evaluation). Ratings can be aggregated to form a final grade which is recorded in the gradebook. Forums have many uses, such as
|
Activities - GlossaryThe glossary activity module enables participants to create and maintain a list of definitions, like a dictionary, or to collect and organise resources or information. A teacher can allow files to be attached to glossary entries. Attached images are displayed in the entry. Entries can be searched or browsed alphabetically or by category, date or author. Entries can be approved by default or require approval by a teacher before they are viewable by everyone. If the glossary auto-linking filter is enabled, entries will be automatically linked where the concept words and/or phrases appear within the course. A teacher can allow comments on entries. Entries can also be rated by teachers or students (peer evaluation). Ratings can be aggregated to form a final grade which is recorded in the gradebook. Glossaries have many uses, such as |
Activities - HotPotThe HotPot module allows teachers to distribute interactive learning materials to their students via Moodle and view reports on the students' responses and results. A single HotPot activity consists of an optional entry page, a single elearning exercise, and an optional exit page. The elearning exercise may be a static web page or an interactive web page which offers students text, audio and visual prompts and records their responses. The elearning exercise is created on the teacher's computer using authoring software and then uploaded to Moodle. A HotPot activity can handle exercises created with the following authoring software: Hot Potatoes (version 6)
|