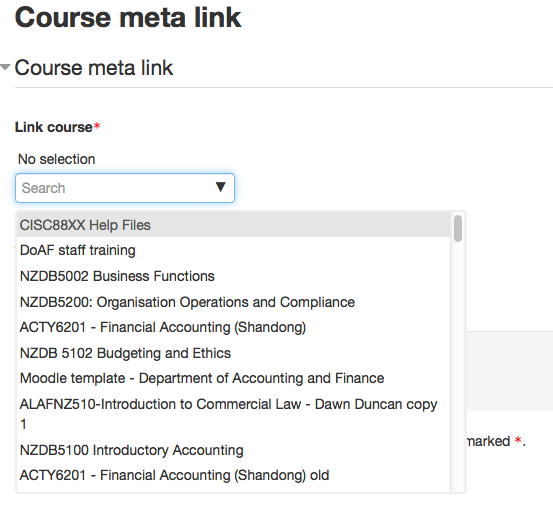
Enrolment - Meta enrolment (meta link)Use this when you want to pull enrolments (student and teacher) from another course into your course. NB: You must be a 'teacher' or higher level in both courses to set this up. Instructions:
Done! Now all students from the other course will also be enrolled in yours. When they are unenrolled from the other course, they will also be unenrolled from yours. |
Enrolment - Guest accessGuest access allows people who are not enrolled in your course, or even people who don't have Moodle accounts at all, to access your course page. This is not a way of enrolling students or teachers into your course. Guests cannot participate in the course in any way (forums, assignments, etc) but they can view anything that an enrolled student can view. Courses with guest access enabled are required to have a password set, with the possible exception of some programme or pathway "homepages". If you believe your programme or pathway requires a homepage with open access, you must get permission from Te Puna Ako and measures must be put in place to ensure sensitive data for students and staff are not made available to visitors from outside Unitec. NB: enabling guest access (but without a password) gives Google access to your course. If you have sensitive or copyrighted material in your course, do not enable guest access. If you do want to enable guest access, make sure you have set a guest password. The instructions below are for historical purposes.  Make sure the the eye is open, so guests can access to your course. Or choose "Guest access" from the "Add method" drop down menu if it isn't there already:
2. Click the edit icon to set a guest password:
3. Click "Save changes" |
Enrolment - Removing people from your course (unenrolling users)Removing staff or students from your course works exactly the same. You can remove staff and students who have been manually enrolled or self-enrolled. You cannot remove students who have been enrolled by "external database" (PeopleSoft). Staff or students enrolled by "course meta link" must be unenrolled from the source course to be unenrolled from yours. Staff (or sometimes students) who are enrolled by "category enrolment" cannot be removed by you, as they have been assigned to their role at the category level to all courses in that category. If you feel that there are staff there by mistake, please contact your programme administrator or elearn@unitec.ac.nz to clarify. Instructions for removing manually or self-enrolled students:
Done! |
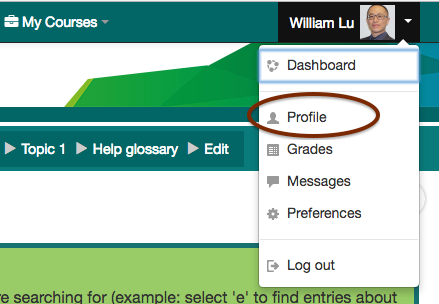
Update profile (my profile)You can find your profile by clicking on your user picture in the top right. This is what other users on the site see when they click on your name. You can add more details and a description, and upload a user picture. 1. From the drop-down menu at the top-right corner, click on 'Profile':
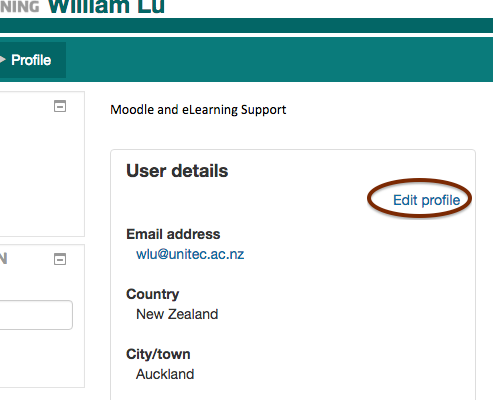
2. Click on the link 'Edit profile':
3. Click the ? next to some fields to see what these settings do 4. Upload a user picture from your computer 5. Click the "Update profile" button at the very bottom |
Grades - Grader report (analytics)The grader report is the grid view that teachers see. Students see the user report, as they can only see their own grades.
There can be quite a bit of sideways scroll on this page, so be prepared to scroll to the bottom, then scroll to the right. Do not alter assignment grades through the grader report! Use the assignment grading page. Only manual grade items should be altered through the grader report. |
Turn editing on |
Editing iconsWhen you turn editing on in a course, you will see a range of icons:
|
Activities - Feedback - Setting up a feedback activityChoose "Feedback" from the "Add an activity or resource" menu.
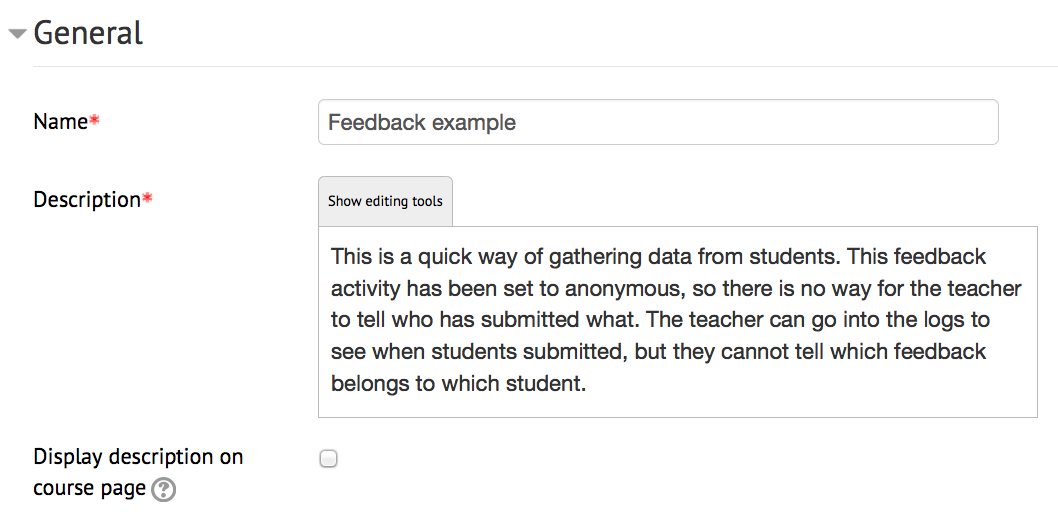
Give your feedback activity a name. Write a brief description (maybe why you are gathering this feedback). Display description on course page - If enabled, the description above will be displayed on the course page just below the link to the activity or resource.
You can leave these disabled. Otherwise, choose a date range where students can submit feedback.
Record user names
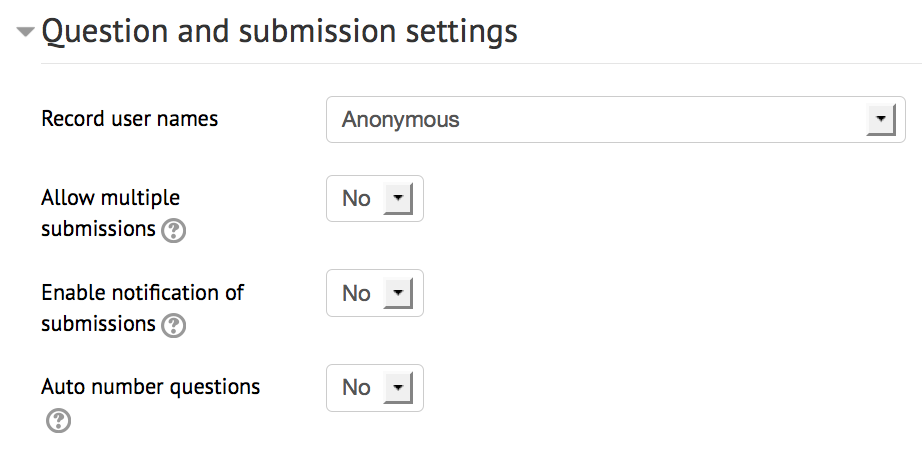
Allow multiple submissions - If enabled for anonymous surveys, users can submit feedback an unlimited number of times. Enable notification of submissions - If enabled, teachers will receive notification of feedback submissions. Auto number questions - Enables or disables automated numbers for each question.
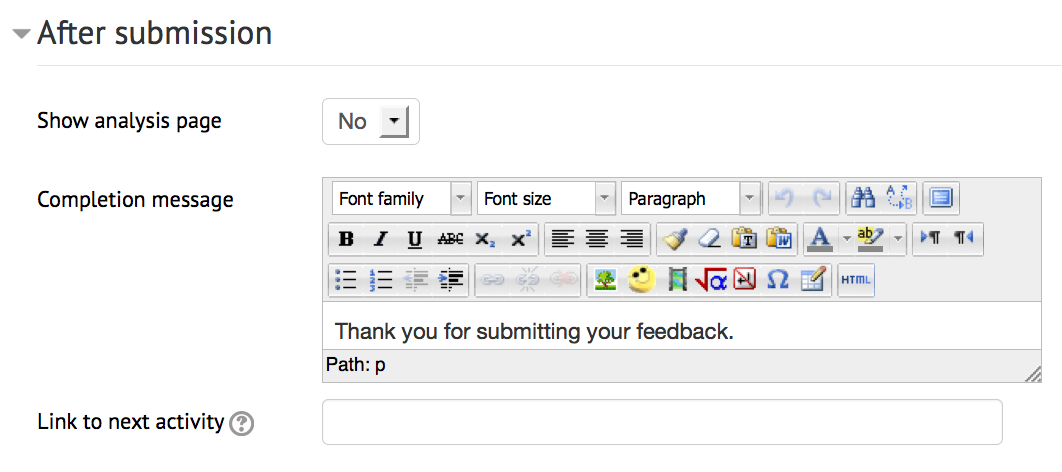
Show analysis page - Allows the students to see an analysis page after they've submitted feedback. Completion message - You can enter a message, maybe a quick thank you, which is displayed after a student submits feedback. Link to next activity - After submitting the feedback, a continue button is displayed, which links to the course page. Alternatively, it may link to the next activity if the URL of the activity is entered here. |
Activities - Feedback - Adding / editing questions in a feedback formUsing the tabs along the top of the activity, choose "Edit questions"
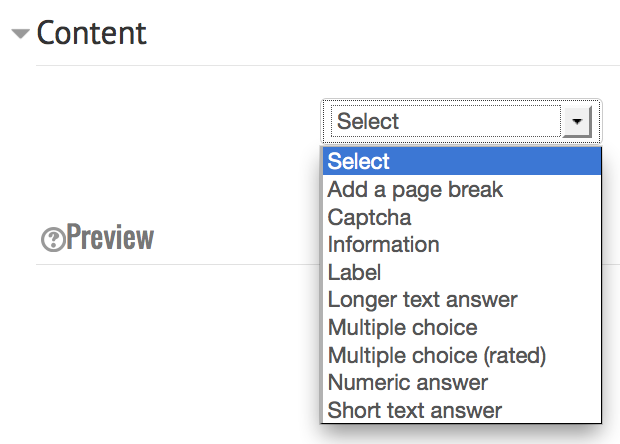
There will be no questions there yet. Choose a question type:
As you add questions you will see them appear in the preview section below. As a teacher you cannot answer the questions in the feedback form. For more detailed information on building your feedback form, please see the MoodleDocs. |
Course - Topic headingsYou may wish to change the topic headings in your course from "Topic 1", "Topic 2" etc to something more informative. Make sure you have editing turned on. Under each topic heading section you'll see this icon: It will say "Edit summary" when you hover over it. Click it.
Untick "Use default section name" (this is "Topic 1", "Topic 2" etc) and then you can type in your own section name. Click "Save changes" |
