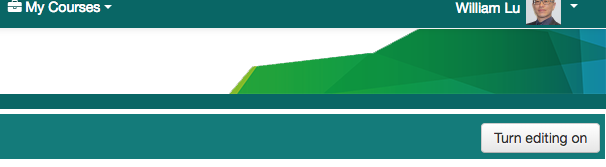
Groups - Restricting Access to Specific Groups1. Click Turn editing on at the top right of your course page:
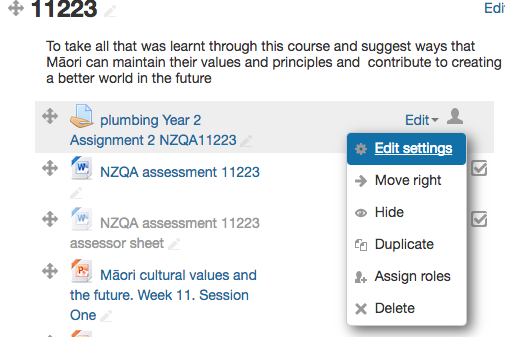
2. Click Edit settings to the right of the activity you want to restrict access to:
or Click Edit topic to the right of the section you want to restrict access to:
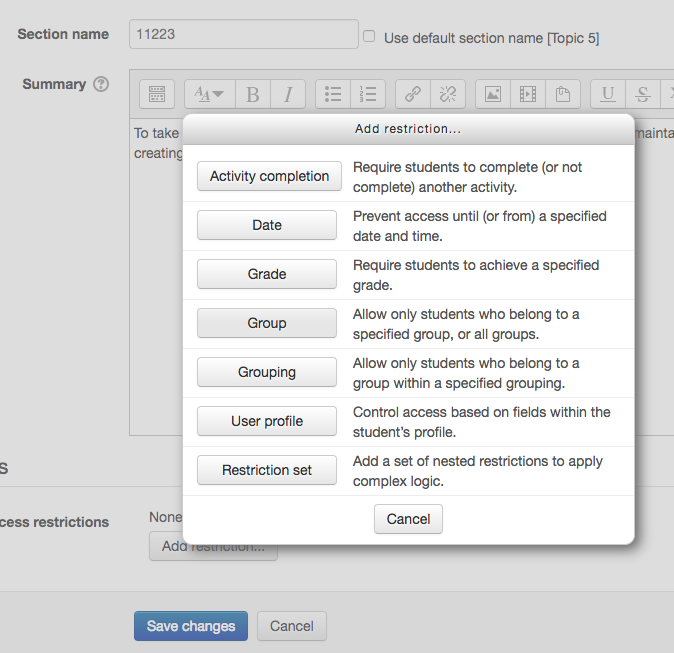
3. Under the Restrict access heading, click Add restriction.
4. Then click on the Group button.
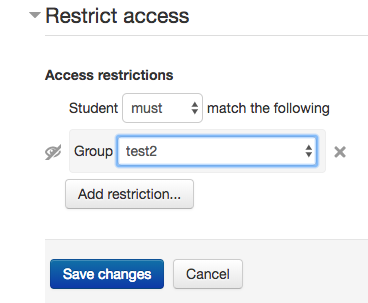
5. Select the group that you want to restrict from accessing the assignment/section from the drop down menu.
6. You can shut off the eye if you want other students who are not in this group to see the warning: "Not available unless..."
7. Save changes. |


How to copy a Quickmarks
|
If I change a question in the Question Bank, will it be changed in all the quizzes it appears in?Yes, If you changed a question in the Question Bank, it will change in all the quizzes it appears in. Questions really live in the Question Bank. When you add a question to the quiz, you are just making a link from the quiz to the question in the Question Bank. So, you can add one question to many quizzes, and then if you edit it, it will change in all quizzes. If you want to change any question, you have to:
What happens if you change the correct answer, but the Quiz has closed and the students have already been graded?
|
Turnitin file formatsTo submit a paper to Turnitin, your paper must meet our requirements. Turnitin will currently accept the following file types to generate Originality Reports:
The paper being submitted must contain more than 20 words, must be under 20MB (or approximately one million characters), must not exceed 200 pages in length, and must not contain spaces in between every letter (l i k e t h i s). Please note that we do not support:
Therefore, if an unsupported word processor is being used, you may need to save the file as a TXT or RTF file in order to upload to Turnitin. If a file format issue is occurring, please re-open the file in a word processor, and save the file again using the "save as" function and choosing a different format from the file type pull down menu (try RTF or TXT as they are the most "safe"). Occasionally content in document headers and footers can prevent a file from being accepted by the Turnitin service. If you encounter issues uploading a document that contains headers and footers, editing or removing the content may resolve the issue. Footnotes:
|
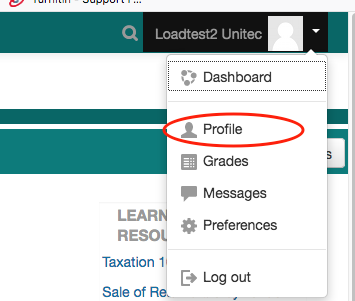
Hide my email from other studentsIf you don't want other students in Moodle to see your email address, you can hide it: 1. Click on your profile photo at the top-right corner, then, click the "Profile" option from the drop-down menu.
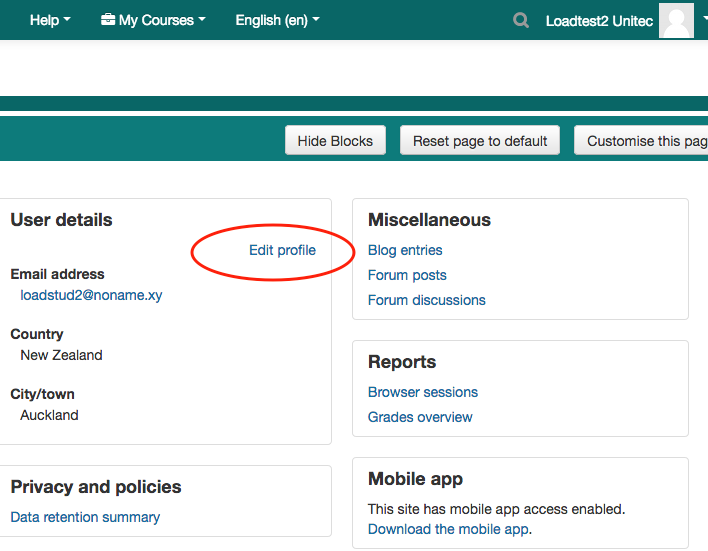
2. Click the "Edit profile" link.
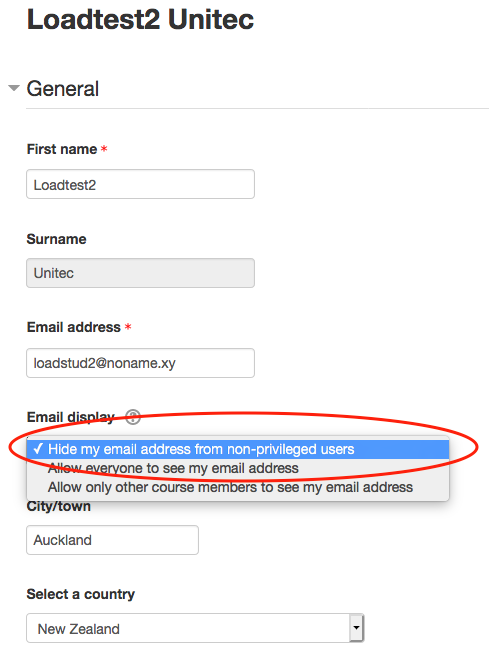
3. Select the "Hide my email address from non-privileged users" option from the "Email display" drop-down menu. (non-privileged users means students, guests, visitors. Privileged users, such as teachers and managers, will always be able to see your email address.)
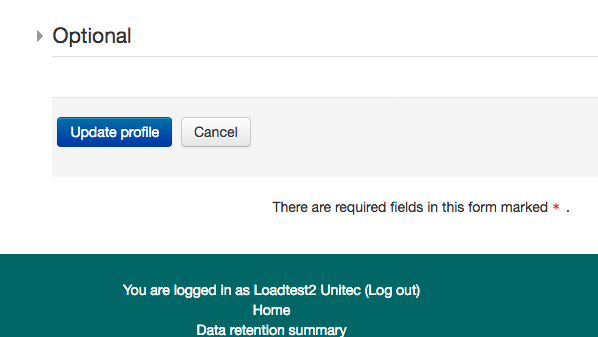
4. Save your changes by scrolling down the page and clicking the "Update profile" button.
|
Download/Backing up Quiz and gradesIt is important to note that student submissions/responses/results will disappear from Moodle 16 days after the enrolment end date. You should ensure you have downloaded and saved them before that deadline. If you should need to retrieve a student's data, you can manually re-enrol the student into the Moodle course. Please remember to un-enrol this student when you have downloaded what you need. If you need to download for the whole class, you will need to manually re-enrol every student in the cohort. And then, click the "Regrade all" button.
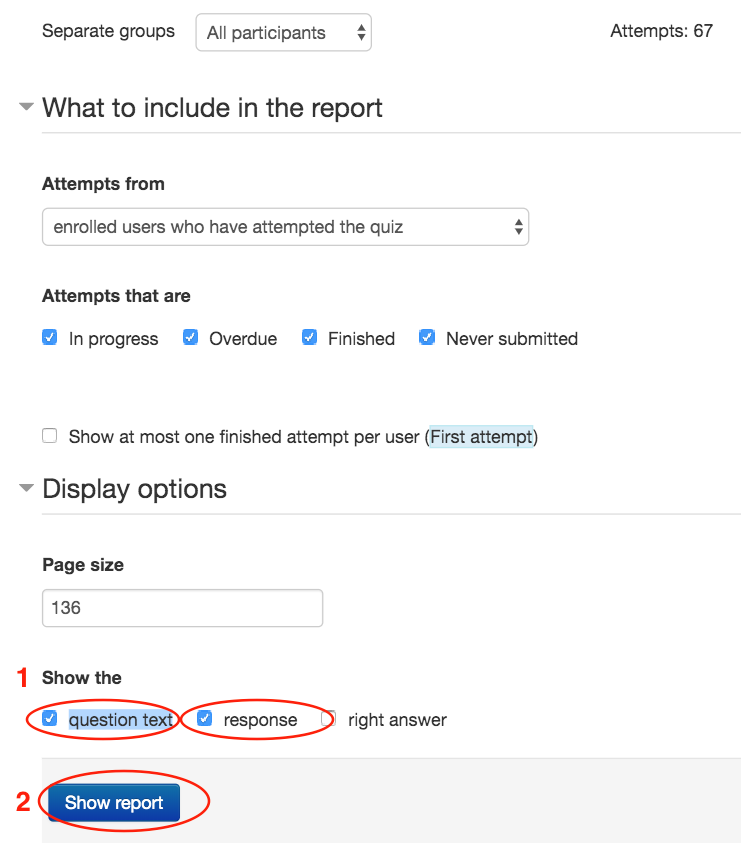
2. Tick the ‘Show the’ options, then click the ‘Show report’ button:
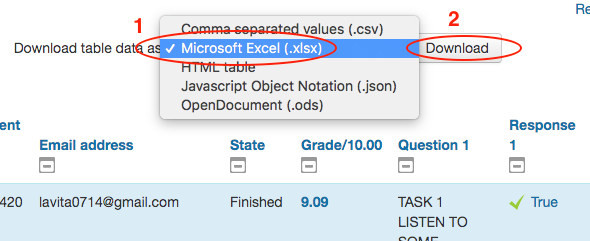
3. From the ‘Download table data as’ dropdown menu, select ‘Microsoft Excel (.xlsx)’, then click the ‘Download’ button and save the file.
|

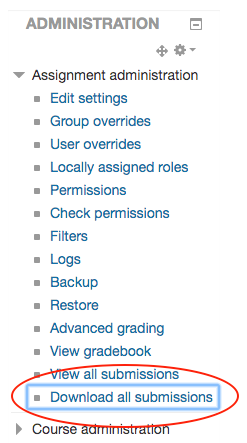
Download/Backing up Moodle Assignments and gradesIt is important to note that student assignments will disappear from Moodle 16 days after the enrolment end date. If you should need to retrieve a student's data, you can manually re-enrol the student into the Moodle course and download their assignment(s). Please remember to un-enrol this student when you have downloaded what you need. If you need assignments from a whole class, you will need to manually re-enrol every student in the cohort. To download the original student submissions:In the ‘Assignment administration’ block, click the 'Download all submissions' link and save the file.
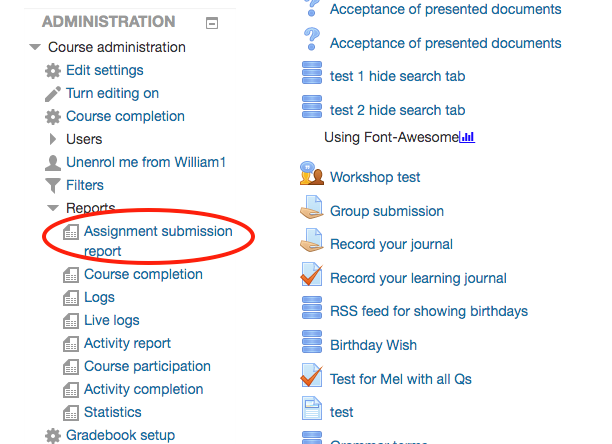
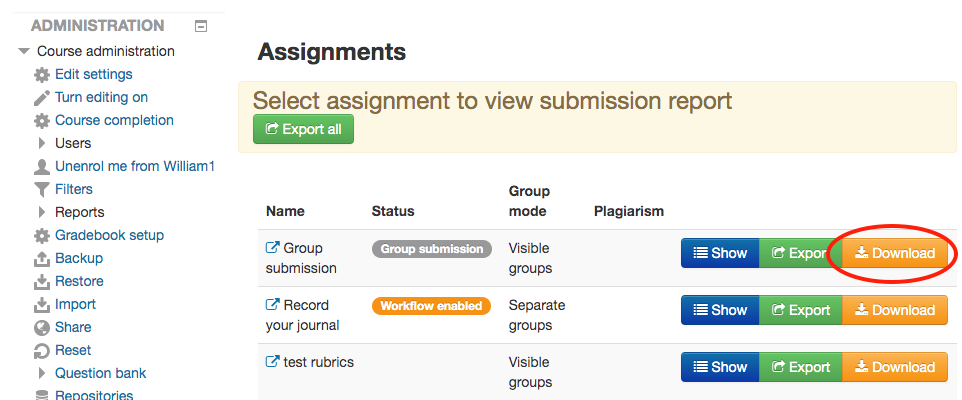
To download the original student submissions and grades, include teachers' annotated PDFs, feedback files and feedback comments: 1. Find the "Assignment submission report" under the "Report" dropdown menu in the Course administration block:
2. Click on the "Download" button to download a zip file and save it to your computer.
|
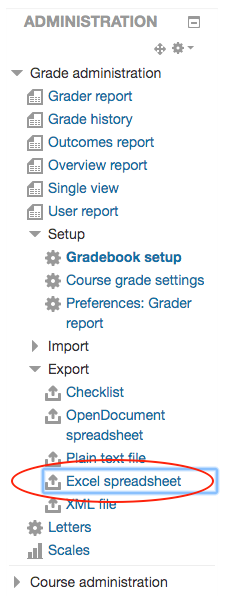
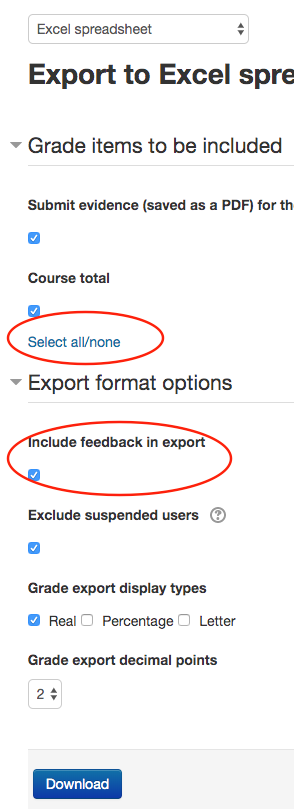
Download/Backing up Moodle GradebookIt is important to note that student submissions/responses/results/grades will disappear from Moodle 16 days after the enrolment end date. You should ensure you have downloaded and saved them before that deadline. If you should need to retrieve a student's data/grades, you can manually re-enrol the student into the Moodle course. Please remember to un-enrol this student when you have downloaded what you need. If you need to download grades for the whole class, you will need to manually re-enrol every student in the cohort. After that, please go to each Quiz and click the "Regrade all" button. 1. In the ‘Course administration’ block, click the ‘Gradebook setup’ link: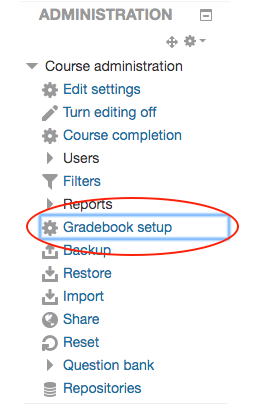 2. In the ‘Export’ dropdown menu, click the ‘Excel spreadsheet’ link: 3. Tick all options, then click the ‘Download’ button and save the file. |
ActivitiesThese are the interactive parts of your course, and allow students (and teachers) to do things. To add a new activity to your course you must first turn editing on
Note: There are now two methods for adding activities and resources to course pages, you may either use the traditional Add activity or resource link or the new Activity chooser. Check the Administration block to see if you have the Activity chooser turned on or off. You may turn the chooser on or off by clicking on the entry within the Administration block.
Add an activity using the Add activity or resource linkNote: To use this method the Activity chooser must be turned off
The Add an activity or resource window will appear. Select the type of activity you wish to add and click the Add button, otherwise click Cancel to return to your course page.
Add an activity using the Activity chooserNote: To use this method the Activity chooser must be turned on When enabled the Activity chooser replaces the Add activity or resource link described above with two drop down boxes one for resources and one for activities.
Scroll to the bottom of the section where you wish to add the activity and click the Add and activity drop down menu. Click on the activity type you wish to add from the list that appears.
This page describes the process of adding activities to your course page, however, the process of adding resources is essentially the same. |


