Groups - Creating groups
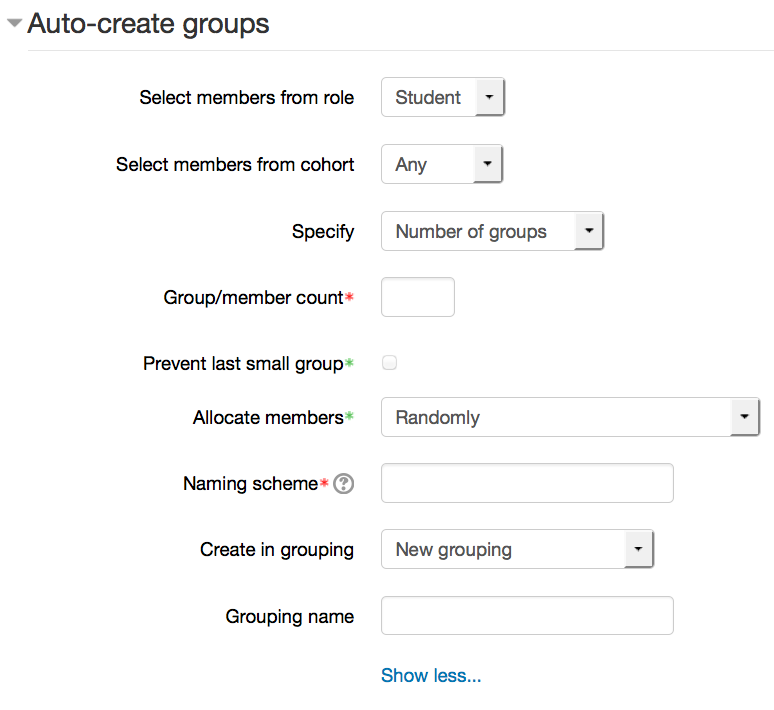
Auto create groups
Select members from role - The members of your group will be selected from the pool of students by default. If you want to include teachers and students in the auto-creation, change this to "All". Select members from cohort - Only site administrators should see this setting. Specify - number of groups or members per group - do you want to break the class up into a specific number of groups, or by the number of people per group? Group/member count - this field is required and is linked to the previous setting. i.e. If you want your students split into 3 groups, put 3 in here and have "number of groups" for the previous setting. Prevent last small group - If there are not the right numbers to make even groups, often one group will be created that is smaller than the rest. Checking this will distribute those students amongst the existing groups instead, even if it pushes the numbers above the ones you specified for maximum members in a group. Allocate members - your options are randomly, alphabetically by first name last name, alphabetically by last name first name, alphabetically by ID number. Naming scheme - The at symbol (@) may be used to create groups with names containing letters. For example Group @ will generate groups named Group A, Group B, Group C, ... The hash symbol (#) may be used to create groups with names containing numbers. For example Group # will generate groups named Group 1, Group 2, Group 3, ... |
Groups - Teaching in a shared courseThis guide is about how teachers can teach in a shared course. Has to be done by the team leader:
Note:
Has to be done by teachers:
Note: |
How to import content from one course to anotherOnce a programme template has been decided on, you can import it over the top of your own course. It will not affect any of your existing content, and you may find that you need to move things around once the template is in place to make the content fit. Some people choose to start from a blank template (start from scratch) and then import the existing content they want to keep from their old course into their new one. This is also an option. If you would like a new course (your old course will be left as it is), please fill out this form. One of the eLearn team will process this request and you will be emailed when your new course is ready for you to use. If you would like to import the programme template over your existing course, please follow the instructions below. Note: You must have editing teacher access to both the template course and your own course. If you do not have editing teacher access to the template course, please speak with another teacher in your programme, they can assign you access. 1. Go to your own course 2. You may need to tidy up the first section in your own course and remove everything from that section 3. Course Administration (block) > Import 4. Find the template course in the list, or search for it using the search box 5. Select that course and click "Continue" 6. Leave all three options ticked (include activities, include blocks, include filters) and click "Next" 7. Scroll to the bottom of the Schema Settings page and click "Next" 8. Scroll to the bottom of the Confirmation and Review page and click "Perform Import" 9. Depending on how much is in the template, you may need to wait a few seconds. You will receive a confirmation screen saying that the import has been successful. Click "Continue" to return to your course, where you should see the new template applied. |
Images or picturesAdding images or pictures to your course page can sometimes be done by dragging the picture into the editing window. This doesn't really add the picture properly, though, and it is recommended that you use the picture uploader tool instead. NB: you must have the image saved to your computer first! Best formats are PNG, JPG or GIF.
NB: To edit any of these things after you've uploaded an image, simply select the image (so that it is highlighted) and click the insert/edit image icon again. You will be taken back to the same window, and the button will say "Update" instead of "Insert". To reduce the file size of an image (so it loads quicker in Moodle): (If the file size of an image is too big, your Moodle course can be slow too load, and it will take up lots of space). |
Remove manually enrolled studentsManually enrolment has no effect on student accessibility to Unitec Moodle. Student enrollment is controlled by PeopleSoft only. As an Editing Teacher role, you can manually enrol a user, it looks fine from your teacher’s view. But, it only works for Staff. Even a student's name appears in your participant list, they still can’t access your course, because their account is not activated yet. Even worse, the inactivated manually enrolled account will cause unpredict issues which will incur complaints to Unitec. Please remove all manually enrolled students to avoid any further issues. |
Remove users |


Resizing images before uploading to MoodleIt is often best to resize images before you upload them to Moodle. This makes their file size smaller, and means less data your students have to download every time they view the image. Here is a quick instructional video on resizing an image using a free browser-based tool called Pixlr Editor. You don't have to install something, just go to the Pixlr website and start using it! Instructions:
It is now ready to upload to Moodle! |
Resizing images in MoodleYou can do this using free software such as Gimp or Paint.NET. On a Windows machine, you can use the inbuilt Paint software to resize images. On Macs, you can use iPhoto. If you need to tweak an image size slightly after uploading, it's easy.
NB: Super hint! If you wish an image to resize automatically to the size available on the screen, then remove the height property in the image dimensions, and add 100% (or whatever percentage) to the width property! The image will then scale / resize automatically!
Resize this window and see the difference between these two pictures. One will resize, the other will not:
|


ResourcesThese are items containing information/knowledge that a teacher offers to support learning. To add a new resource to your course you must first turn editing on
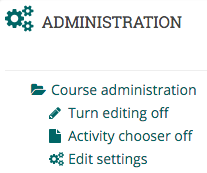
Note: There are now two methods for adding activities and resources to course pages, you may either use the traditional Add activity or resource link or the new Activity chooser. Check the Administration block to see if you have the Activity chooser turned on or off. You may turn the chooser on or off by clicking on the entry within the Administration block.
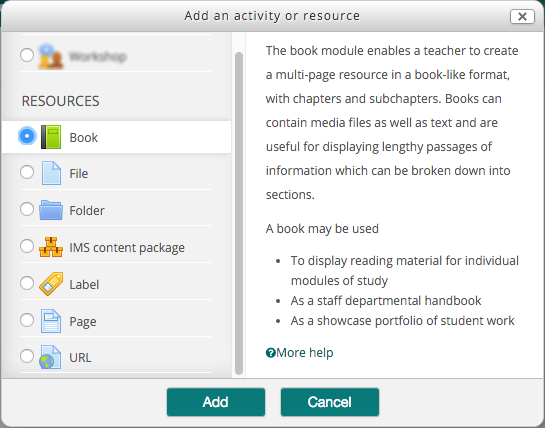
Add an resource using the Add activity or resource linkNote: To use this method the Activity chooser must be turned off
The Add an activity or resource window will appear. Scroll past the list of activities to select the type of resource you wish to add and click the Add button, otherwise click Cancel to return to your course page.
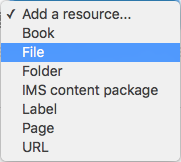
Add a resource using the Activity chooserNote: To use this method the Activity chooser must be turned on When enabled the Activity chooser replaces the Add activity or resource link described above with two drop down boxes one for resources and one for activities.
Scroll to the bottom of the section where you wish to add the resource and click the Add a resource drop-down menu. Click on the resource type you wish to add from the list that appears.
This page describes the process of adding resources to your course page, however, the process of adding activities is essentially the same. |
Resources - BookPresents content in a textbook format, allowing for chapters and subchapters (2 levels only). Pages can be enhanced by multimedia. Setting up a book: Choose "Book" from the "Add an activity or resource" menu. Give the book a name. You can give it a description, though this is not necessary. Chapter numbering
Custom titles Normally the chapter title is displayed in the table of contents (TOC) AND as a heading above the content. If the custom titles checkbox is ticked, the chapter title is NOT displayed as a heading above the content. A different title (perhaps longer than the chapter title) may be entered as part of the content. You will be prompted to add your first page (chapter) when you create the book. Add in a title (this will show in the book table of contents) and content (this will display in the main page area). Adding pages (chapters and subchapters): Make sure you have editing on when you are viewing your book to edit and add chapters. You will know if you do, because the table of contents will have editing icons after each chapter/page like this:
When adding a page you have the option to make it a 'sub-chapter'. This nests the page under the one you clicked the plus icon by. When you have multiple pages, there will be another icon which lets you change the order of pages in your book: |