Resources - FileA document presented for students to download - PDF, Word, Excel, PowerPoint, image... Adding a file: Drag and drop the file onto your course page (make sure you have editing turned on before doing this). OR Choose "File" from the "Add an activity or resource" menu. Give it a name. Description is optional. Drag the file into the drag and drop box or choose the "Add..." button to browse for the file on your computer. Once the file appears in the box on the Moodle page, you can continue. Appearance Display This setting, together with the file type and whether the browser allows embedding, determines how the file is displayed. Options may include:
Display size Displays the file size, such as '3.1 MB', beside links to the file. If there are multiple files in this resource, the total size of all files is displayed. Display type Displays the type of the file, such as 'Word document', beside links to the file. If there are multiple files in this resource, the start file type is displayed. If the file type is not known to the system, it will not display. |
Resources - File - Linking to Office365 documents for studentsThis page describes a method for creating read-only links for students to view office documents directly in the browser. DescriptionIt is common for teachers to want to put content on a Moodle course for students to access. This may be in the form of Microsoft Office documents such as Word, Powerpoint or Excel. Traditionally a teacher might upload these documents as File resources, either as the original file type (eg. doc, ppt, xls) or exported to PDF first. This method works fine, but these resources need to be carefully maintained should the content of the file need changes in future. An alternative solution may be to create read-only links for students to view live documents directly in their browser, while also allowing the teacher to edit the content without any need to update or otherwise maintain links in Moodle. Step 1: Get a link for your office documentThis requires your document to be stored in OneDrive or SharePoint and the document open in your web browser. Once the document is open and you are satisfied the content is ready to share with your students, click the Share button in the top right corner of the window. or This will bring up the sharing popup, click on Get a link on the left hand side, then click on the drop down list to select appropriate security options. If you wish to restrict access to Unitec students only; select View link - account in your organization required, otherwise if you want anyone to be able to view the document; select View link - no sign in required. Warning: Do not leave the drop down list in the default Edit link - no sign in required state; this will mean anyone will be able to edit your document! Select one of the View link - options instead. Once you have selected the appropriate View link - option you are ready to select and copy the URL link provided. Right click on the URL box and select copy from the drop down menu (or use control-c to copy the text). You are now ready to move onto the next step. Step 2: Create a URL resource in moodle and link to your documentGo to your moodle course page and Turn editing on, then use the activity picker to create a new URL resource. Give your link a meaningful name, and an optional description if you wish. Paste your URL into the External URL box It's a good idea to check that your URL resource is setup to open in a new window so that students don't lose their place in Moodle by following your link. This is done under appearance. Check any other settings you might wish to change, for example displaying the description on the course page and automatic completion tracking when students view the resource. Finally, click Save and Return to Course and you are done. Turn editing off for your course and check your newly created link works correctly. |
Tidy up your courseThis entry contains suggestions for how to tidy up your moodle course.1. If you’re not using it, delete it, or drag it to a hidden section2. Put links into a Glossary or a Page (to reduce scroll of death)Glossary features:
Page features:
3. Put files e.g PDF, Word or PPT into Folders (or Glossary) or do 5. belowFolder features:
4. Videos and imagesPut videos into a 'page' by either adding a link or inserting the embed code. Don't put the video on your course homepage, as it will take time to load. Reduce your image size - otherwise, it will take time to load. 5. Instead of uploading Word, Ppt, Excel etc files , use Office 365 and link from there.Benefits:
6. Contact Te Puna Ako staff for help with how to do any of these steps (or search in the Guide to Moodle for the relevant word e.g. page/glossary).......... enjoy your tidy course!! |
Why am I not getting emails from Moodle?If you are a teacher, but your Moodle profile email is not the one you are using now, then you should change it to the right one. If you are a student, our Moodle updates your profile every day according to your Unitec Student Portal data. you should NOT change your email in Moodle, because of the change will be overwritten by PeopleSoft overnight. So please change your email here: https://myportal.unitec.ac.nz/welcome, then wait for the next day to see your Moodle email updated. If it is the right email but you didn’t get any email from Moodle, they might land into your Junk mails or Spam folder. Follow the link below to the guide of how to tame Gmail. Hotmail and other Email Apps should be similar. https://moodle.unitec.ac.nz/mod/glossary/showentry.php?eid=595Another possibility (unlikely) is that you had turned off the Moodle notification at some stage. Follow the link below to the guide of how to turn it back on: https://moodle.unitec.ac.nz/mod/glossary/showentry.php?eid=572 |
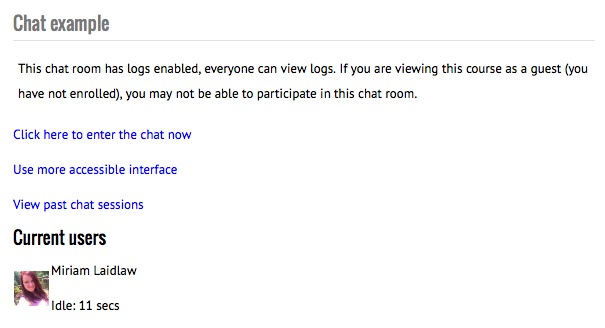
Activities - Chat - Using a chat roomVisit the chat room on your course page.
This will show you:
Click to enter the chat room.
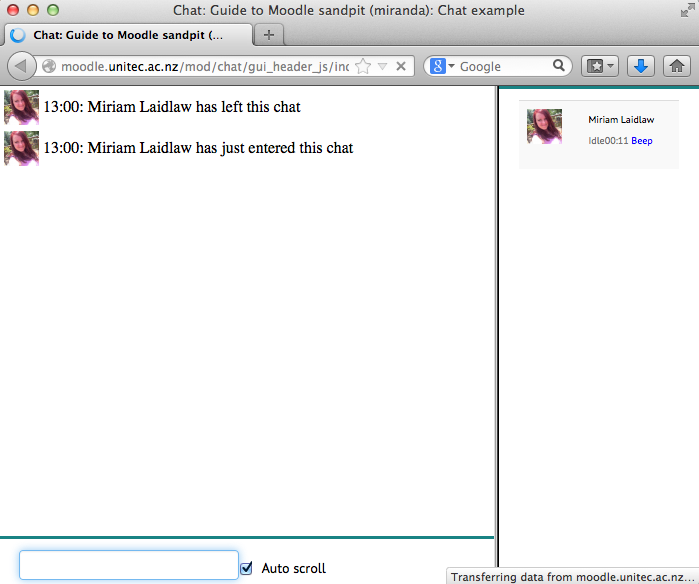
This is a simple three-panel chat interface. Top left you see any messages users have posted. Note you will only see messages from the time you enter the room until the time you leave the room. To see messages posted when you're not in the room, view the chat logs. Bottom left is where you can type your messages. Press enter/return on your keyboard to post them to the chat window. The right panel is the list of users in the room. It shows you how long the user has been idle, and gives you a link to "beep" the user (this will make a beeping sound on their computer if they have sound turned on). To leave the room, simply close the chat room window. |
Activities - ChoiceThe choice activity module enables a teacher to ask a single question and offer a selection of possible responses. Choice results may be published after students have answered, after a certain date, or not at all. Results may be published with student names or anonymously. A choice activity may be used |
Activities - Choice - Setting up a choiceSelect "Choice" from the "Add an activity or resource" menu.
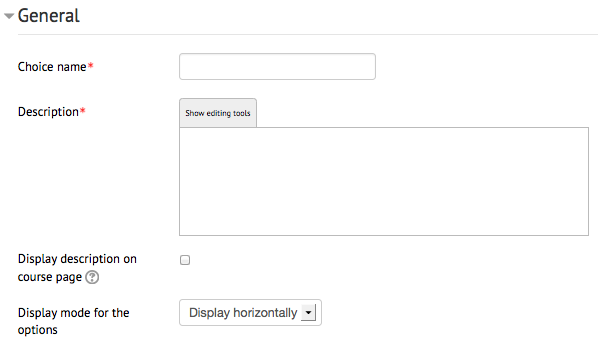
Choice name - Give the activity a name. This will display on the course page and at the top of the page when viewing the activity. Description - This is a good place to put the question you are asking the students to answer. Display description on course page - If enabled, the description above will be displayed on the course page just below the link to the activity or resource. Display mode for the options
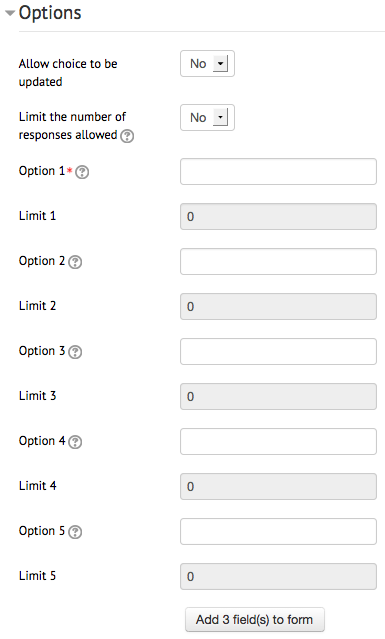
Allow choice to be updated - Allows the student to change their mind/choice even after they have answered. Limit the number of responses allowed - This lets you put a limit on each option. For example, you can get students to arrange themselves into groups of 4 using the choice activity, so you would limit each option to 4 users. Once 4 users have chosen that option, no more can choose it, they must choose another. If this is left on No, then the "Limit" fields remain disabled. Options - At least one option must be given. Any fields left blank will not be included. Limits - If you set "limit the number of responses" to Yes, then these fields will become enabled and you can choose how many students/users can choose each option.
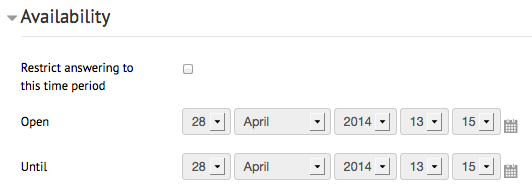
Restrict answering to this time period - By checking this box, you can select a time during which students can use the activity and make their choices. After the time is closed, students can still view the activity and choices they made, but can no longer make changes or new choices.
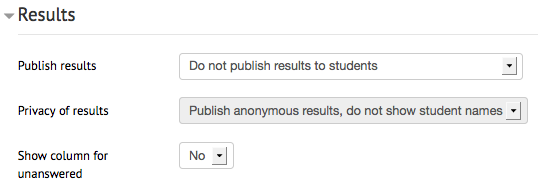
Publish results
Privacy of results
NOTE - teachers always see which students have answered which choice, no matter the settings above. |
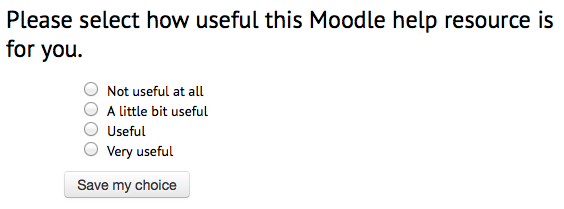
Activities - Choice - Using a choiceOnce you have a choice activity set up it is simple to use. Students visit the choice activity, select the option they wish to answer, and click "Save my choice".
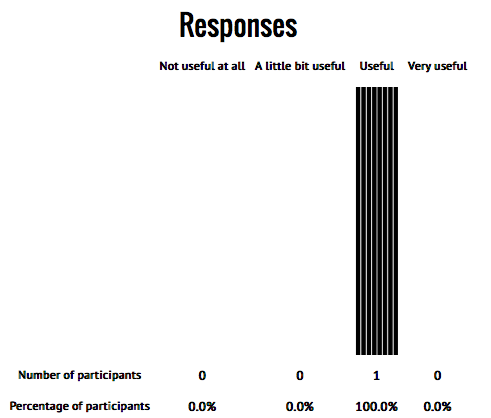
If they see anonymous results, they may see a bar graph like this:
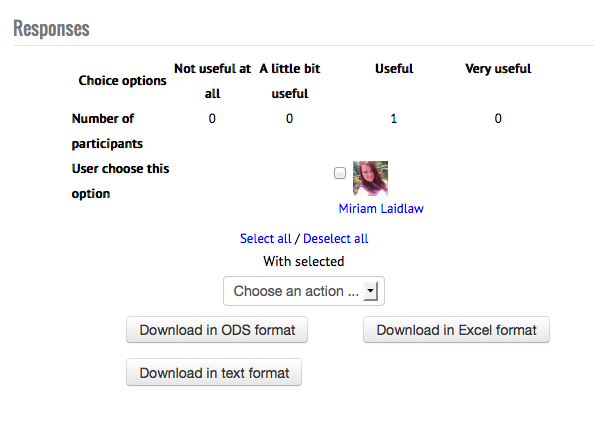
You as the teacher would also see this bar graph, but you also have a link near the top right that says "View X responses" where X is the number of users/students who have answered the choice activity.
You will see all responses, who responded what, and have the option of deleting responses or downloading all responses in various formats. |
Activities - FeedbackThe feedback activity module enables a teacher to create a custom survey for collecting feedback from participants using a variety of question types including multiple choice, yes/no or text input. Feedback responses may be anonymous if desired, and results may be shown to all participants or restricted to teachers only. Any feedback activities on the site front page may also be completed by non-logged-in users. Feedback activities may be used |
Activities - Database - FieldsIn order to collect data, you need to add fields to your database. It is best to plan out in advance exactly what information you wish to collect. Field types
Things that are automatically collected (don't need fields added):
Adding a field:
|