ActivitiesThese are the interactive parts of your course, and allow students (and teachers) to do things. To add a new activity to your course you must first turn editing on
Note: There are now two methods for adding activities and resources to course pages, you may either use the traditional Add activity or resource link or the new Activity chooser. Check the Administration block to see if you have the Activity chooser turned on or off. You may turn the chooser on or off by clicking on the entry within the Administration block.
Add an activity using the Add activity or resource linkNote: To use this method the Activity chooser must be turned off
The Add an activity or resource window will appear. Select the type of activity you wish to add and click the Add button, otherwise click Cancel to return to your course page.
Add an activity using the Activity chooserNote: To use this method the Activity chooser must be turned on When enabled the Activity chooser replaces the Add activity or resource link described above with two drop down boxes one for resources and one for activities.
Scroll to the bottom of the section where you wish to add the activity and click the Add and activity drop down menu. Click on the activity type you wish to add from the list that appears.
This page describes the process of adding activities to your course page, however, the process of adding resources is essentially the same. |


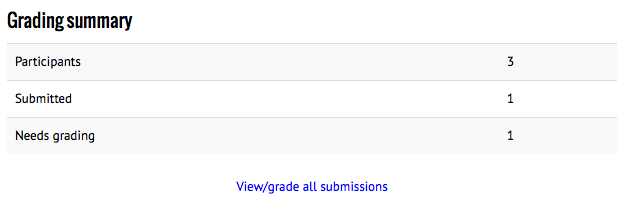
Activities - Assignment - Grading assignmentsOnce students have submitted assignments, you will see this information when you visit the assignment module in your course:
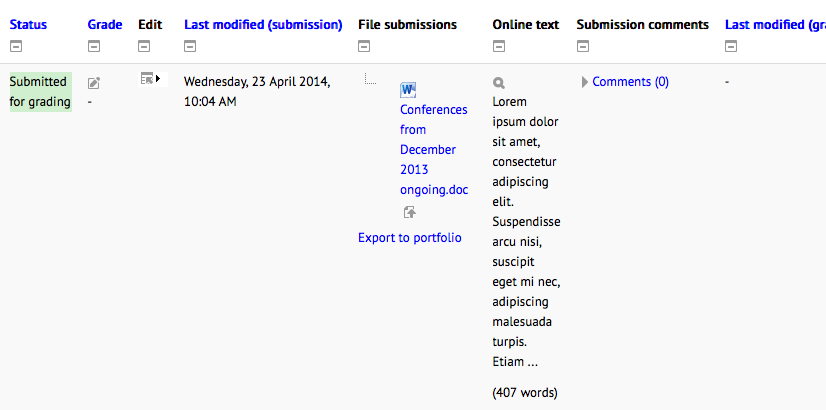
Click "View/grade all submissions" You will see a grid view of all your students and their submissions. Students who have submitted will have a green "Submitted for grading" box under "Status".
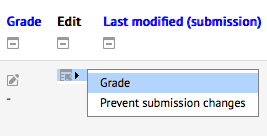
To grade, click the small pencil icon next to it, or hover over the icon in the "Edit" column for more options.
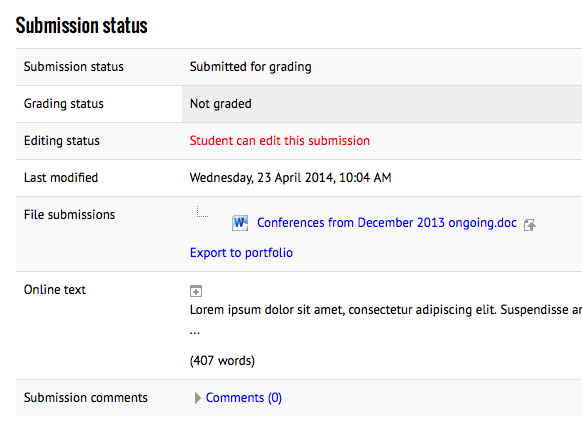
The grading view gives you an overview of the student's assignment:
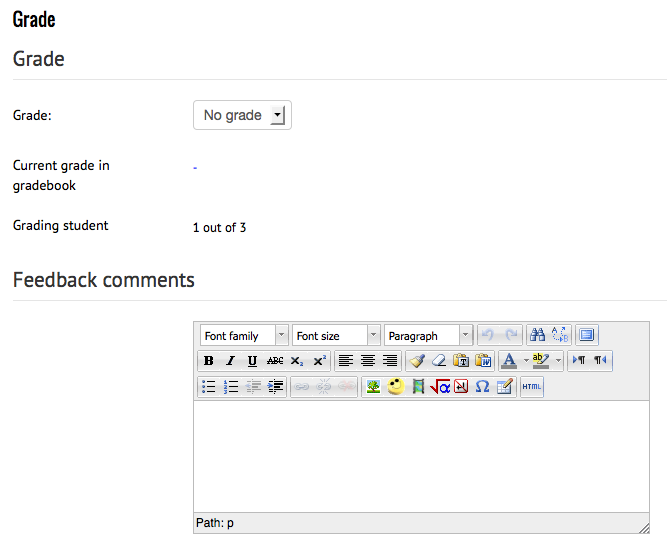
From here you can download the file, or click the "+" button above the online text to view the full online text submission. If the student has added submission comments to their assignment, they will also show here where it says "Comments (0)". Further down you can grade the assignment using the drop down menu (if you have chosen a custom grading scale) or if you have chosen a number grade then you will get a small box to type the grade into.
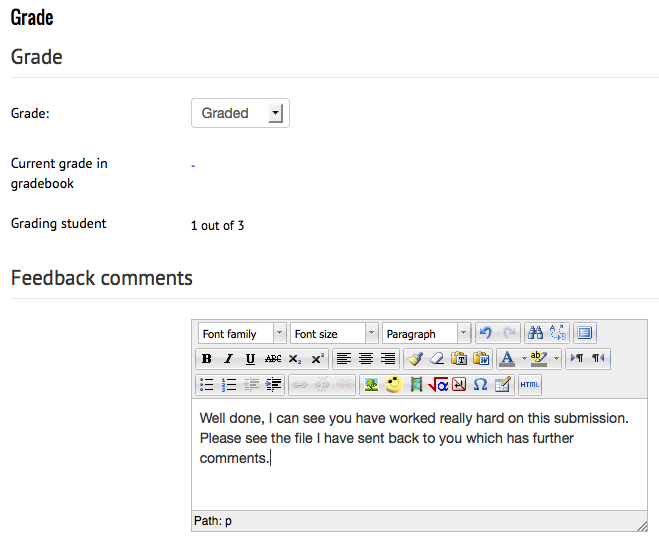
There is also a box for putting your feedback into. NB - an assignment's grade MUST be filled out or changed from "No grade" before the student can see any feedback! No grade, no feedback!
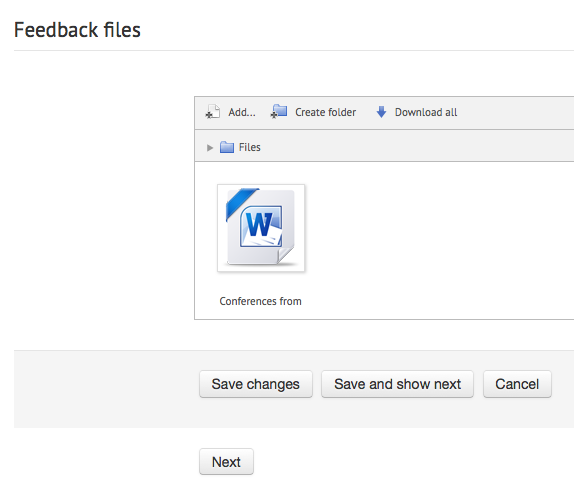
If you enabled the ability to add feedback files, you will see an upload box underneath the comments section for you to upload the feedback file to the student. This can be their own assignment, sent back to them with comments all over it.
Once you are done, either click "Save changes" if this is the only student you are giving feedback to, or "Save and show next" if you are grading all of your students. Clicking "Cancel" or "Next" will lose your grade and feedback information! |
Activities - Assignment - Setting up an assignmentFrom the "Add an activity or resource" menu, choose "Assignment"
Assignment name - Give the assignment a descriptive name Assignment description - This is a good place for the assignment information and marking criteria Display description on course page - checking this will display the assignment description directly below the assignment name on the course page. Otherwise students will see the description when they click on the assignment name to view the assignment.
Allow submissions from - If enabled, students will not be able to submit before this date. If disabled, students will be able to start submitting right away. Due date - This is when the assignment is due. Submissions will still be allowed after this date but any assignments submitted after this date are marked as late. To prevent submissions after a certain date - set the assignment cut off date. Cut-off date - If set, the assignment will not accept submissions after this date without an extension. Always show description - If disabled, the Assignment Description above will only become visible to students at the "Allow submissions from" date.
Submission types
Maximum number of uploaded files - If file submissions are enabled, each student will be able to upload up to this number of files for their submission. Maximum submission size - Files uploaded by students may be up to this size.
Feedback comments - If enabled, the marker can leave feedback comments for each submission. Offline grading worksheet - If enabled, the teacher will be able to download and upload a worksheet with student grades when marking the assignments. Feedback files - If enabled, the teacher will be able to upload files with feedback when marking the assignments. These files may be, but are not limited to marked up student submissions, documents with comments or spoken audio feedback.
Require students click submit button - If enabled, students will have to click a Submit button to declare their submission as final. This allows students to keep a draft version of the submission on the system. If this setting is changed from "No" to "Yes" after students have already submitted those submissions will be regarded as final. Require that students accept the submission statement - Require that students accept the submission statement for all submissions to this assignment. Attempts reopened Determines how student submission attempts are reopened. The available options are:
Maximum number of attempts - The maximum number of submissions attempts that can be made by a student. After this number of attempts has been made the student's submission will not be able to be reopened.
Students submit in groups - If enabled students will be divided into groups based on the default set of groups or a custom grouping. A group submission will be shared among group members and all members of the group will see each others changes to the submission. Require all group members submit - If enabled, all members of the student group must click the submit button for this assignment before the group submission will be considered as submitted. If disabled, the group submission will be considered as submitted as soon as any member of the student group clicks the submit button. Grouping for student groups - This is the grouping that the assignment will use to find groups for student groups. If not set - the default set of groups will be used.
Notify graders about submissions - If enabled, graders (usually teachers) receive a message whenever a student submits an assignment, early, on time and late. Message methods are configurable. Notify graders about late submissions - If enabled, graders (usually teachers) receive a message whenever a student submits an assignment late. Message methods are configurable.
Grade - Select a number that the assignment is graded out of, or one of the custom scales available either from the site level or created at the course level. Grading method Choose the advanced grading method that should be used for calculating grades in the given context. To disable advanced grading and switch back to the default grading mechanism, choose 'Simple direct grading'. Other options are 'Marking guide' and 'Rubric'. Grade category - This setting controls the category in which this activity's grades are placed in the gradebook. Blind marking - Blind marking hides the identity of students to markers. Blind marking settings will be locked once a submission or grade has been made in relation to this assignment. |


Activities - Assignment - Submitting assignmentsStudents can submit assignments by visiting the assignment activity in Moodle. They will see a submission button (if submissions are open).
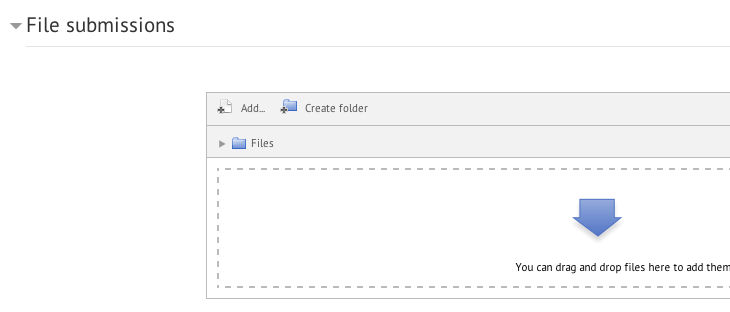
Depending on what has been set up by the teacher, a student may be asked to upload a file:
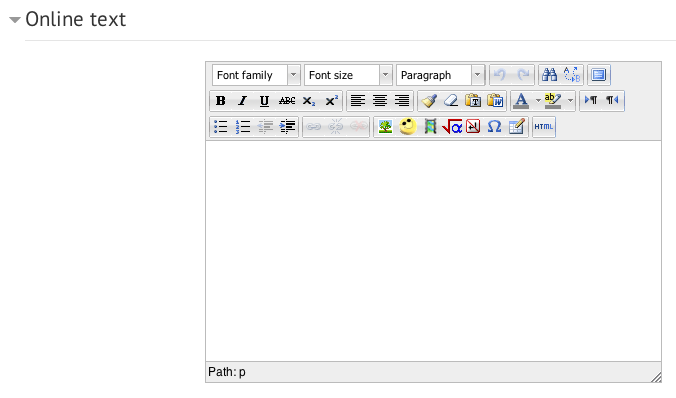
And/or write some text directly into Moodle:
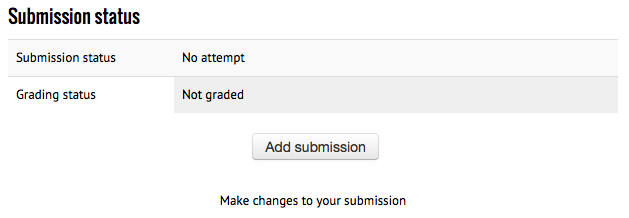
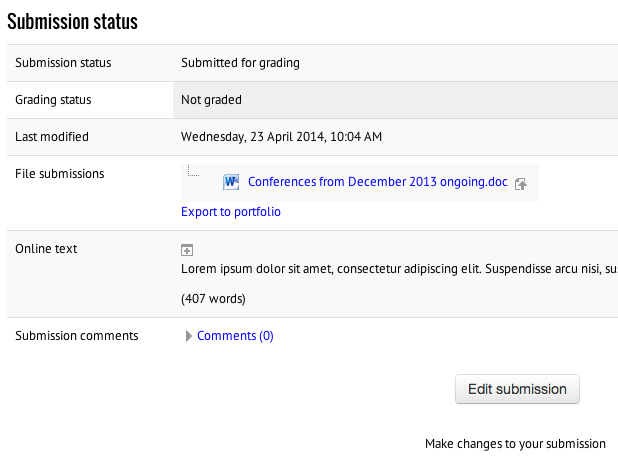
When they are done they click "Save changes". They are then given an overview of their assignment, which they may or may not be able to edit depending on the assignment settings:
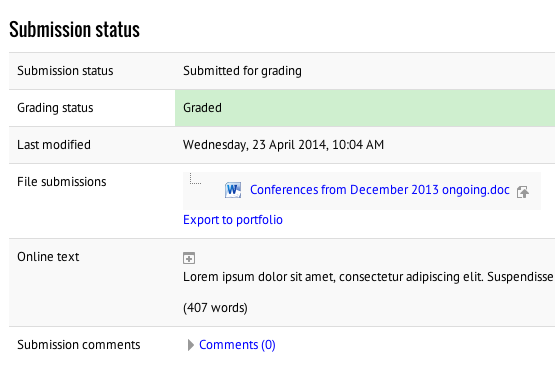
Once the teacher has graded the assignment, this view may change to something like this:
And feedback appears underneath:
|

Activities - ChatThe chat activity module enables participants to have text-based, real-time synchronous discussions. The chat may be a one-time activity or it may be repeated at the same time each day or each week. Chat sessions are saved and can be made available for everyone to view or restricted to users with the capability to view chat session logs. Chats are especially useful when the group chatting is not able to meet face-to-face, such as
|
Activities - Chat - Setting up a chat roomChoose "Chat" from the "Add an activity or resource" menu.
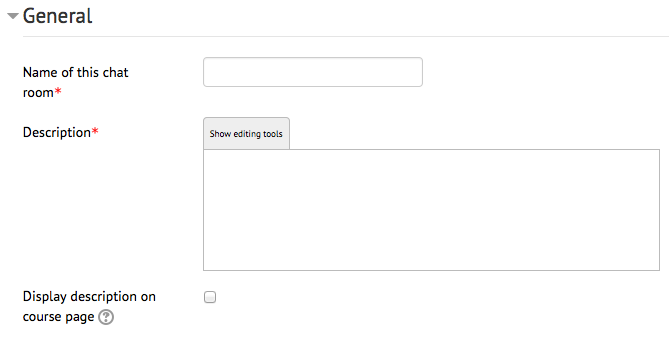
Give your chat room a name. Write a brief description (maybe what you wish the students to use the chat room for, some general guidelines/rules). Display description on course page - If enabled, the description above will be displayed on the course page just below the link to the activity or resource.
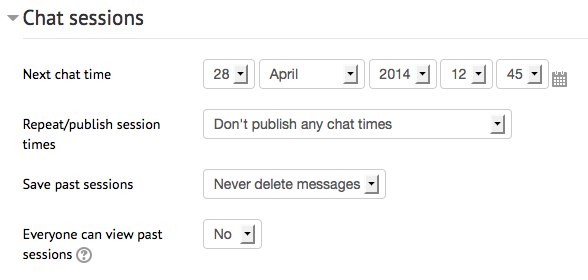
If you want students to be made aware of times that you will be in the chat room, choose a session time. Repeat/publish session times - Choose whether a session time will be published in the course calendar, and how often you are repeating this session time. NOTE - the chat room remains open at all times even outside of the published session times. If you don't want students to use the chat room outside of the published session times, please use the eye to hide the chat room from students. Save past sessions - this determines how long Moodle keeps a record/transcript of chat sessions. Everyone can view past sessions - If set to No, only users have mod/chat:readlog capability are able to see the chat logs (teachers, non-editing teachers). If set to Yes, students can also view past chat sessions. |
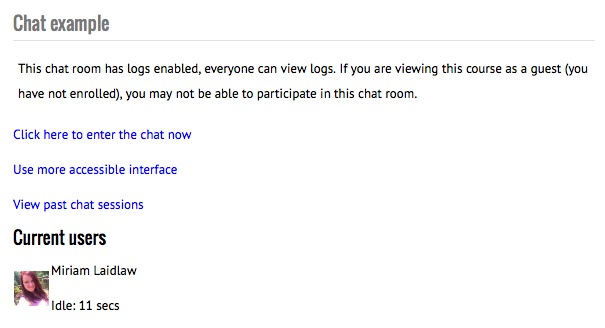
Activities - Chat - Using a chat roomVisit the chat room on your course page.
This will show you:
Click to enter the chat room.
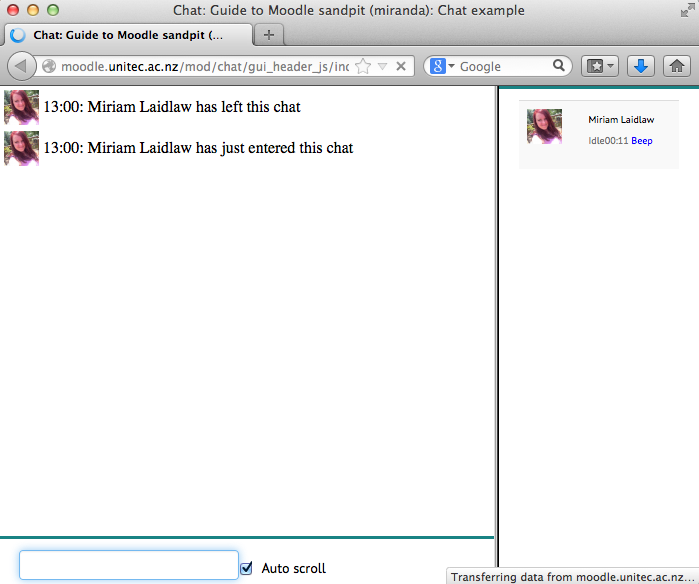
This is a simple three-panel chat interface. Top left you see any messages users have posted. Note you will only see messages from the time you enter the room until the time you leave the room. To see messages posted when you're not in the room, view the chat logs. Bottom left is where you can type your messages. Press enter/return on your keyboard to post them to the chat window. The right panel is the list of users in the room. It shows you how long the user has been idle, and gives you a link to "beep" the user (this will make a beeping sound on their computer if they have sound turned on). To leave the room, simply close the chat room window. |
Activities - ChoiceThe choice activity module enables a teacher to ask a single question and offer a selection of possible responses. Choice results may be published after students have answered, after a certain date, or not at all. Results may be published with student names or anonymously. A choice activity may be used |
Activities - Choice - Setting up a choiceSelect "Choice" from the "Add an activity or resource" menu.
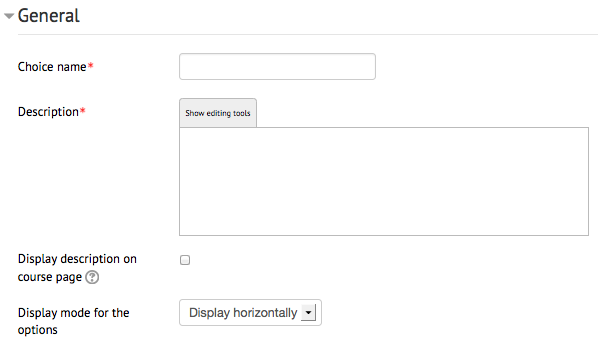
Choice name - Give the activity a name. This will display on the course page and at the top of the page when viewing the activity. Description - This is a good place to put the question you are asking the students to answer. Display description on course page - If enabled, the description above will be displayed on the course page just below the link to the activity or resource. Display mode for the options
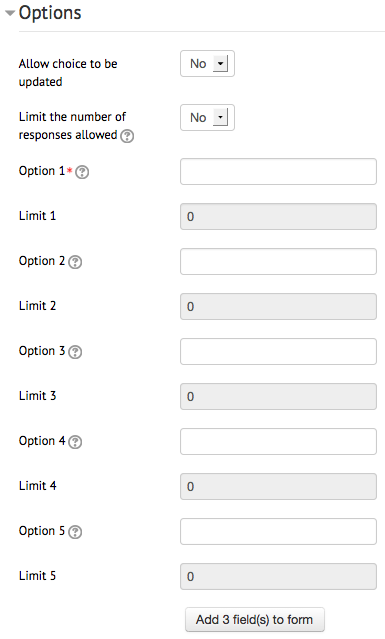
Allow choice to be updated - Allows the student to change their mind/choice even after they have answered. Limit the number of responses allowed - This lets you put a limit on each option. For example, you can get students to arrange themselves into groups of 4 using the choice activity, so you would limit each option to 4 users. Once 4 users have chosen that option, no more can choose it, they must choose another. If this is left on No, then the "Limit" fields remain disabled. Options - At least one option must be given. Any fields left blank will not be included. Limits - If you set "limit the number of responses" to Yes, then these fields will become enabled and you can choose how many students/users can choose each option.
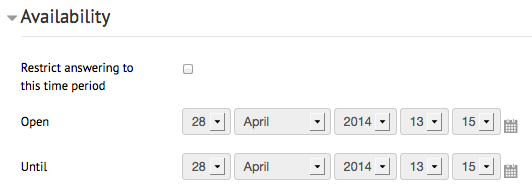
Restrict answering to this time period - By checking this box, you can select a time during which students can use the activity and make their choices. After the time is closed, students can still view the activity and choices they made, but can no longer make changes or new choices.
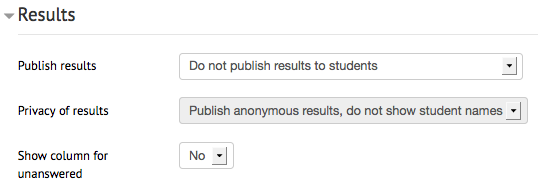
Publish results
Privacy of results
NOTE - teachers always see which students have answered which choice, no matter the settings above. |
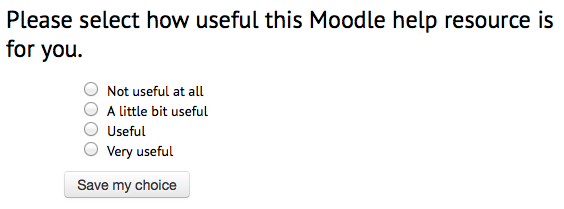
Activities - Choice - Using a choiceOnce you have a choice activity set up it is simple to use. Students visit the choice activity, select the option they wish to answer, and click "Save my choice".
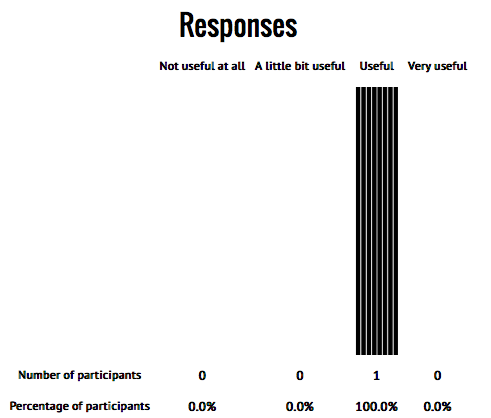
If they see anonymous results, they may see a bar graph like this:
You as the teacher would also see this bar graph, but you also have a link near the top right that says "View X responses" where X is the number of users/students who have answered the choice activity.
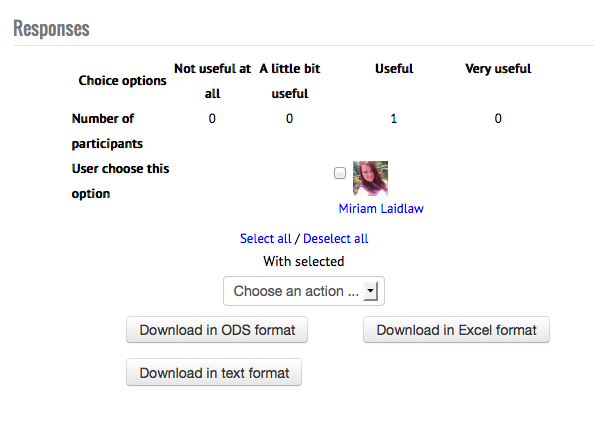
You will see all responses, who responded what, and have the option of deleting responses or downloading all responses in various formats. |
Activities - Database - FieldsIn order to collect data, you need to add fields to your database. It is best to plan out in advance exactly what information you wish to collect. Field types
Things that are automatically collected (don't need fields added):
Adding a field:
|
Activities - Database - Setting up a databaseChoose "Database" from the "Add an activity or resource" menu.
Name - Give your database a name Description - Give your database a description. This will display at the top of your database. Display description on course page - If enabled, the description above will be displayed on the course page just below the link to the activity or resource.
Approval required - If enabled, entries require approving by a teacher before they are viewable by everyone. Allow comment on entries - This allows teachers and students to comment on database entries. Entries required for completion - The number of entries a student is required to submit before the activity can be considered complete. Entries required before viewing - The number of entries a student is required to submit before they can view entries from other students. Note: If entries are required before viewing, the database auto-linking filter should be disabled. This is because the database auto-linking filter can't determine whether a user has submitted the required number of entries. Maximum number of entries - The maximum number of entries a student is allowed to submit for this activity.
Available from and to is when the database may have entries added to it. Read only from and to is when the database can still be viewed but can no longer have any entries added to it (or edited).
If you are feeding the entries of this database out using an RSS feed (either into another course or an external site), here you can determine how many entries are included in the RSS feed.
Grade category - This setting controls the category in which this activity's grades are placed in the gradebook. Roles with permission to rate - To submit ratings users require the moodle/rating:rate capability and any module specific capabilities. Users assigned the following roles should be able to rate items. The list of roles may be amended via the permissions link in the administration block. Aggregate type - The aggregate type defines how ratings are combined to form the final grade in the gradebook.
If "No ratings" is selected, then the activity will not appear in the gradebook. Scale - If ratings are enabled, choose which scale will be used. Restrict ratings to items with dates in this range - If enabled, only entries made between the dates specified can be rated. If entries are made outside of those times, they cannot be rated. |


Activities - Database - TemplatesTemplates are how the database looks on your Moodle page. There are three main templates you need to worry about:
All others can be left on their default settings. List view This is the default view when people first arrive in the database activity. It shows multiple entries, usually stacked vertically one after the other. If there are a lot of entries in the database, and the entries are long, it may be worth making this a reduced view (with just a title and entry author) which can click through to the single entry. Single entry view This shows just a single database entry. It will contain all the information. Add template This determines what the page looks like when a student (or teacher) adds a new entry to the database. It will also contain all the possible fields for the participant to fill out, laid out in a way and order that makes sense. |
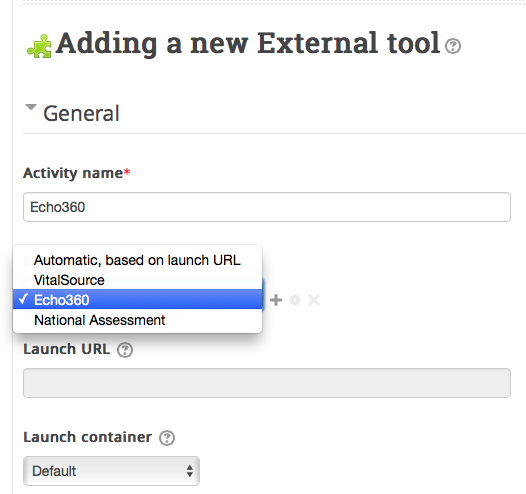
Activities - External ToolThe external tool activity module enables students to interact with learning resources and activities on other web sites. For example, an external tool could provide access to a new activity type or learning materials from a publisher. For example, to Add Echo360 activity, you can select "Echo360' from the 'External too type' drop down menu:
|
Activities - FeedbackThe feedback activity module enables a teacher to create a custom survey for collecting feedback from participants using a variety of question types including multiple choice, yes/no or text input. Feedback responses may be anonymous if desired, and results may be shown to all participants or restricted to teachers only. Any feedback activities on the site front page may also be completed by non-logged-in users. Feedback activities may be used |
Activities - Feedback - Adding / editing questions in a feedback formUsing the tabs along the top of the activity, choose "Edit questions"
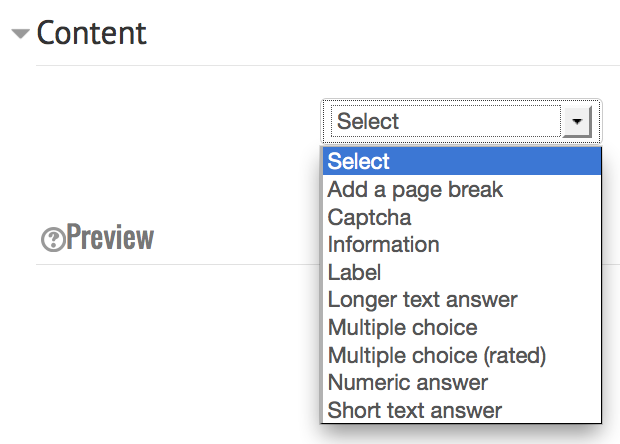
There will be no questions there yet. Choose a question type:
As you add questions you will see them appear in the preview section below. As a teacher you cannot answer the questions in the feedback form. For more detailed information on building your feedback form, please see the MoodleDocs. |

Activities - Feedback - Setting up a feedback activityChoose "Feedback" from the "Add an activity or resource" menu.
Give your feedback activity a name. Write a brief description (maybe why you are gathering this feedback). Display description on course page - If enabled, the description above will be displayed on the course page just below the link to the activity or resource.
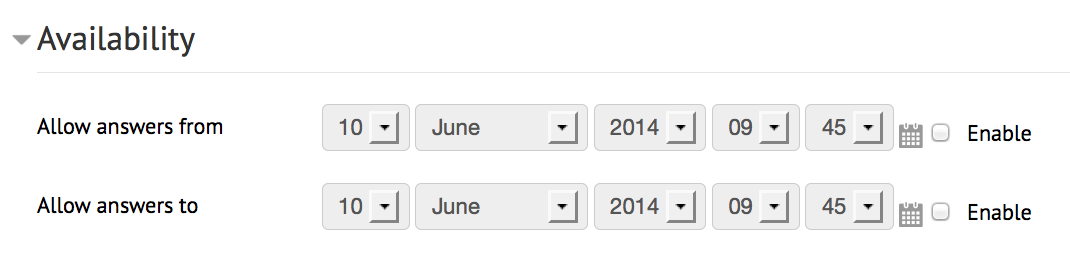
You can leave these disabled. Otherwise, choose a date range where students can submit feedback.
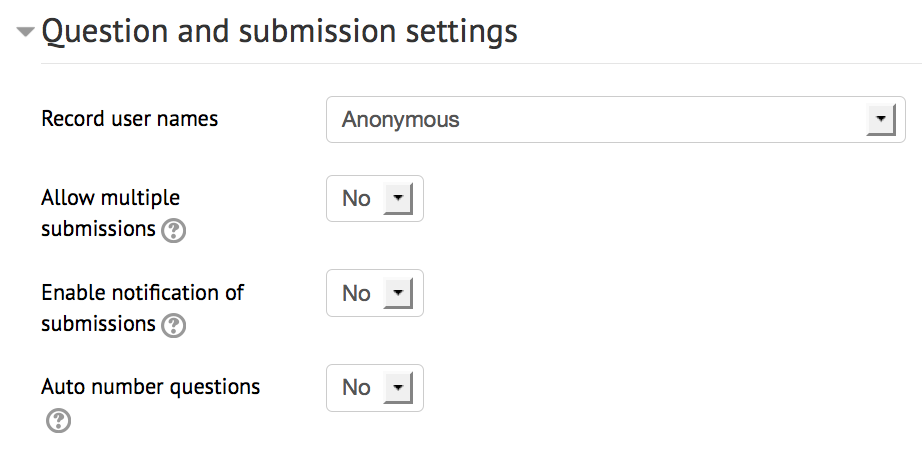
Record user names
Allow multiple submissions - If enabled for anonymous surveys, users can submit feedback an unlimited number of times. Enable notification of submissions - If enabled, teachers will receive notification of feedback submissions. Auto number questions - Enables or disables automated numbers for each question.
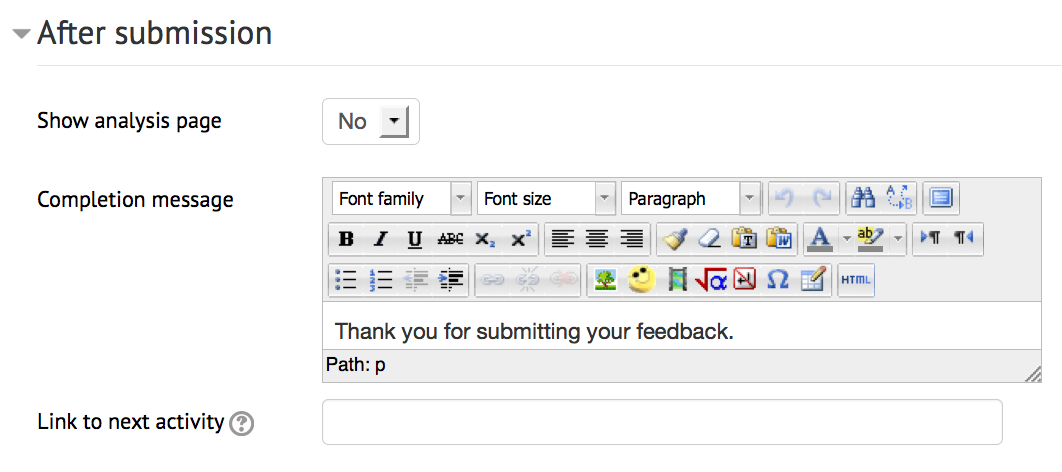
Show analysis page - Allows the students to see an analysis page after they've submitted feedback. Completion message - You can enter a message, maybe a quick thank you, which is displayed after a student submits feedback. Link to next activity - After submitting the feedback, a continue button is displayed, which links to the course page. Alternatively, it may link to the next activity if the URL of the activity is entered here. |

Activities - ForumThe forum activity module enables participants to have asynchronous discussions i.e. discussions that take place over an extended period of time. There are several forum types to choose from, such as a standard forum where anyone can start a new discussion at any time; a forum where each student can post exactly one discussion; or a question and answer forum where students must first post before being able to view other students' posts. A teacher can allow files to be attached to forum posts. Attached images are displayed in the forum post. Participants can subscribe to a forum to receive notifications of new forum posts. A teacher can set the subscription mode to optional, forced or auto, or prevent subscription completely. If required, students can be blocked from posting more than a given number of posts in a given time period; this can prevent individuals from dominating discussions. Forum posts can be rated by teachers or students (peer evaluation). Ratings can be aggregated to form a final grade which is recorded in the gradebook. Forums have many uses, such as
|
Activities - GlossaryThe glossary activity module enables participants to create and maintain a list of definitions, like a dictionary, or to collect and organise resources or information. A teacher can allow files to be attached to glossary entries. Attached images are displayed in the entry. Entries can be searched or browsed alphabetically or by category, date or author. Entries can be approved by default or require approval by a teacher before they are viewable by everyone. If the glossary auto-linking filter is enabled, entries will be automatically linked where the concept words and/or phrases appear within the course. A teacher can allow comments on entries. Entries can also be rated by teachers or students (peer evaluation). Ratings can be aggregated to form a final grade which is recorded in the gradebook. Glossaries have many uses, such as |
Activities - HotPotThe HotPot module allows teachers to distribute interactive learning materials to their students via Moodle and view reports on the students' responses and results. A single HotPot activity consists of an optional entry page, a single elearning exercise, and an optional exit page. The elearning exercise may be a static web page or an interactive web page which offers students text, audio and visual prompts and records their responses. The elearning exercise is created on the teacher's computer using authoring software and then uploaded to Moodle. A HotPot activity can handle exercises created with the following authoring software: Hot Potatoes (version 6)
|
Activities - LessonThe lesson activity module enables a teacher to deliver content and/or practice activities in interesting and flexible ways. A teacher can use the lesson to create a linear set of content pages or instructional activities that offer a variety of paths or options for the learner. In either case, teachers can choose to increase engagement and ensure understanding by including a variety of questions, such as multiple choice, matching and short answer. Depending on the student's choice of answer and how the teacher develops the lesson, students may progress to the next page, be taken back to a previous page or redirected down a different path entirely. A lesson may be graded, with the grade recorded in the gradebook. Lessons may be used
|
Activities - QuizThe quiz activity enables a teacher to create quizzes comprising questions of various types, including multiple choice, matching, short-answer and numerical. The teacher can allow the quiz to be attempted multiple times, with the questions shuffled or randomly selected from the question bank. A time limit may be set. Each attempt is marked automatically, with the exception of essay questions, and the grade is recorded in the gradebook. The teacher can choose when and if hints, feedback and correct answers are shown to students. Quizzes may be used
Video Resources: 1. The video below shows how to add and remove Quiz questions - click the square box icon in bottom right corner to make it play in full screen. |
Activities - SCORM packageA SCORM package is a collection of files which are packaged according to an agreed standard for learning objects. The SCORM activity module enables SCORM or AICC packages to be uploaded as a zip file and added to a course. Content is usually displayed over several pages, with navigation between the pages. There are various options for displaying content in a pop-up window, with a table of contents, with navigation buttons etc. SCORM activities generally include questions, with grades being recorded in the gradebook. SCORM activities may be used
|
Activities - Turnitin AssignmentCreates a Turnitin Moodle Direct assignment which links an activity in Moodle to an assignment / assignments on Turnitin. Once linked, the activity allows instructors to access and provide feedback for student's written work using the assessment tools available within Turnitin's Document Viewer. Walkthrough video: https://vimeo.com/203368521
Steps: Setting up a Turnitin Assignment: To create a Turnitin Assignment open the course home page, after logging in as a tutor click the 'Turn editing on' button. Select 'Turnitin Assignment' from the 'Add an activity...' drop down menu. General Turnitin Assignment settings:
Advanced Turnitin Assignment settings:
Once you have selected all of the required options click 'Save and Display' to be directed to the Summary screen where you will see options to configure each assignment part in more detail. Assignment Submission Dates After completion of the assignment settings the 'Summary' page gives you the opportunity update the assignment parts and balance the grades awarded for each part as a proportion of the overall grade. The edit the dates and grades awarded for each part click the pencil icon. The default dates for each assignment part are initially set to be one week from the date the assignment was created.
|
Activities - Turnitin MarkingHere are several videos introducing quick ways to mark Turnitin assignments.
|
Activities - WikiThe wiki activity module enables participants to add and edit a collection of web pages. A wiki can be collaborative, with everyone being able to edit it, or individual, where everyone has their own wiki which only they can edit. A history of previous versions of each page in the wiki is kept, listing the edits made by each participant. Wikis have many uses, such as
How to edit a wiki: 2. Click the wiki 3. Click the edit tab 4, Delete or Add the text you want to change. 5. To edit the table (ie add more rows), click the icon in the top left corner of the edit window, then click the 'table' icon 6. Click save |
Activities - WorkshopThe workshop activity module enables the collection, review and peer assessment of students' work. Students can submit any digital content (files), such as word-processed documents or spreadsheets and can also type text directly into a field using the text editor. Submissions are assessed using a multi-criteria assessment form defined by the teacher. The process of peer assessment and understanding the assessment form can be practised in advance with example submissions provided by the teacher, together with a reference assessment. Students are given the opportunity to assess one or more of their peers' submissions. Submissions and reviewers may be anonymous if required. Students obtain two grades in a workshop activity - a grade for their submission and a grade for their assessment of their peers' submissions. Both grades are recorded in the gradebook. |
Add a YouTube videoIf you want to embed a Youtube video on Moodle, you can do that by letting Youtube itself provide you with the code you need:
|

Adding a link to a resource in a pageSometimes you will want to add a link to a file or other Moodle resource inside a Moodle page - like your Assessments page or your Welcome page. Instructions:
|